
1. Introduction
This manual provides instructions for the PowerA Spectra Enhanced Illuminated Wired Controller. This controller is designed for use with Xbox One, Xbox Series X|S, and Windows 10/11, offering enhanced features such as customizable LED lighting, mappable advanced gaming buttons, and adjustable trigger locks.
2. Package Contents
- PowerA Spectra Enhanced Illuminated Wired Controller
- Detachable 9.8ft (3m) Braided USB Cable with Snap-Lock and Inline Release

Figure 2.1: Controller and detachable USB cable.
3. Setup and Connection
- Connect the USB Cable: Insert the small end of the detachable braided USB cable into the micro USB port on the top of the controller. Ensure it clicks securely into place with the snap-lock mechanism.
- Connect to Console/PC: Plug the standard USB end of the cable into an available USB port on your Xbox One, Xbox Series X|S console, or Windows 10/11 PC.
- Power On: The controller will automatically power on and connect to your device. The LED illumination will activate.

Figure 3.1: USB cable connection point on the controller.
4. Operating Instructions
4.1 Controller Layout
The PowerA Spectra Enhanced controller features a standard Xbox layout with additional enhancements. Refer to the diagram below for key components.

Figure 4.1: Front and back view of the controller with feature callouts.
4.2 Advanced Gaming Buttons (Mappable)
The controller includes two mappable Advanced Gaming Buttons on the back. These can be programmed to replicate any standard button input for quick access.
- Program Mode: Press and hold the Program Button (located on the back, near the center) for 2 seconds. The LED indicator will flash to signal program mode.
- Select Button to Map: Press the button you wish to map (A, B, X, Y, LB, RB, LT, RT, Left Stick Click, Right Stick Click, D-pad).
- Assign to Advanced Button: Press one of the Advanced Gaming Buttons (AGB1 or AGB2) on the back of the controller. The LED indicator will stop flashing, confirming the button has been mapped.
- Clear Mapping: To clear a single Advanced Gaming Button, repeat the mapping process but do not press any button after entering program mode. Instead, press the Advanced Gaming Button you wish to clear twice. To clear all mappings, hold the Program Button for 5 seconds.
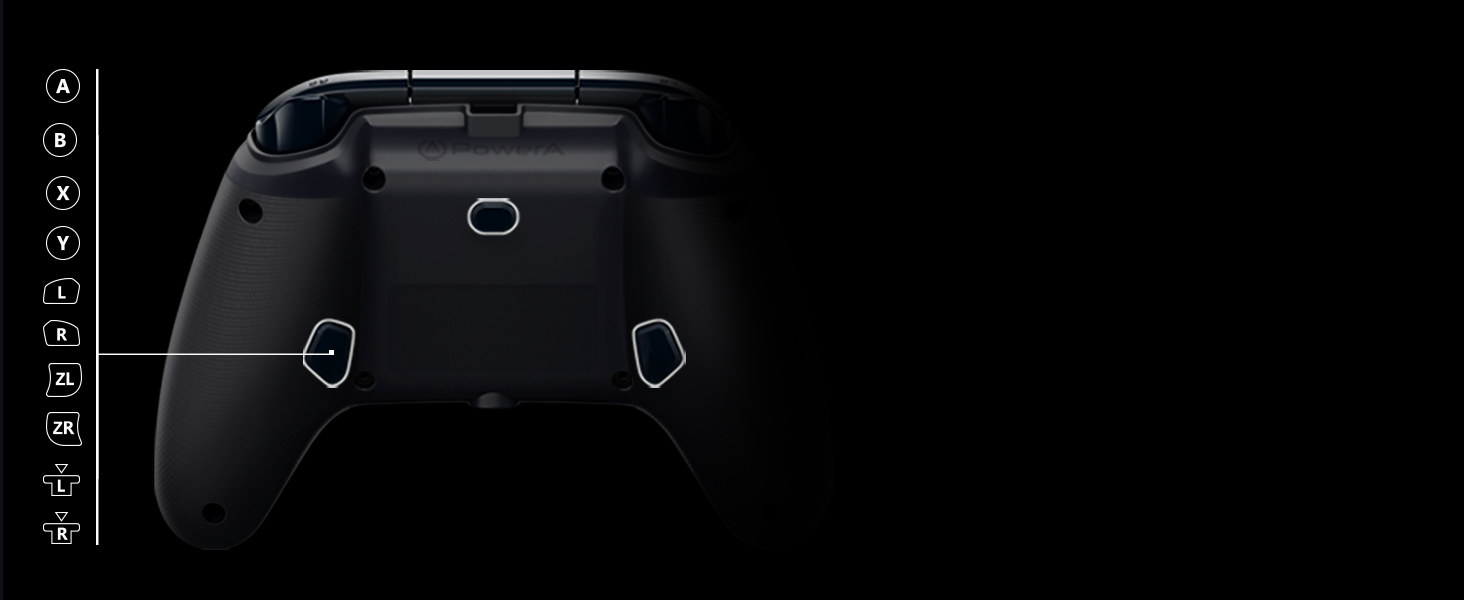
Figure 4.2: Location of Advanced Gaming Buttons and Program Button.
4.3 LED Illumination
The controller features vibrant LED edge lighting in 7 colors (Red, Orange, Yellow, Green, Blue, Indigo, Violet). Use the Color-Cycle Button (located on the back, near the center) to adjust the lighting.
- Change Color: Press the Color-Cycle Button to cycle through the 7 available colors.
- Auto-Cycle: Hold the Color-Cycle Button for 2 seconds to activate auto-cycle mode, where the colors will continuously fade and change.
- Turn Off LEDs: Press and hold the Color-Cycle Button again for 2 seconds to turn off the LED illumination.

Green LED

Blue LED

Purple LED

Cyan LED

Orange LED
4.4 3-Way Trigger Locks
The controller features 3-way trigger locks for the Left Trigger (LT) and Right Trigger (RT). These switches allow you to adjust the travel distance of the triggers, enabling quicker response times in certain games.
- Full Travel: Default position for maximum trigger movement.
- Medium Travel: Reduces trigger travel for a faster response.
- Short Travel: Minimizes trigger travel for the quickest possible input.
Adjust the physical switches on the back of the controller to select your preferred trigger travel setting.

Figure 4.3: Location of 3-way trigger locks.
4.5 3.5mm Stereo Headset Jack
A 3.5mm stereo headset jack is located on the bottom of the controller, allowing you to connect your gaming headset for audio and chat functionality.

Figure 4.4: Location of the 3.5mm stereo headset jack.
5. Maintenance
- Cleaning: Use a soft, dry cloth to clean the controller. Avoid using abrasive cleaners or solvents, as these can damage the surface.
- Cable Care: Handle the detachable USB cable with care. Avoid sharp bends or excessive pulling. Always disconnect the cable by gripping the connector, not the cable itself.
- Storage: Store the controller in a cool, dry place away from direct sunlight and extreme temperatures when not in use.
6. Troubleshooting
| Issue | Possible Solution |
|---|---|
| Controller not responding |
|
| LEDs not illuminating or changing color |
|
| Advanced Gaming Buttons not mapping |
|
| Headset audio issues |
|
If you continue to experience issues, please visit the official PowerA support website for further assistance.
7. Specifications
- Model Number: 1510523-01
- Compatibility: Xbox One, Xbox Series X|S, Windows 10/11
- Connectivity: Wired USB
- Cable Length: 9.8 ft (3 meters) braided, detachable
- Illumination: 7-color LED edge lighting
- Special Features: 2 mappable Advanced Gaming Buttons, 3-way Trigger Locks, Dual Rumble Motors, 3.5mm Stereo Headset Jack, Anti-friction Rings on thumb sticks
- Dimensions (Packaging): Approximately 7.76 x 7.76 x 11.14 inches
- Weight: Approximately 15.8 ounces
- Manufacturer: PowerA
8. Warranty and Support
The PowerA Spectra Enhanced Illuminated Wired Controller comes with a 2-year limited warranty from the date of purchase. This warranty covers defects in material and workmanship under normal use.
For warranty claims, technical support, or further product information, please visit the official PowerA support website or contact their customer service directly.
PowerA Official Website: www.powera.com


