
iTOMA 206
iTOMA 206 Alarm Clock Radio User Manual
Model: 206
Introduction
Thank you for purchasing the iTOMA 206 Alarm Clock Radio. This device combines a digital alarm clock with an FM radio, Bluetooth connectivity, and convenient charging features, including 5W wireless charging and a USB charging port. Please read this manual carefully to ensure proper operation and to fully utilize all features.
Key Features
- 5W Wireless Charging: Conveniently charge compatible smartphones by placing them on the top surface.
- USB Charging Port: A 5V/1A USB port for charging additional devices like smartwatches or other phones.
- Dimmable 1.4'' LED Display: Blue LED display with 4-level brightness control for optimal visibility day or night.
- Dual Alarm System: Set two independent alarms with options to wake by radio or buzzer.
- Alarm Week Modes: Choose from Every day, single day, weekdays, or weekends.
- Snooze/Repeat Alarm & Crescendo Wake-up: Gentle wake-up with adjustable volume.
- FM Radio: Easy tuning with 20 programmable preset stations (87.5MHz to 108.0MHz).
- Bluetooth Connectivity: Stream audio wirelessly from your Bluetooth-enabled devices.
- Headphone Jack: For private listening.
Setup
1. Unpacking and Placement
Carefully remove the alarm clock from its packaging. Place the unit on a stable, flat surface away from direct sunlight, heat sources, or excessive moisture. Ensure adequate ventilation around the unit.
2. Power Connection
Connect the provided AC adapter to the DC IN jack on the back of the unit, then plug the adapter into a standard wall outlet. The display will light up, indicating the unit is powered on.
3. Setting the Time
Upon first power-up, the clock may automatically set the time. If not, or if you need to adjust it:
- Press and hold the CLOCK SET button. The hour digits will flash.
- Use the TUNE+ or TUNE- buttons to adjust the hour. Pay attention to the AM/PM indicator.
- Press CLOCK SET again. The minute digits will flash.
- Use the TUNE+ or TUNE- buttons to adjust the minutes.
- Press CLOCK SET to confirm and exit time setting mode.
4. FM Antenna Setup
Extend the FM wire antenna located at the back of the unit. For optimal radio reception, fully extend the antenna and adjust its position.
Operating Instructions
Wireless Charging
Place your Qi-compatible smartphone centrally on the wireless charging pad located on top of the unit. The charging indicator on the display will illuminate to confirm charging is active. Ensure no metal objects are between the phone and the charging pad.

Image: The iTOMA 206 alarm clock with a smartphone placed on its top surface, indicating active wireless charging.
USB Charging
Connect your device's USB charging cable to the USB port on the back of the alarm clock. This port provides 5V/1A output for charging.

Image: The iTOMA 206 alarm clock with a smartwatch connected to its USB charging port, demonstrating wired charging capability.
Setting Alarms (Dual Alarm)
The iTOMA 206 supports two independent alarms (Alarm 1 and Alarm 2).
- Press and hold the AL1 or AL2 button. The alarm time will flash.
- Use TUNE+ or TUNE- to set the desired alarm hour (AM/PM indicator).
- Press AL1 or AL2 again. The minute digits will flash.
- Use TUNE+ or TUNE- to set the desired alarm minutes.
- Press AL1 or AL2 again to select the alarm source (Buzzer or FM Radio).
- Press AL1 or AL2 again to select the alarm week mode (Every day, Single day, Weekdays, Weekends).
- Press AL1 or AL2 to confirm and activate the alarm. An alarm icon will appear on the display.
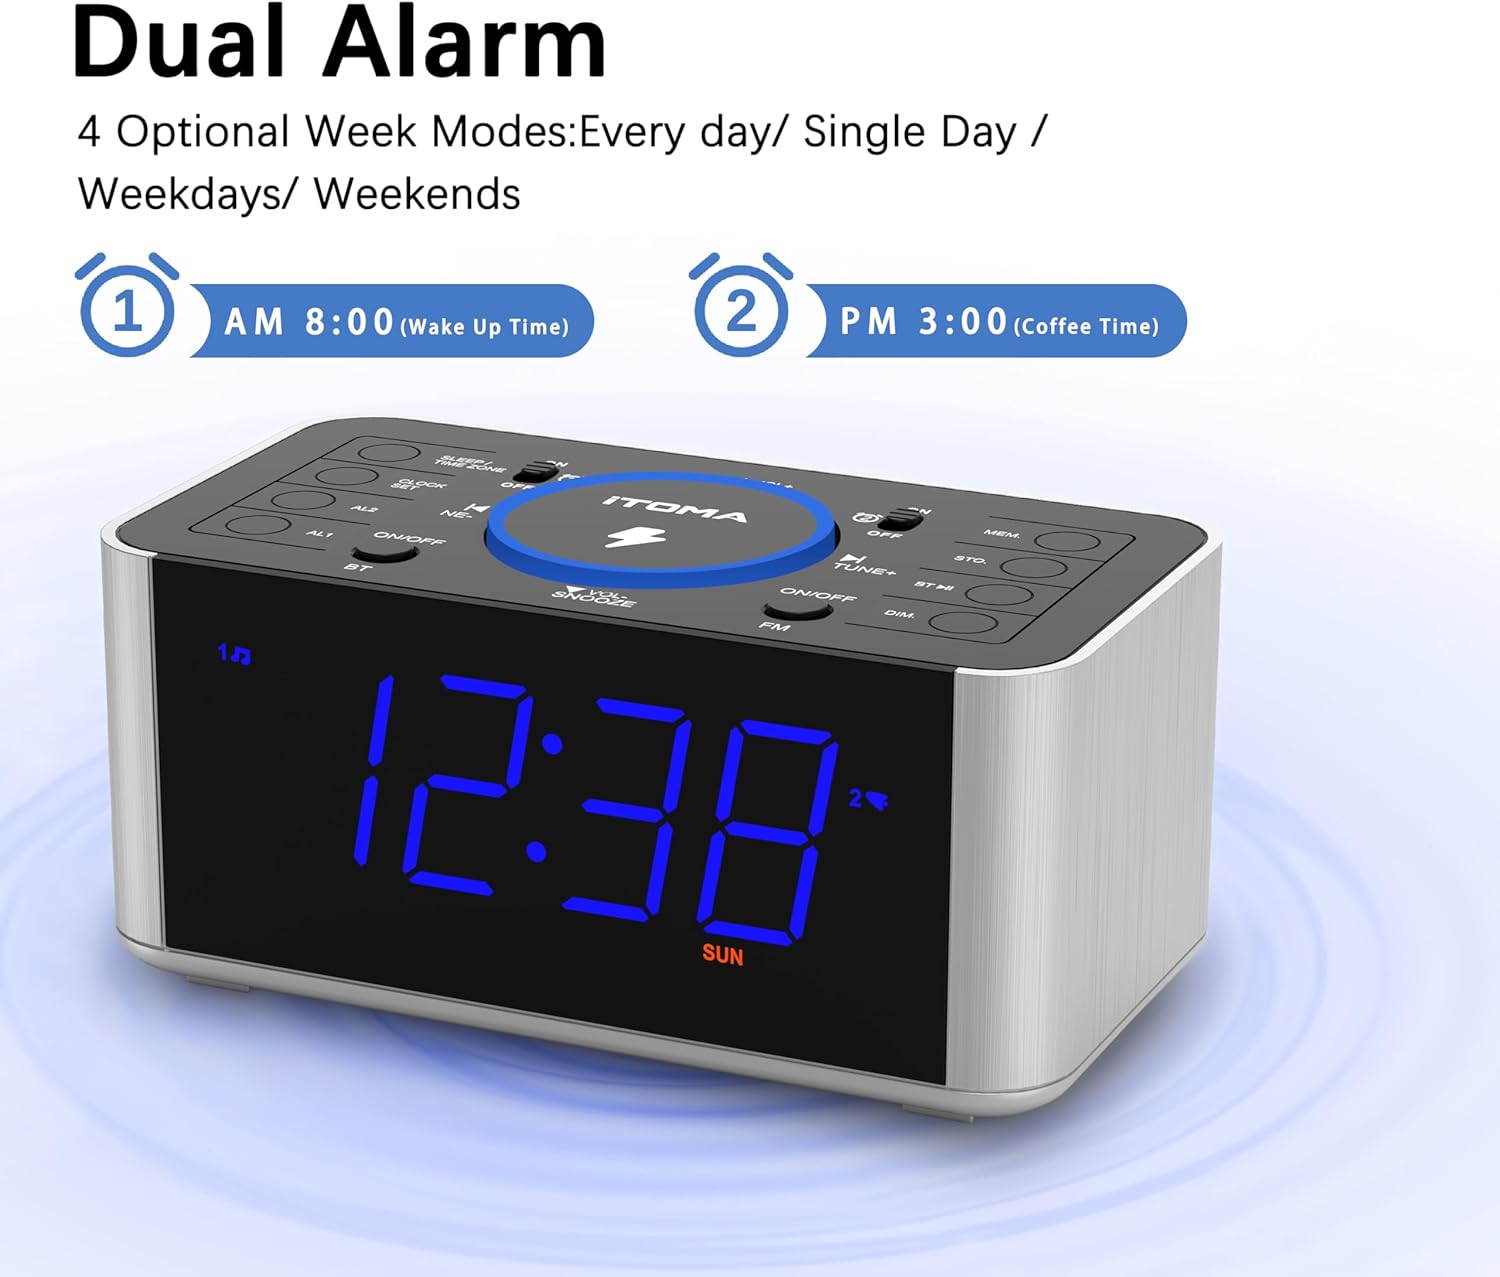
Image: The iTOMA 206 alarm clock showing its dual alarm capability with two distinct alarm times set.
Snooze Function
When the alarm sounds, press the large SNOOZE button on top of the unit to temporarily silence the alarm for approximately 9 minutes. The alarm will sound again after the snooze period.
Turning Off the Alarm
To turn off an active alarm completely, press the corresponding AL1 ON/OFF or AL2 ON/OFF button. The alarm icon will disappear from the display.
FM Radio Operation
- Press the FM ON/OFF button to turn on the radio.
- Use the TUNE+ or TUNE- buttons to manually tune to a desired frequency.
- Press and hold TUNE+ or TUNE- to auto-scan for the next available station.
- Adjust the volume using the VOL+ or VOL- buttons.
- To save a preset station:
- Tune to the desired station.
- Press and hold the MEM button until "P01" (or next available preset number) flashes.
- Use TUNE+ or TUNE- to select the preset number.
- Press MEM again to confirm.
- To recall a preset station, briefly press the MEM button, then use TUNE+ or TUNE- to cycle through saved presets.
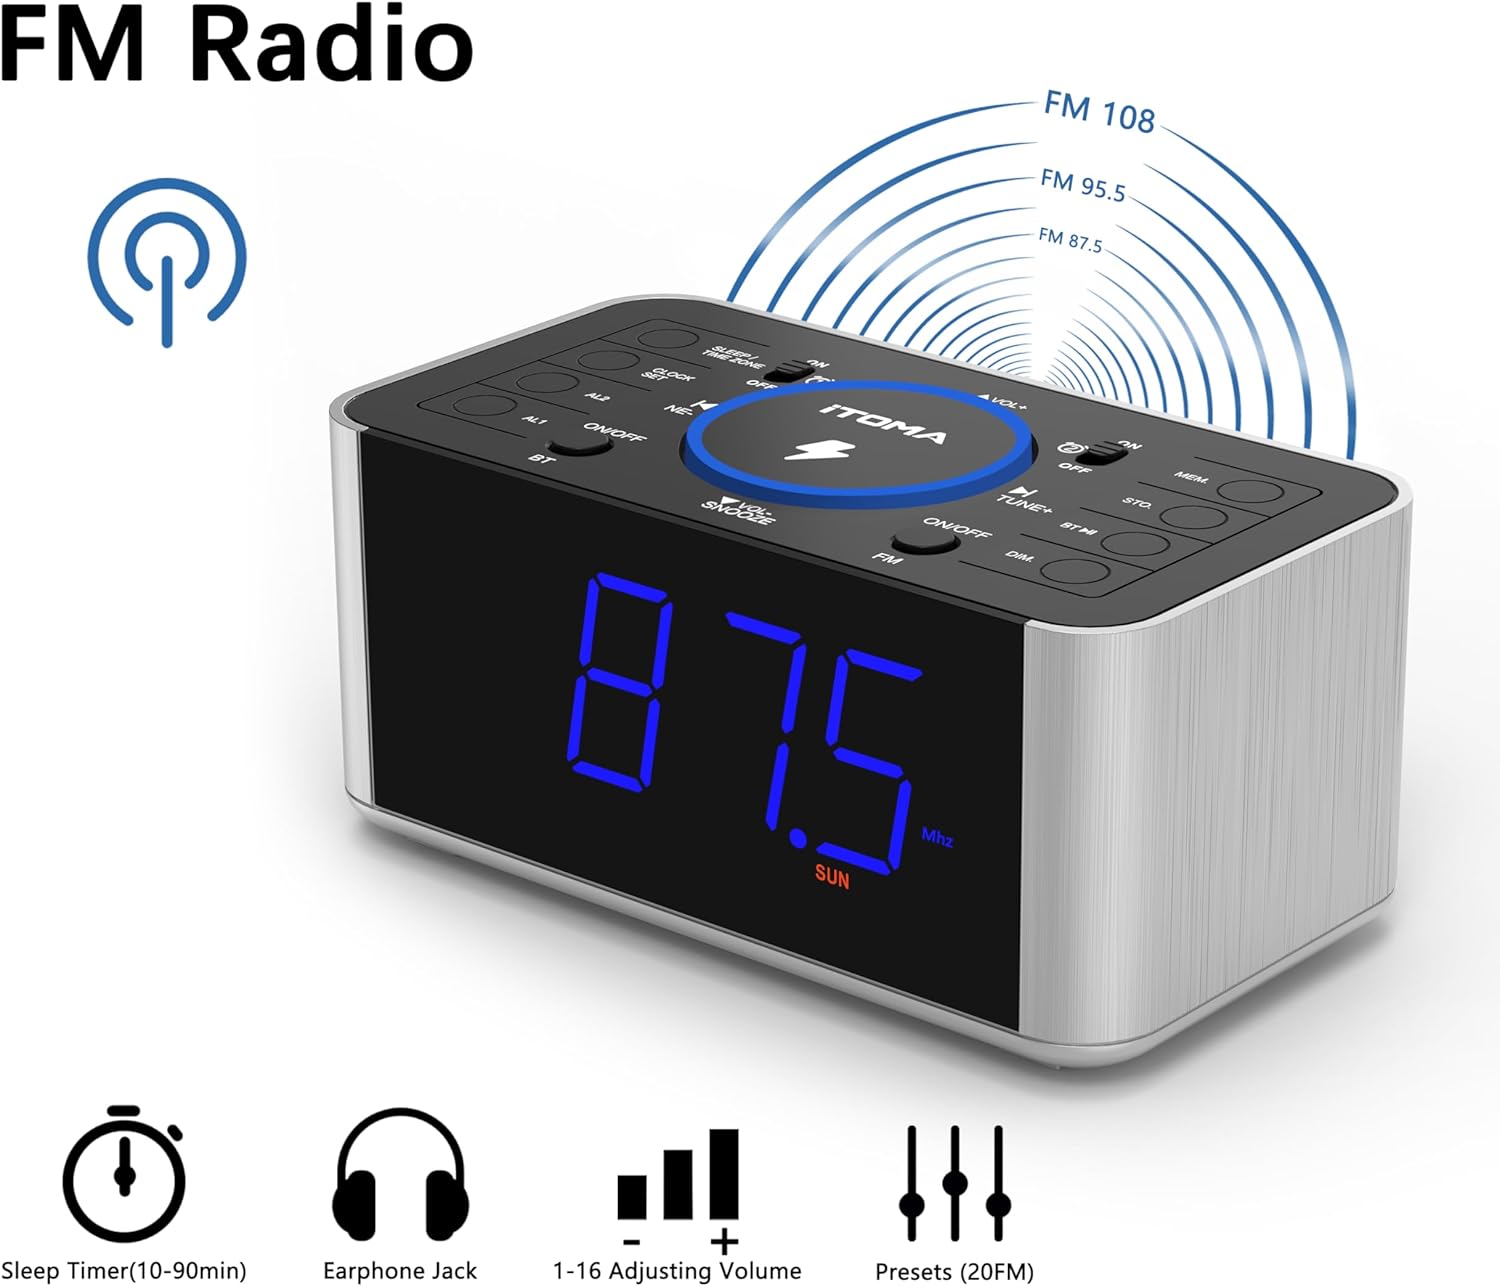
Image: The iTOMA 206 alarm clock showing its FM radio function, tuned to 87.5 MHz, with icons for sleep timer, earphone jack, volume adjustment, and presets.
Bluetooth Pairing
To stream audio from a Bluetooth device:
- Press the BT ON/OFF button to enter Bluetooth mode. The Bluetooth icon on the display will flash.
- Enable Bluetooth on your smartphone or other device and search for "iTOMA 206".
- Select "iTOMA 206" to pair. Once paired, the Bluetooth icon will stop flashing and remain solid.
- You can now play music from your device through the alarm clock's speaker.

Image: The iTOMA 206 alarm clock wirelessly connected to a smartphone via Bluetooth, demonstrating its audio streaming capability.
Display Dimmer Control
The display has 4 brightness levels. Press the DIM button repeatedly to cycle through the brightness settings (L-3, L-2, L-1, OFF). The unit may also have an auto-dimming feature based on ambient light.

Image: The iTOMA 206 alarm clock demonstrating its adjustable dimmer feature, showing the display at various brightness levels from bright to completely off.
Maintenance
- Cleaning: Disconnect the power adapter before cleaning. Use a soft, dry cloth to wipe the exterior of the unit. Do not use abrasive cleaners, waxes, or solvents as they may damage the finish.
- Storage: If the unit is not used for an extended period, unplug it from the power outlet and store it in a cool, dry place.
- Battery Backup (if applicable): This model does not explicitly state battery backup. If your model has a battery compartment, ensure batteries are replaced periodically to maintain time and alarm settings during power outages.
Troubleshooting
| Problem | Possible Cause | Solution |
|---|---|---|
| Unit does not power on. | Power adapter not connected or outlet is faulty. | Ensure the power adapter is securely plugged into the unit and a working wall outlet. Try a different outlet. |
| Wireless charging not working. | Phone not Qi-compatible, not placed correctly, or foreign objects present. | Ensure your phone supports Qi wireless charging. Reposition the phone centrally on the charging pad. Remove any metal objects or thick cases. |
| Alarm does not sound. | Alarm not set, alarm volume too low, or alarm turned off. | Verify alarm time and source are set correctly. Increase alarm volume. Ensure the alarm is activated (alarm icon visible). |
| Poor FM radio reception. | Antenna not extended or interference. | Fully extend and reposition the FM wire antenna. Move the unit away from other electronic devices that may cause interference. |
| Bluetooth pairing failed. | Device too far, Bluetooth not enabled, or unit not in pairing mode. | Ensure the unit is in Bluetooth pairing mode (flashing BT icon). Keep devices within 10 meters. Restart Bluetooth on your device and try again. |
| Display too bright/dim. | Dimmer setting needs adjustment. | Press the DIM button repeatedly to cycle through brightness levels. |
Specifications
- Model: iTOMA 206
- Power Source: AC Power Adapter (Input: 100-240V~50/60Hz, Output: DC 9V)
- Wireless Charging Output: 5W
- USB Charging Output: 5V/1A
- FM Frequency Range: 87.5 - 108.0 MHz
- Bluetooth Version: (Not specified, assuming standard modern version)
- Display: 1.4-inch Blue LED
- Dimensions (W x H): 16.5 cm x 7.8 cm
- Weight: Approximately 0.7 Kilograms
Warranty and Support
For warranty information and technical support, please refer to the warranty card included with your purchase or visit the official iTOMA website. You may also contact iTOMA customer service directly for assistance.
iTOMA Store Link: Visit the iTOMA Store on Amazon
Related documents206

Ask a question about this manual
Ask about setup, troubleshooting, compatibility, parts, safety, or missing instructions. Manuals+ will review the question and use this page’s manual context to help answer it.