
1. Introduction
Thank you for choosing the AOG L-Series 30-Inch 3-Burner Built-in Propane Gas Grill with Rotisserie. This manual provides essential information for the safe and efficient installation, operation, maintenance, and troubleshooting of your new grill. Please read all instructions carefully before using the appliance and retain this manual for future reference.
This grill is designed for outdoor use only and must be installed by a qualified professional in accordance with all local codes and regulations.
2. Important Safety Information
WARNING: For Outdoor Use Only. Improper installation, adjustment, alteration, service, or maintenance can cause injury or property damage. Read the installation, operating, and maintenance instructions thoroughly before installing or servicing this equipment.
2.1 Gas Safety
- Always check for gas leaks after connecting the propane supply. Use a soap and water solution; never use an open flame.
- Do not store or use gasoline or other flammable vapors and liquids in the vicinity of this or any other appliance.
- A propane cylinder not connected for use shall not be stored in the vicinity of this or any other appliance.
- Ensure adequate ventilation around the grill. Do not obstruct the flow of combustion and ventilation air.
2.2 General Safety Precautions
- Keep children and pets away from the grill during operation.
- Never leave the grill unattended when in use.
- Always wear protective gloves when handling hot components.
- Ensure the grill is installed on a stable, non-combustible surface.
- Maintain proper clearances from combustible materials as specified in the installation instructions.
3. Setup and Installation
This section provides general guidance. Refer to the separate detailed installation guide for specific instructions regarding built-in enclosure requirements, gas line connections, and electrical wiring.
3.1 Unpacking and Inspection
- Carefully remove all packaging materials.
- Inspect the grill for any shipping damage. Report any damage to your dealer immediately.
- Ensure all components listed in the packing list are present.
3.2 Built-in Enclosure Requirements
The AOG 30PBL grill is designed for built-in installation. The enclosure must be constructed from non-combustible materials and provide adequate ventilation. Consult the detailed installation guide for precise cutout dimensions and clearance requirements.
3.3 Gas Connection (Propane)
This grill operates on liquid propane (LP) gas. The gas connection must be performed by a qualified gas technician. Ensure the gas supply line is properly sized and all connections are leak-tested before initial use.
3.4 Electrical Connection
The grill features interior halogen lighting and backlit knobs, requiring a 120-volt electrical connection. This connection should be made by a qualified electrician in accordance with local electrical codes.

Figure 1: Overview of the AOG L-Series 30-Inch Built-in Propane Gas Grill.
4. Operating Instructions
4.1 Initial Burn-Off
Before cooking food for the first time, operate the grill on high heat for 15-20 minutes with the hood closed. This will burn off any manufacturing residues and prepare the cooking surfaces.
4.2 Lighting the Main Burners
- Ensure the propane supply valve is open.
- Push in and turn a main burner control knob counter-clockwise to the HIGH position.
- Press the electronic push-button ignition. You should hear a clicking sound and see the burner ignite.
- If the burner does not light within 5 seconds, turn the knob to OFF, wait 5 minutes, and repeat the process.
- Once lit, adjust the flame to the desired cooking temperature.

Figure 2: Close-up view of the U-shaped main burner, designed for even heat distribution.
4.3 Using the Rotisserie Burner
The grill is equipped with a 10,000 BTU infrared back burner for rotisserie cooking.
- Securely attach the food to the rotisserie spit rod.
- Insert the spit rod into the rotisserie motor and support brackets.
- Turn on the rotisserie burner control knob.
- Activate the rotisserie motor (if applicable, usually a separate switch).
- Monitor cooking progress. The main burners can be used simultaneously for additional heat if desired.
4.4 Interior Halogen Lighting and Backlit Knobs
For night grilling, the grill features interior halogen lighting and backlit control knobs. These are activated by a push button located on the right side of the grill control panel, requiring a 120-volt electrical connection.
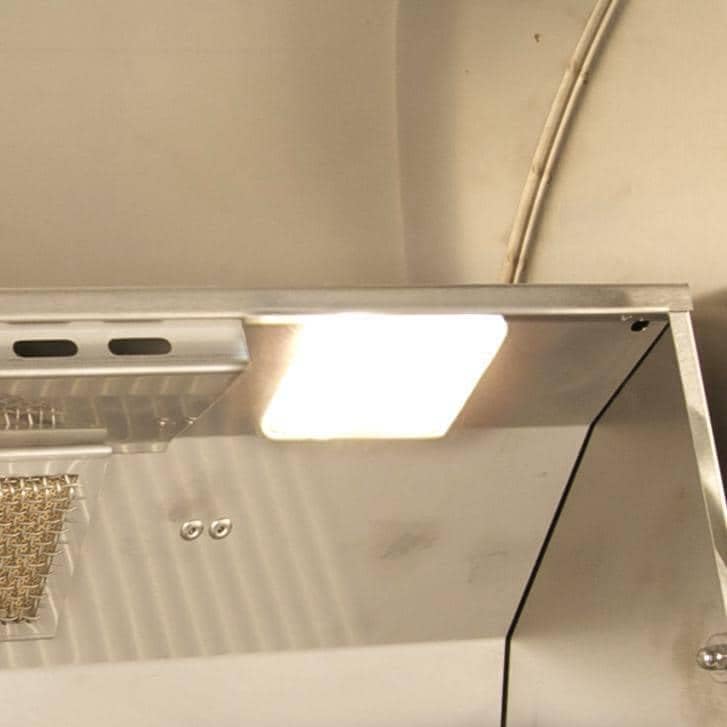
Figure 3: Interior halogen lighting illuminates the cooking surface for evening use.

Figure 4: Backlit control knobs provide visibility and precise temperature control in low light conditions.
5. Maintenance and Care
Regular cleaning and maintenance will ensure the longevity and optimal performance of your AOG grill.
5.1 Cleaning Cooking Grids
After each use, once the grill has cooled, clean the stainless steel cooking grids with a grill brush. For stubborn residue, use warm soapy water and a non-abrasive scrubber.

Figure 5: Durable stainless steel cooking grids for consistent grilling results.
5.2 Cleaning Vaporizer Panels
The stainless steel vaporizer panels (also known as flame tamers) help distribute heat evenly and minimize flare-ups. Periodically remove and clean them to prevent grease buildup. Use a plastic scraper or brush to remove debris.

Figure 6: Stainless steel vaporizer panels ensure even heat distribution and reduce flare-ups.
5.3 Cleaning the Exterior
Clean the stainless steel exterior with a mild detergent and warm water. Wipe in the direction of the grain to avoid scratching. Avoid abrasive cleaners or steel wool, which can damage the finish.
5.4 Grease Management System
The funneled grease management system with a slide-out drip tray simplifies cleanup. Regularly empty and clean the drip tray to prevent grease fires and maintain hygiene.
5.5 Winterization and Storage
If the grill will not be used for an extended period, especially in cold climates, disconnect the gas supply, clean the grill thoroughly, and cover it with a protective grill cover. Store the propane tank in a well-ventilated outdoor area, away from direct sunlight and heat sources.
6. Troubleshooting
This section addresses common issues you might encounter with your grill. For problems not listed here, contact a qualified service technician.
| Problem | Possible Cause | Solution |
|---|---|---|
| Burner won't light | No gas supply; clogged burner port; faulty igniter; loose electrical connection. | Check propane tank and valve; clean burner ports; check igniter electrode and wire; ensure electrical connections are secure. |
| Uneven heat | Clogged burner ports; dirty vaporizer panels; low gas pressure. | Clean burner ports; clean vaporizer panels; check propane tank level and regulator. |
| Rotisserie not turning | Motor unplugged or faulty; food too heavy; spit rod not properly engaged. | Check motor power connection; ensure food weight is within limits; verify spit rod engagement. |
| Lights not working | No electrical power; faulty bulb; loose wiring. | Check 120V power connection; replace bulb; inspect wiring for damage. |
7. Specifications
| Feature | Specification |
|---|---|
| Model Number | 30PBL |
| Brand | AOG |
| Fuel Type | Propane Gas |
| Installation Type | Built-In |
| Main Burner Count | 3 |
| Rotisserie Burner BTU | 10,000 BTU |
| Cooking Surface Area | 540 Square Inches |
| Material | Commercial Grade 304 Stainless Steel, Brass |
| Special Features | Interior Halogen Lighting, Backlit Knobs, Rotisserie Kit |
| Item Dimensions (L x W x H) | 26.25 x 34 x 20.07 inches |
| Item Weight | 140 Pounds |
| Manufacturer | AOG |
| UPC | 619655061320 |
8. Warranty and Support
AOG products are manufactured to high standards and come with a manufacturer's warranty. For specific warranty details, including coverage periods and terms, please refer to the warranty card included with your product or visit the official AOG website.
For technical support, replacement parts, or service inquiries, please contact your authorized AOG dealer or the manufacturer's customer service department. Ensure you have your model number (30PBL) and proof of purchase available when contacting support.


