1. Introduction and Overview
The eMylo Smart RF Relay Switch is a wireless remote control module designed for home automation. It allows you to conveniently control various electrical appliances, such as lights, motors, and other devices, from a distance using the included remote controls. This module offers high signal sensitivity, strong anti-interference capabilities, and stable performance, making it a reliable solution for enhancing your smart home experience.

Image 1.1: eMylo Smart RF Relay Switch module and two remote controls.
2. Product Features
- RF Remote Control: Control lamps or other household electric appliances remotely with long distance, high sensitivity, strong anti-interference performance, and stability.
- Excellent Stability: The relay module provides high signal sensitivity at lower cost and resists interference effectively.
- Strong Signal: The eMylo Smart Wireless Relay Switch can transmit signals through walls, floors, and doors, allowing control of the receiver from any place within a reliable distance (up to 50 feet / 20-50 meters).
- Easy Installation: Designed for quick and simple wiring, typically less than 10 seconds. Features durable insulated terminals where you just press and insert cables to complete the wiring.
- More Flexibility & Widely Application: Adopts non-directional wireless encoding technology, enabling independent control without mutual interference. Suitable for various industrial control and security fields, including lights, motors, remote controllers, wireless security alarms, and wireless door alarms.
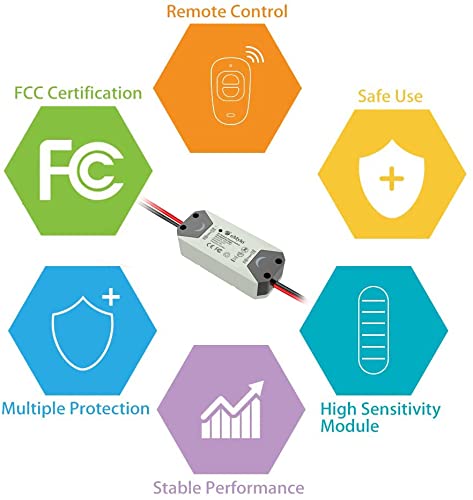
Image 2.1: Overview of key product features.

Image 2.2: The RF signal can penetrate walls and floors, offering a control range of up to 50 feet.
3. Package Contents
Please verify that all items are present and in good condition upon opening the package:
- 1 x eMylo Smart RF Relay Switch Module
- 2 x Wireless Remote Controls
- 2 x Wire Connectors (Wago-style)
4. Safety Information
WARNING: To prevent electric shock or fire, always follow these safety precautions.
- Always disconnect power to the circuit at the main breaker or fuse box before installing, servicing, or removing the device.
- Ensure proper wiring connections according to the provided diagram to avoid electrical hazards.
- Do not exceed the maximum current rating of 10 Amps. Overloading the switch can cause damage or fire.
- This device is designed for indoor use. Do not expose it to moisture or extreme temperatures.
- Keep the device and remote controls out of reach of children.
- If you are unsure about any part of the installation process, consult a qualified electrician.
5. Setup and Installation
Follow these steps for proper installation and pairing of your eMylo Smart RF Relay Switch:
5.1 Wiring the Module
- Disconnect Power: Before starting any wiring, ensure the power supply to the circuit is completely disconnected at the main breaker.
- Identify Wires: Identify the Live (L) and Null (N) lines for both your power source (input) and the appliance/light (load) you wish to control.
- Connect Input: Connect the power source's Live and Null wires to the corresponding 'Input' terminals on the eMylo module. The module typically has black for Null (N) and red for Live (L) input wires.
- Connect Output: Connect the appliance/light's Live and Null wires to the corresponding 'Output' terminals on the eMylo module. The module typically has black for Null (N) and red for Live (L) output wires.
- Secure Connections: Use the provided wire connectors to ensure all connections are secure and insulated.
- Restore Power: Once all connections are secure and verified, restore power to the circuit.

Image 5.1: Wiring diagram for the eMylo Smart RF Relay Switch.
5.2 Pairing the Remote Control
The remote controls need to be paired with the relay module to function. Follow these steps:
- Enter Learning Mode: Briefly press the small learning button located on the eMylo relay module. The indicator light on the module will turn on, indicating it's in learning mode.
- Press Remote Button: Within a few seconds, press the desired button (e.g., 'A' or 'B') on the remote control you wish to pair.
- Confirmation: The indicator light on the module will flash, then turn off, signifying successful pairing.
- Repeat for Other Remotes: If you have multiple remote controls, repeat steps 1-3 for each remote.
Video 5.1: Demonstrates the wiring and pairing process for the eMylo Smart RF Relay Switch.
6. Operating Instructions
Once the module is installed and the remote controls are paired, operating your connected device is simple:
- Turn ON: Press button 'A' on the remote control to turn on the connected electrical appliance or light.
- Turn OFF: Press button 'B' on the remote control to turn off the connected electrical appliance or light.

Image 6.1: Using the remote control to operate the connected device.
7. Maintenance
To ensure the longevity and optimal performance of your eMylo Smart RF Relay Switch, consider the following maintenance tips:
- Regular Checks: Periodically inspect all wire connections to ensure they remain secure. Loose connections can lead to intermittent operation or safety hazards.
- Cleaning: Keep the relay module and remote controls clean and free from dust and debris. Use a soft, dry cloth for cleaning. Do not use liquid cleaners.
- Battery Replacement: If the remote control's range decreases or it becomes unresponsive, replace its battery. Refer to the remote control's specific instructions for battery type and replacement procedure.
- Environmental Conditions: Avoid exposing the module to extreme temperatures, high humidity, or direct sunlight, as these can affect its performance and lifespan.
8. Troubleshooting
If you encounter issues with your eMylo Smart RF Relay Switch, refer to the following common problems and solutions:
| Problem | Possible Cause | Solution |
|---|---|---|
| Device does not respond to remote control. | No power to module, incorrect wiring, remote not paired, remote battery low. | Check power supply to the module. Verify all wiring connections are correct. Re-pair the remote control (see Section 5.2). Replace remote control battery. |
| Short control range. | Obstructions (thick walls, metal objects), strong electromagnetic interference, low remote battery. | Try operating from a closer distance. Minimize obstructions between remote and module. Identify and remove sources of strong interference. Replace remote control battery. |
| Module indicator light does not turn on. | No power to module, module malfunction. | Check power supply and wiring. If power is present and wiring is correct, the module may be faulty and require replacement. |
9. Specifications
| Specification | Detail |
|---|---|
| Model | XL0251RF (as per product image) |
| Input Voltage | AC 90-250V, 50/60Hz |
| Current Rating | Max Load 10 Amps |
| RF Frequency | 433Mhz |
| Control Distance | 20-50 meters (approx. 50 feet) |
| Mounting Type | Wall Mount |
| Contact Material | Rhodium |
| Dimensions (Package) | 6.1 x 1.9 x 1.4 inches |
| Manufacturer | Yasorn |
| Country of Origin | China |
10. Warranty and Support
For warranty information, technical assistance, or any product-related inquiries, please contact Yasorn customer service through the retailer where you purchased the product or visit the official Yasorn website. Please have your product model and purchase details ready when contacting support.
Online Resources:
- Yasorn Store on Amazon: Visit Store


