
EaseLife 6.6 FT Single Door Kit (0101_W2_200J_1)
EaseLife 6.6 FT Single Sliding Barn Door Hardware Kit Installation Manual
Model: 6.6 FT Single Door Kit (0101_W2_200J_1)
Introduction
This manual provides detailed instructions for the safe and proper installation, operation, and maintenance of your EaseLife 6.6 FT Single Sliding Barn Door Hardware Kit. Please read all instructions carefully before beginning installation to ensure a smooth and successful setup. Keep this manual for future reference.
Safety Information
- Always wear appropriate safety gear, including safety glasses and gloves, during installation.
- Ensure the wall structure can support the weight of the door and hardware. Consult a professional if unsure.
- Verify all mounting points are secured into wall studs or appropriate anchors.
- Keep children and pets away from the installation area.
- Do not exceed the maximum door weight capacity of 220 lbs (100 kg).
- Handle all components with care to prevent injury or damage.
Package Contents
Please verify that all components listed below are included in your package. If any parts are missing or damaged, please contact EaseLife customer support.
- (2) 3.3ft Rails (Total 6.6ft)
- (5) Wall Hangers / Spacers
- (2) Rollers / Hangers
- (2) Door Stops
- (1) Floor Guide
- (1) 12-inch Handle Set
- Mounting Screws and Hardware

Figure 1: Overview of all included hardware components.
Specifications
| Brand | EaseLife |
| Model Number | 0101_W2_200J_1 |
| Track Length | 6.6 FT (79 inches) |
| Max Door Width | Up to 40 inches |
| Fit Door Thickness | 1-3/8" to 1-3/4" (35-45mm) |
| Door Weight Capacity | 220 lbs (100 kg) |
| Material | Steel |
| Color | Black |
| Assembly Required | Yes |

Figure 2: Product dimensions and compatibility details.
Setup and Installation
Follow these steps to install your sliding barn door hardware kit. It is recommended to have two people for certain steps.
Step 1: Prepare the Wall and Track
- Measure and mark the desired height for the track on your wall. Ensure it is level.
- Locate wall studs using a stud finder. Mark the center of each stud where the track will be mounted. If studs do not align with desired mounting points, a header board (not included) may be required.
- Drill pilot holes for the wall hangers/spacers at the marked locations.
- Attach the two 3.3ft rails together to form the 6.6ft track.
- Mount the track to the wall using the wall hangers and appropriate screws, ensuring it is securely fastened and level.
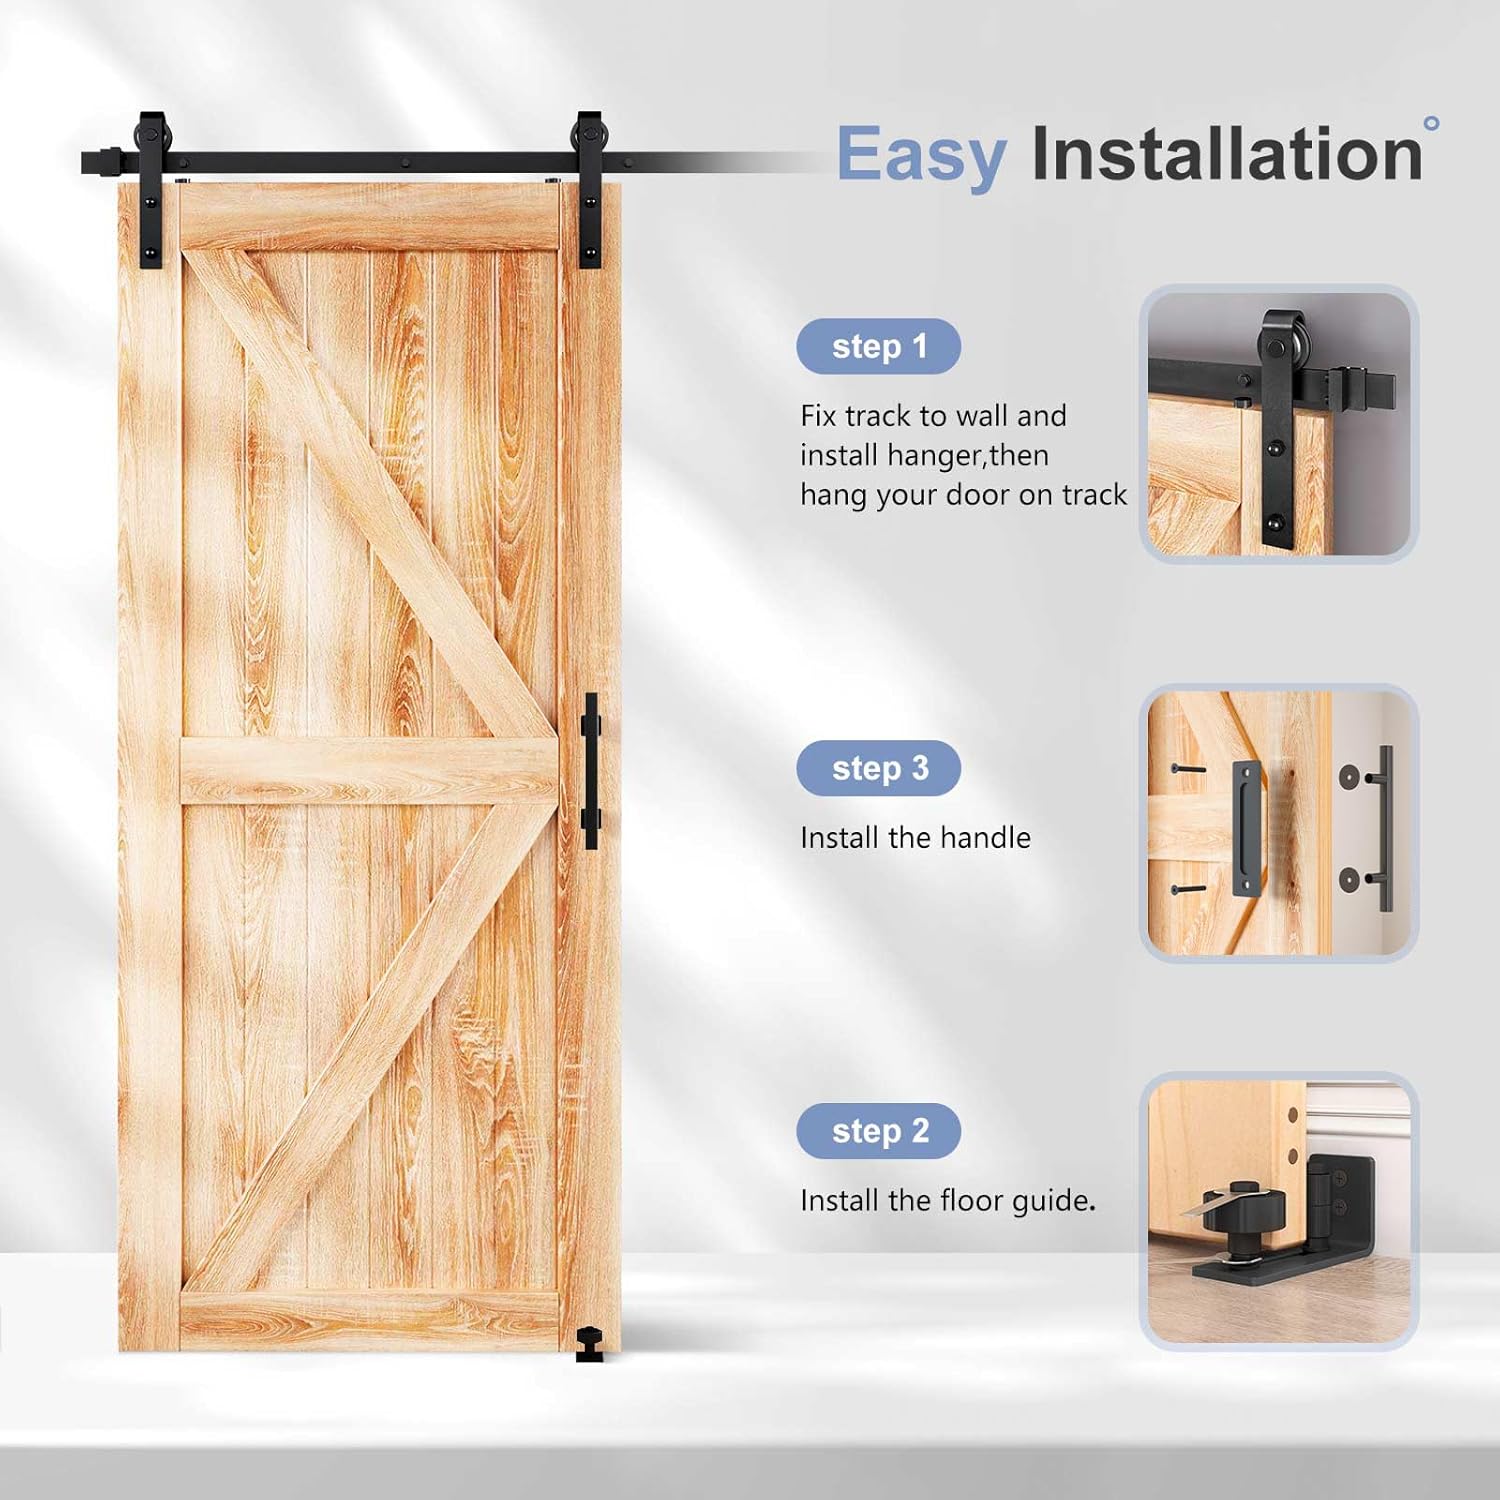
Figure 3: Visual guide for key installation steps.
Step 2: Attach Rollers to the Door
- Measure and mark the positions for the rollers on the top edge of your barn door.
- Drill pilot holes and securely attach the two rollers to the door using the provided hardware.
Step 3: Hang the Door
- Carefully lift the door and hook the rollers onto the mounted track.
- Slide the door back and forth to ensure smooth movement.
Step 4: Install Door Stops
- Position the door stops at the desired end points of the track to prevent the door from sliding off.
- Tighten the door stops securely.
Step 5: Install Floor Guide
- Place the floor guide on the floor directly beneath the door, ensuring it aligns with the door's bottom groove.
- Mark the mounting holes, drill pilot holes, and secure the floor guide to the floor.

Figure 4: Detail of the adjustable floor guide.
Step 6: Install Handle Set
- Determine the desired height and position for the handle set on your door.
- Drill necessary holes and attach the 12-inch handle set securely.

Figure 5: The 12-inch handle set.
Operating Instructions
Your EaseLife sliding barn door is designed for smooth and quiet operation. To open or close the door, gently push or pull the handle along the track. Avoid forcing the door, as this can cause damage to the hardware or the door itself.

Figure 6: Smooth and quiet door operation.
Maintenance
- Regular Cleaning: Wipe down the track and rollers periodically with a soft, damp cloth to remove dust and debris. Avoid abrasive cleaners.
- Lubrication: If the door's movement becomes less smooth over time, apply a silicone-based lubricant to the roller bearings and the top of the track. Do not use oil-based lubricants as they can attract dirt.
- Hardware Check: Periodically inspect all screws and bolts to ensure they remain tight. Re-tighten if necessary.
- Floor Guide: Ensure the floor guide remains free of obstructions and is securely fastened.

Figure 7: EaseLife hardware is designed for long-lasting durability.
Troubleshooting
| Problem | Possible Cause | Solution |
|---|---|---|
| Door is difficult to slide or sticks. | Dirt or debris on the track/rollers; lack of lubrication; loose hardware. | Clean the track and rollers. Apply silicone lubricant. Check and tighten all mounting screws. |
| Door wobbles or feels unstable. | Loose wall mounts or door hangers; improper installation of floor guide. | Ensure all wall hangers are securely fastened into studs. Check that door hangers are tight on the door. Verify floor guide is properly installed and adjusted. |
| Door does not stop at desired position. | Door stops are loose or incorrectly positioned. | Adjust the position of the door stops and tighten them securely. |
Warranty and Support
EaseLife is committed to providing quality products and customer satisfaction. Our hardware is designed for durability and longevity. If you encounter any issues, or if any parts are missing or broken, please contact our customer support team.
We are available online 24 hours a day to assist you with any problems or questions regarding your product. Please refer to your purchase documentation for specific warranty details or visit the official EaseLife website for contact information.
For further assistance, you may also refer to the EaseLife Store on Amazon.
Related documents6.6 FT Single Door Kit (0101_W2_200J_1)


Ask a question about this manual
Ask about setup, troubleshooting, compatibility, parts, safety, or missing instructions. Manuals+ will review the question and use this page’s manual context to help answer it.