
Introduction
This manual provides comprehensive instructions for the Calvas RM-8023y universal remote control, designed for seamless operation with various Panasonic air conditioner models. This remote offers a convenient replacement for your original Panasonic air conditioner remote, ensuring full functionality for your cooling and heating needs.
Important Note: This remote control is specifically designed for Panasonic air conditioners and is not compatible with other brands.
Product Overview
The Calvas RM-8023y remote control features an intuitive layout with clearly labeled buttons and a digital display for easy operation. Below are images illustrating the remote's design and components.
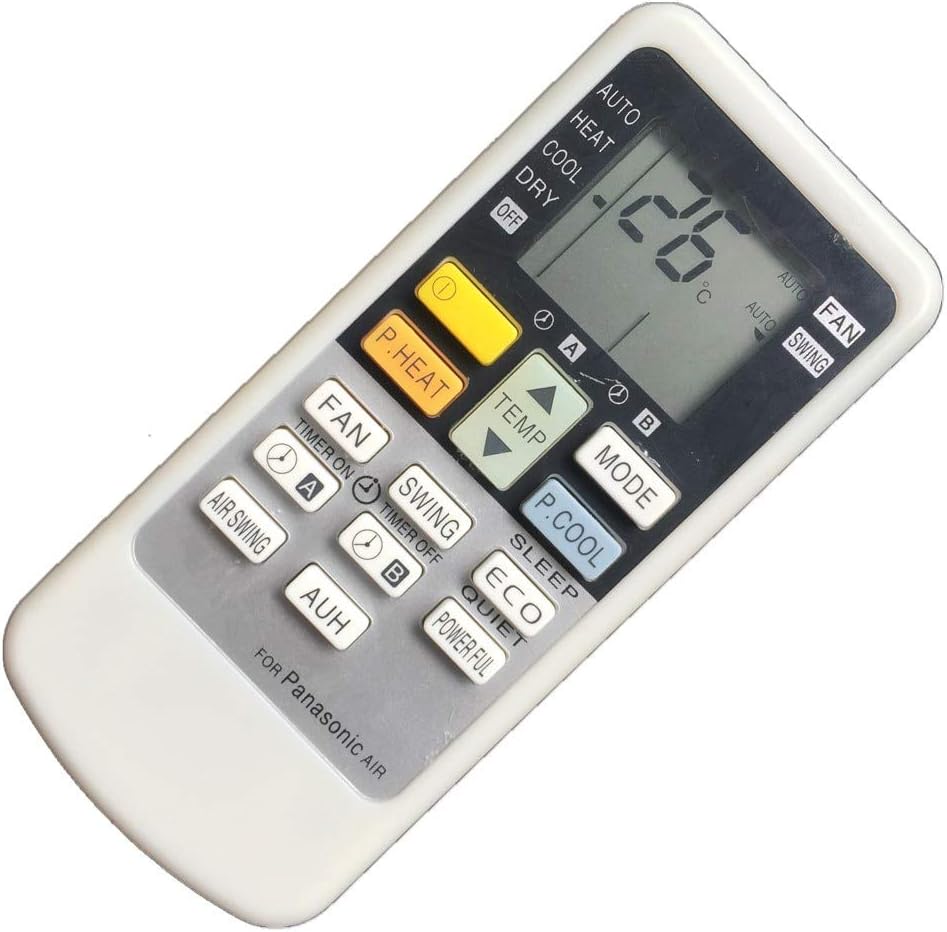
Figure 1: Front view of the Calvas RM-8023y remote control. This image displays the main interface, including the LCD screen showing temperature and mode, along with buttons for power, mode selection, temperature adjustment, fan speed, and other functions.
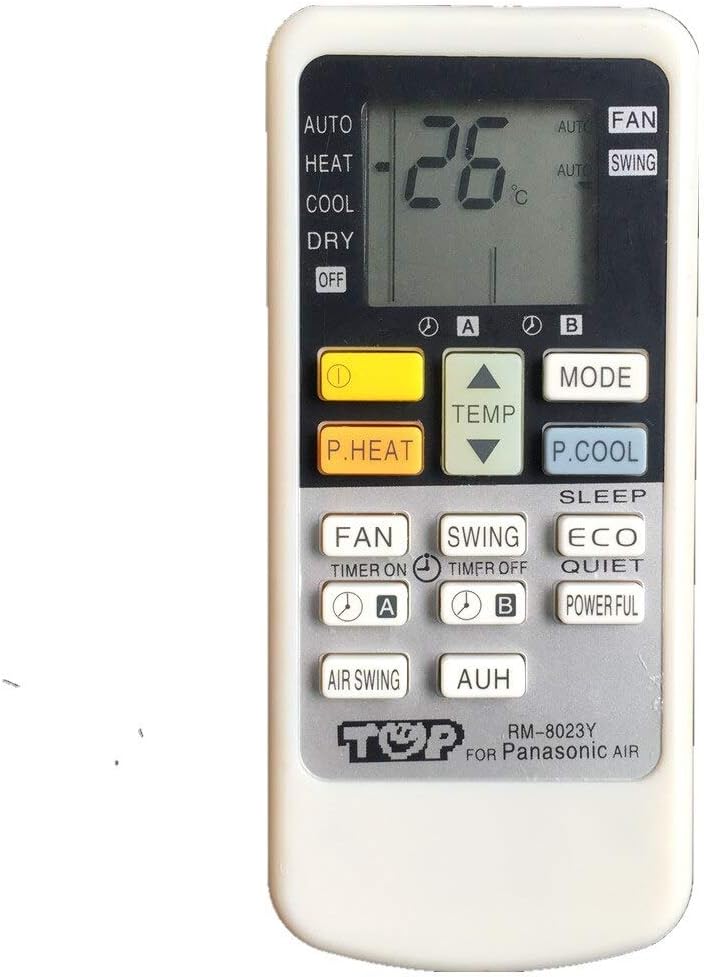
Figure 2: Another front view of the remote control, emphasizing the "TOP RM-8023Y FOR Panasonic AIR" branding at the base, confirming its model and intended use.

Figure 3: Rear view of the remote control with the battery cover removed, revealing the battery compartment designed for two AAA batteries. A small instruction label is also visible, providing quick setup guidance.
Setup
To begin using your Calvas RM-8023y remote control, follow these simple steps:
- Install Batteries: Open the battery compartment on the back of the remote control (refer to Figure 3). Insert two AAA batteries, ensuring correct polarity (+/-). Close the battery cover securely.
- Pairing with Air Conditioner:
- Ensure your Panasonic air conditioner is powered on.
- Point the remote control directly at the air conditioner's receiver.
- Press and hold the POWER button on the remote control continuously.
- Release the POWER button immediately when you hear an audible "di" sound from the air conditioner, indicating it has turned on or off automatically.
- After releasing the button, test other functions (e.g., temperature adjustment, mode change) to confirm successful pairing and full functionality.
Your remote control is now ready for use.
Operating Instructions
Familiarize yourself with the remote's buttons to control your air conditioner effectively:
- POWER Button: Turns the air conditioner on or off.
- MODE Button: Cycles through operating modes:
- AUTO: Automatically selects cooling or heating based on room temperature.
- HEAT: Provides heating.
- COOL: Provides cooling.
- DRY: Dehumidifies the air.
- FAN: Operates only the fan, circulating air without heating or cooling.
- TEMP ▲ / ▼ Buttons: Adjusts the desired temperature setting. Press ▲ to increase temperature, ▼ to decrease.
- FAN Button: Adjusts the fan speed (e.g., Auto, Low, Medium, High).
- SWING Button: Controls the vertical airflow direction of the air conditioner's louvers. Press to activate or adjust swing patterns.
- TIMER ON / TIMER OFF Buttons: Sets a specific time for the air conditioner to turn on or off. Refer to your air conditioner's manual for detailed timer programming.
- SLEEP Button: Activates sleep mode, which typically adjusts temperature gradually for comfortable sleep and reduces noise.
- ECO Button: Engages energy-saving mode for reduced power consumption.
- QUIET Button: Reduces fan speed and compressor operation for quieter performance.
- POWERFUL Button: Activates maximum cooling or heating for rapid temperature change.
- AIR SWING Button: Controls horizontal airflow direction (if supported by your AC model).
- AUH Button: (Function may vary by AC model, often related to auxiliary heating or specific Panasonic features).
Maintenance
Proper maintenance ensures the longevity and optimal performance of your remote control:
- Battery Replacement: Replace batteries when the remote's range decreases or the display becomes dim. Always replace both batteries simultaneously with new AAA batteries. Do not mix old and new batteries, or different types of batteries.
- Cleaning: Wipe the remote control with a soft, dry cloth. Do not use liquid cleaners, sprays, or abrasive materials, as these can damage the remote's surface or internal components.
- Storage: If the remote will not be used for an extended period, remove the batteries to prevent leakage and potential damage. Store in a cool, dry place away from direct sunlight.
Troubleshooting
If you encounter issues with your remote control, try the following solutions:
- Remote Not Responding:
- Check if the batteries are inserted correctly with the correct polarity.
- Replace old batteries with new ones.
- Ensure there are no obstructions between the remote control and the air conditioner's receiver.
- Verify that you are within the effective operating range (up to 9 meters).
- Air Conditioner Not Responding to All Functions:
- Re-attempt the pairing process described in the "Setup" section.
- Some advanced functions may be specific to your original air conditioner remote or not supported by all Panasonic models.
- Display is Dim or Blank:
- Replace the batteries.
Specifications
| Brand | Calvas |
| Model Number | RM-8023y |
| Manufacturer Reference | CLS-52D6A150190ACC4B6D58D36AC8EE2B0A |
| Compatible Devices | Panasonic Air Conditioners |
| Connectivity Technology | Infrared (IR) Wireless |
| Maximum Range | 9 Meters |
| Number of Buttons | 14 |
| Batteries Required | 2 x AAA (not included) |
| Item Weight | 80 Grams |
Warranty and Support
For any questions or support regarding your Calvas remote control, please refer to the retailer or point of purchase. Specific warranty information may be provided by the seller at the time of purchase.