
Introduction
This manual provides detailed instructions for the operation and maintenance of your TICCI T0003VB Vibrating Alarm Watch. Please read this manual thoroughly to ensure proper use and to maximize the watch's features. This watch is designed to assist with medication reminders, task alerts, and general timekeeping with its unique vibrating alarm system and easy-to-read display.
Product Overview
The TICCI T0003VB is a multi-functional digital watch featuring a large display, 8 customizable vibrating alarms, a countdown timer, and water resistance. It is particularly useful for individuals who require discreet reminders or have hearing impairments.

Image: Front view of the TICCI T0003VB Vibrating Alarm Watch, displaying large digital time and various icons.
Key Features:
- Easy-to-Read Display: Features a large face and big digits for clear visibility, even for those with impaired eyesight.
- 8 Vibrating Alarms: Customizable alarms with options for sound, vibration, or both, ideal for medication reminders, task alerts, or discreet notifications. Alarms can be set to auto-repeat daily.
- Super Bright Backlight: Ensures readability in low-light conditions with a bright, illuminated display.
- Countdown Timer: Adjustable from 15 minutes to 24 hours with an auto-start and auto-repeat function, useful for timed activities.
- Water Resistance: 30 meters water resistance meets daily life needs, allowing for hand washing, showering, and swimming.
- Lockout Feature: Prevents accidental changes to watch settings, enhancing usability for all users.
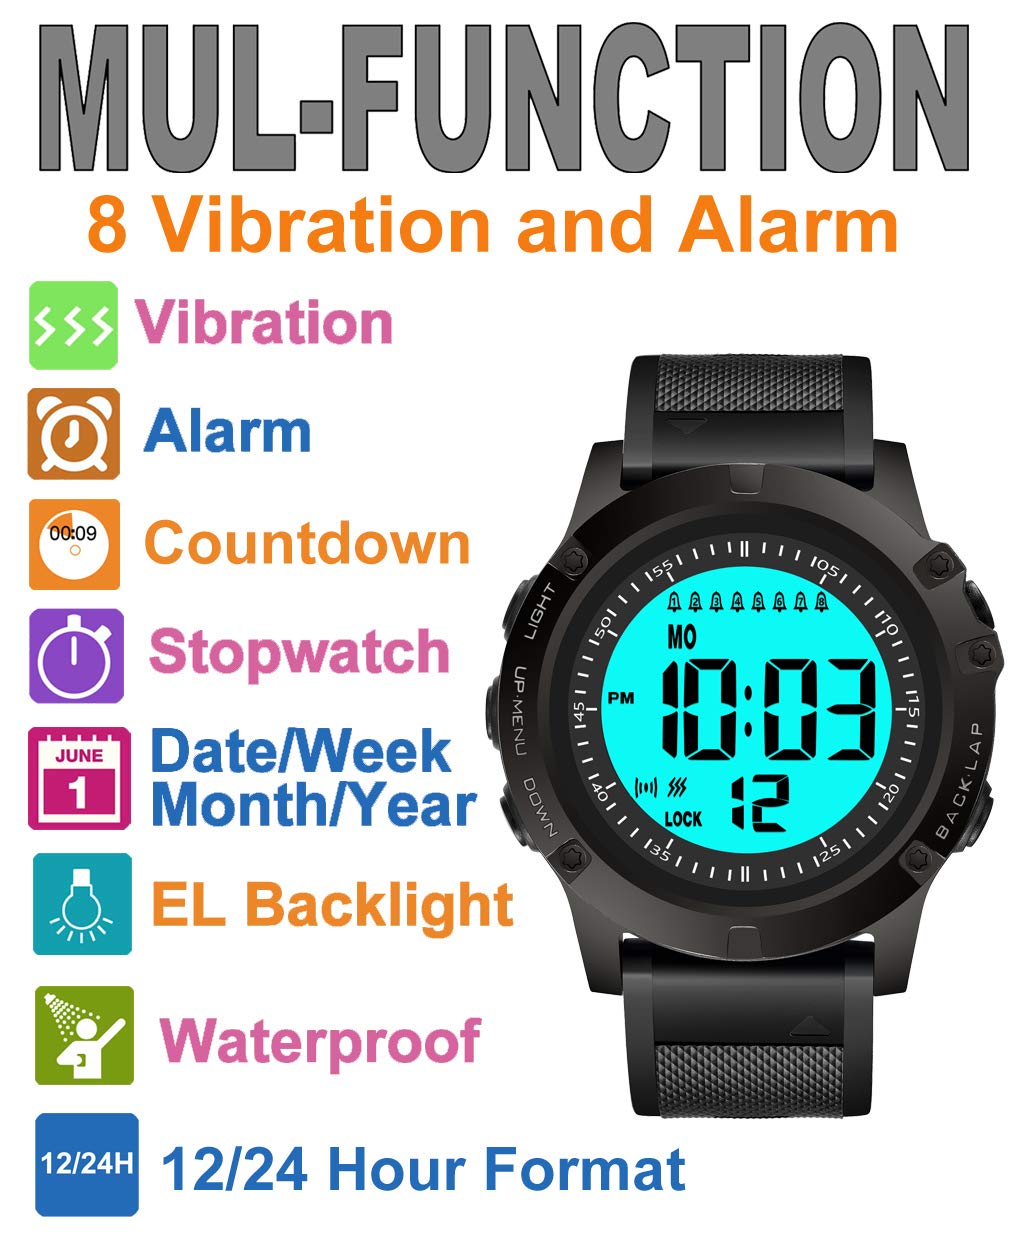
Image: Diagram illustrating the multi-function features of the watch, including vibration, alarm, countdown, stopwatch, date/week/month/year, EL backlight, waterproof, and 12/24 hour format.
Button Functions
The watch features four primary buttons, labeled A, B, C, and D, for navigation and setting adjustments. Familiarize yourself with their positions and functions:

Image: Diagram showing the watch face with buttons labeled A (LIGHT), B (UP/MENU), C (DOWN), and D (BACK/LAP).
- Button A (LIGHT): Activates the backlight for improved visibility in dark environments.
- Button B (UP/MENU): Used to cycle through different modes (Time, Alarm, Countdown, Stopwatch) and to increase values during setting adjustments.
- Button C (DOWN): Used to decrease values during setting adjustments.
- Button D (BACK/LAP): Used to confirm settings, exit modes, or record lap times in stopwatch mode.
Operating Instructions
1. Setting Time and Calendar
- From the normal time display, press Button B repeatedly until the time setting mode is activated (seconds will flash).
- Press Button D to cycle through the setting options: Seconds, Minutes, Hours, Date, Month, and Year.
- Use Button B or Button C to adjust the flashing value for each setting.
- Press Button D to confirm each setting and move to the next.
- Once all settings are complete, press Button B to exit the setting mode and return to the normal time display.
2. Setting Alarms (8 Vibrating Alarms)
- From the normal time display, press Button B repeatedly until "ALARM" appears on the display.
- Press Button C to select the desired alarm number (A1 through A8).
- Press Button D to enter the alarm time setting mode (the hour digits will flash).
- Use Button B or Button C to adjust the hour.
- Press Button D to move to the minute digits and adjust using Button B or Button C.
- Press Button D to confirm the alarm time.
- Press Button B to return to the ALARM mode display.
3. Turning Alarms On/Off and Alarm Type Selection
- In ALARM Mode, press Button C to select the alarm you wish to enable or disable.
- Press Button D to toggle the alarm on or off. The corresponding alarm icon will appear/disappear on the display.
- To select the alarm type (sound, vibration, or both), press Button B while in ALARM Mode.
- Press Button D to cycle through the options: (1) Both sound (beep) & vibration, (2) Only sound (beep), (3) Only vibration. The corresponding sound and vibration icons will appear/disappear on the lower left of the display.
4. Countdown Timer
- From the normal time display, press Button B repeatedly until "COUNTDOWN" appears.
- Press Button D to enter setting mode (the hour digits will flash).
- Use Button B or Button C to set the desired countdown duration (from 15 minutes to 24 hours).
- Press Button D to confirm. The countdown will start automatically.
- To stop the countdown, press Button D. To resume, press Button D again.
- To reset the countdown, press Button B while the countdown is stopped.
5. Stopwatch
- From the normal time display, press Button B repeatedly until "STOPWATCH" appears.
- Press Button D to start the stopwatch.
- Press Button D again to stop the stopwatch.
- While stopped, press Button B to reset the stopwatch to zero.
- For lap timing, press Button D to start, then press Button B to record a lap time without stopping the main timer. Press Button B again to view the next lap. Press Button D to stop the stopwatch.
6. Backlight Operation
Press Button A (LIGHT) to activate the super bright backlight. The backlight will illuminate the display for a few seconds, making it easy to read in dark conditions.

Image: The watch display illuminated with its bright blue backlight, showing clear digits in the dark.
7. Lockout Feature
To prevent accidental changes to settings, the watch includes a lockout feature. To activate or deactivate, press and hold both Button B and Button C simultaneously for approximately 2 seconds. A "LOCK" icon will appear on the display when activated, indicating that button functions are temporarily disabled.
Maintenance
Water Resistance
The TICCI T0003VB watch is rated for 30 meters (3 ATM) water resistance. This means it is suitable for daily use, including hand washing, showering, and swimming. However, it is not recommended for diving or prolonged submersion in hot water, as steam can penetrate the seals. Do not operate buttons while the watch is wet or submerged to prevent water ingress.

Image: Icon depicting water resistance, indicating the watch can withstand water exposure.
Battery Replacement
The watch requires 1 CR2 battery. When the display dims, backlight weakens, or alarms become less effective, it indicates a low battery. Frequent use of the vibration feature may shorten battery life. Battery replacement should ideally be performed by a qualified technician to ensure the watch's water resistance is maintained after the procedure.
Troubleshooting
- Watch not vibrating/alarming: Verify that the alarm is enabled and the alarm type is set to vibration or both. Check if the battery has sufficient power.
- Display is dim or blank: This typically indicates a low or depleted battery. Replace the CR2 battery.
- Settings change accidentally: Activate the lockout feature by pressing and holding Buttons B and C simultaneously to prevent unintended adjustments.
- Water ingress: Although the watch is water-resistant, exposure to hot water or operating buttons while submerged can compromise seals. If water enters the watch, seek professional service immediately to prevent further damage.
Specifications
| Feature | Detail |
|---|---|
| Model Number | T0003VB |
| Case Diameter | 54 Millimetres |
| Case Thickness | 15 Millimetres |
| Band Material Type | Thermoplastic Polyurethane (TPU) |
| Band Colour | Black |
| Watch Movement Type | Quartz |
| Water Resistance | 30 Meters |
| Battery Type | 1 CR2 battery required |
| Item Weight | 136 g (0.14 Kilograms) |
| Manufacturer | Derieter |
| Country of Origin | USA |
Important Safety Information
- Do not attempt to open the watch case, as this may void the warranty and compromise water resistance.
- Avoid exposing the watch to extreme temperatures or direct sunlight for prolonged periods.
- Clean the watch with a soft, damp cloth. Do not use chemical cleaners or abrasive materials.
- Keep batteries out of reach of children and dispose of them properly according to local regulations.
Support
For further assistance, technical support, or warranty inquiries, please contact your retailer or the manufacturer's customer support. Refer to your purchase documentation for specific contact details and warranty terms.