
Introduction
This manual provides detailed instructions for the safe and effective use of your SKYBASIC S113-5.5mm Industrial Endoscope Inspection Camera. This device is designed for visual inspection in hard-to-reach areas, featuring a 1080P HD camera, a 4.3-inch LCD screen, adjustable LED lighting, and a semi-rigid cable. Please read this manual thoroughly before operation.
Package Contents
Verify that all items listed below are included in your package:
- LCD Digital Endoscope Unit
- User Manual
- USB Charging Cable
- Accessories: Hook, Magnet, Side Mirror, Protective Cap
- 32GB Micro SD Card

Figure 1: Included Package Contents
Key Features
- 4.3-inch HD LCD Screen: Provides a clear and detailed view of the inspection area.
- 1080P HD Camera: Captures high-resolution images and videos.
- 180° Image Rotation: Allows for easy adjustment of the viewing angle.
- 6 Adjustable LED Lights: Ensures optimal illumination in various dark environments.
- IP67 Waterproof Probe: Suitable for use in wet or submerged conditions.
- Semi-Rigid Cable: Offers flexibility for navigating tight spaces while maintaining shape.
- Plug and Play Operation: No external phone or Wi-Fi connection required.
- 32GB Micro SD Card: Included for storing captured images and videos.

Figure 2: 4.3-inch HD LCD Screen and Camera Specifications
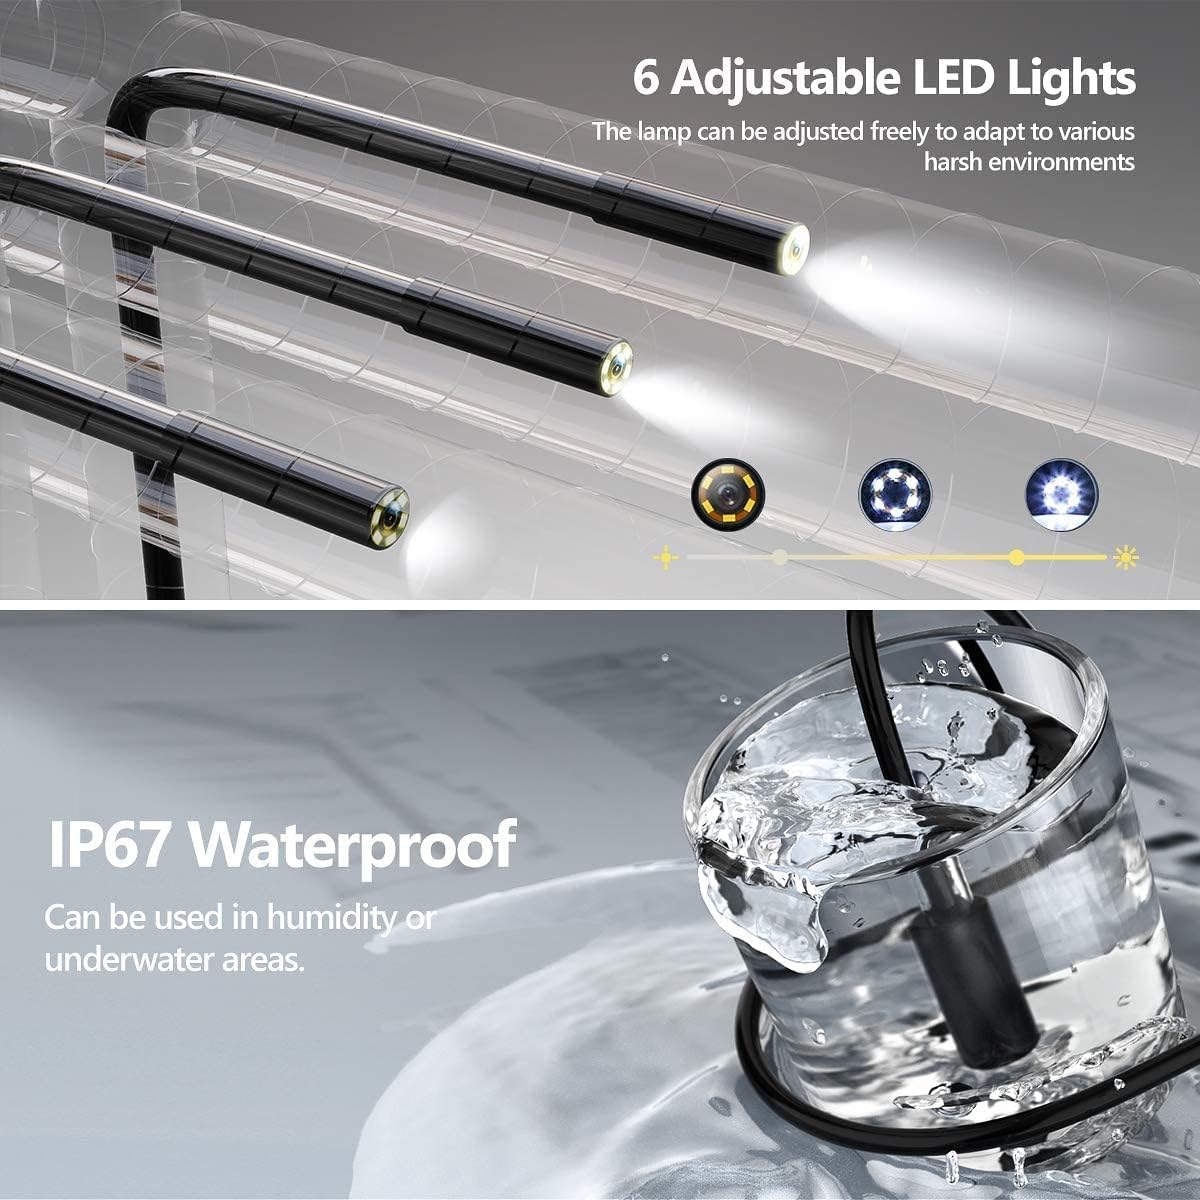
Figure 3: Adjustable LED Lights and IP67 Waterproof Probe

Figure 4: Semi-Rigid Cable Design
Setup Instructions
- Charge the Device: Before first use, fully charge the endoscope unit using the provided USB charging cable. Connect the cable to the unit's charging port and a standard USB power adapter (not included). The charging indicator will show the charging status.
- Insert Micro SD Card: Locate the Micro SD card slot on the side of the unit. Gently insert the included 32GB Micro SD card until it clicks into place. Ensure the card is inserted correctly to enable photo and video recording.
- Power On: Press and hold the power button (usually marked with a power symbol) for a few seconds until the screen illuminates. The device is designed for "plug and play" operation, meaning it's ready for use immediately after powering on.
- Attach Accessories (Optional): If needed, attach the hook, magnet, or side mirror to the camera probe tip. These accessories are designed to assist in retrieving objects or viewing at different angles.

Figure 5: Plug and Play Operation
Operating Instructions
Basic Operation
- Power On/Off: Press and hold the power button to turn the device on or off.
- Navigate Menu: Use the directional buttons (Up/Down/Left/Right) to navigate through menu options.
- Confirm Selection: Press the "OK" button to confirm a selection or enter a menu.
- Return: Press the "M" (Menu) button to return to the previous screen or exit a menu.
Camera Functions
- Adjust LED Lights: Use the dedicated light adjustment button (often marked with a light bulb icon or up/down arrows) to increase or decrease the brightness of the 6 LED lights on the camera probe. This helps illuminate dark inspection areas.
- Take Photos: While viewing the live feed, press the photo capture button (usually marked with a camera icon) to take a still image. The image will be saved to the inserted Micro SD card.
- Record Videos: Press the video recording button (usually marked with a video camera icon) to start recording. Press it again to stop recording. Videos will be saved to the Micro SD card.
- 180° Image Rotation: If the image orientation is incorrect, press the image rotation button (often marked with a circular arrow) to rotate the image 180 degrees. This feature is useful when the probe is inverted.
- Focusing Distance: The optimal focusing distance for clear images is between 3cm and 10cm from the object. Position the camera within this range for best results.
Maintenance and Care
- Cleaning the Probe: The camera probe is IP67 waterproof. After use in dirty or wet environments, gently wipe the probe with a damp cloth. For stubborn dirt, a mild detergent can be used, followed by a clean, damp cloth. Ensure the probe is dry before storage.
- Cleaning the Main Unit: The main unit is not waterproof. Clean it with a soft, dry cloth. Avoid using liquid cleaners or abrasive materials.
- Storage: Store the endoscope in a cool, dry place, away from direct sunlight and extreme temperatures. Coil the semi-rigid cable loosely to prevent damage.
- Battery Care: To prolong battery life, charge the device regularly, even if not in frequent use. Avoid completely draining the battery for extended periods.
- SD Card Management: Periodically transfer photos and videos from the Micro SD card to a computer to free up space and back up your data. Format the SD card through the device's menu if performance degrades.
Troubleshooting
| Problem | Possible Cause | Solution |
|---|---|---|
| Device does not power on. | Low battery. | Charge the device fully using the USB cable. |
| No image on screen. | Cable not properly connected; device malfunction. | Ensure the camera cable is securely connected. Restart the device. If the problem persists, contact support. |
| Cannot take photos/record videos. | No Micro SD card inserted; SD card full or corrupted. | Insert a Micro SD card. Check if the SD card has sufficient space or format it (this will erase all data). |
| Image is blurry. | Camera lens dirty; object out of focus range. | Clean the camera lens. Adjust the distance between the camera and the object to be within 3cm-10cm. |
| LED lights are not working. | Lights turned off; malfunction. | Press the light adjustment button to turn on/increase brightness. If still not working, contact support. |
Specifications
| Feature | Detail |
|---|---|
| Brand | SKYBASIC |
| Model Number | S113-5.5mm |
| Display | 4.3-inch LCD |
| Video Recording Resolution | 720p (Note: Product title mentions 1080P HD, but specifications list 720p. User should be aware of this discrepancy.) |
| Image Rotation | 360° (as per product title) / 180° (as per image feature) |
| Camera Diameter | 5.5mm (implied by model number) |
| LED Lights | 6 adjustable LEDs |
| Water Resistance Level | IP67 (for probe only) |
| Connectivity Technology | USB |
| Storage Media | Micro SDXC Card (32GB included) |
| Battery | 1 Lithium-polymer (included) |
| Item Weight | 549 g |
| Package Dimensions | 19.89 x 13.31 x 7.9 cm |
Note: Some specifications, such as video resolution and image rotation degrees, may vary slightly between product descriptions and detailed specifications. Refer to the device's on-screen information for the most accurate details.
Safety Information
- Do not attempt to disassemble or modify the device. This may cause damage and void the warranty.
- Keep the main unit away from water and liquids, as it is not waterproof.
- Do not expose the device to extreme temperatures, direct sunlight, or high humidity.
- Use only the provided USB cable for charging.
- Keep out of reach of children.
- Dispose of the device and its battery according to local regulations.
Typical Applications
The SKYBASIC S113-5.5mm Industrial Endoscope is suitable for a variety of inspection tasks in hard-to-reach areas. Common applications include:
- Automotive Maintenance: Inspecting engine components, cylinders, and other vehicle parts.
- Drainpipe Inspection: Checking for blockages, corrosion, or damage in pipes and plumbing systems.
- HVAC Inspection: Examining air conditioning ducts and ventilation systems.
- Electrical Repair: Inspecting wiring in walls or conduits.
- Home Inspection: Looking into wall cavities, behind appliances, or other confined spaces.

Figure 6: Endoscope in various inspection scenarios


