1. Introduction
This manual provides essential information for the proper installation, operation, and maintenance of your Truma 34020-00241 Thermostat Plate. Please read this manual thoroughly before attempting any installation or use to ensure safe and efficient performance of the product. This thermostat plate is a critical component designed for specific Truma heating or cooling systems, facilitating accurate temperature regulation.
2. Product Overview
The Truma 34020-00241 Thermostat Plate is an integral part of a temperature control system. It typically houses the temperature sensing elements and provides the interface for connection to the main control unit. Its design ensures reliable communication within the system for precise environmental control.
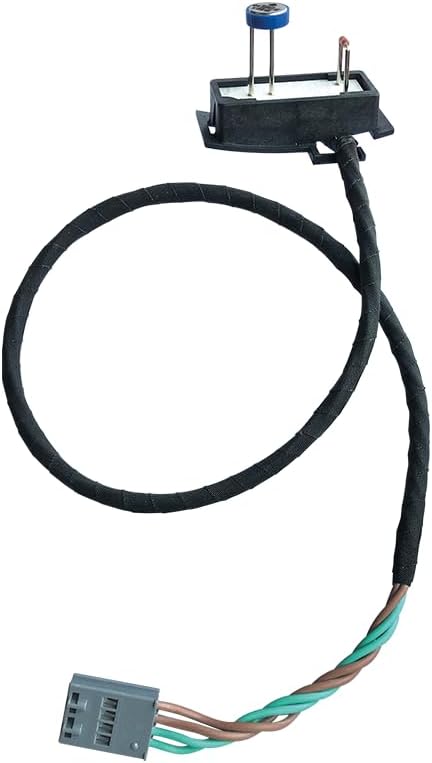
Figure 1: The Truma 34020-00241 Thermostat Plate. This image displays the thermostat plate component, featuring a black rectangular base with two metal prongs extending upwards, one topped with a blue cap. A black insulated wire extends from the base, leading to a grey multi-pin connector at the end. The wire also shows sections of twisted brown and green wires near the connector.
3. Setup and Installation
Installation of the Truma 34020-00241 Thermostat Plate should be performed by a qualified technician or an individual with appropriate technical knowledge. Incorrect installation can lead to system malfunction or damage.
3.1 Safety Precautions
- Ensure the main power supply to the appliance is disconnected before beginning installation.
- Refer to the main appliance's instruction manual for specific wiring diagrams and mounting locations.
- Handle the thermostat plate carefully to avoid damage to the sensitive components.
- Verify all connections are secure and correctly polarized before restoring power.
3.2 Installation Steps (General)
- Locate Mounting Position: Identify the designated mounting location for the thermostat plate as specified in your main appliance's manual.
- Secure the Plate: Mount the thermostat plate securely using appropriate fasteners (not included, typically part of the main appliance).
- Connect Wiring: Carefully connect the wiring harness from the thermostat plate to the corresponding port on the main control unit. Ensure the connector is fully seated and locked.
- Verify Connections: Double-check all wiring connections against the system's wiring diagram.
- Restore Power: Once installation is complete and verified, restore power to the appliance.
- System Test: Perform a functional test of the heating/cooling system to confirm the thermostat plate is communicating correctly and regulating temperature as expected.
4. Operating Principles
The Truma 34020-00241 Thermostat Plate functions as a sensor interface within your Truma climate control system. It continuously monitors the ambient temperature and transmits this data to the main control unit. The control unit then processes this information to activate or deactivate the heating or cooling elements, maintaining the desired temperature setting. Users interact with the main control panel of the appliance, not directly with the thermostat plate itself.
5. Maintenance
The Truma 34020-00241 Thermostat Plate is designed for minimal maintenance. However, periodic checks can help ensure its longevity and proper function.
- Cleaning: Gently wipe the exterior of the thermostat plate with a soft, dry cloth to remove dust. Do not use abrasive cleaners or solvents.
- Visual Inspection: Periodically inspect the wiring and connector for any signs of wear, damage, or loose connections.
- Environmental Conditions: Ensure the thermostat plate is not exposed to excessive moisture, extreme temperatures, or direct sunlight, which could affect its performance.
No user-serviceable parts are contained within the thermostat plate. Any internal issues require professional service.
6. Troubleshooting
If you experience issues with your Truma climate control system, consider the following general troubleshooting steps related to the thermostat plate. For detailed system-specific troubleshooting, refer to your main appliance's manual.
| Symptom | Possible Cause | Action |
|---|---|---|
| Inaccurate temperature readings | Sensor obstruction, faulty connection, or sensor damage. | Ensure the sensor area is clear of obstructions. Check wiring connections. If issues persist, contact Truma support. |
| System not responding to temperature changes | Loose or disconnected wiring harness, faulty thermostat plate. | Verify the wiring harness is securely connected. Check the main appliance for error codes. |
| No power to the thermostat plate (if applicable) | Main power supply off, fuse blown, wiring issue. | Check the main power supply and relevant fuses. Consult the main appliance manual for power distribution. |
If troubleshooting steps do not resolve the issue, it is recommended to contact Truma customer support or a certified service technician.
7. Specifications
| Attribute | Detail |
|---|---|
| Brand | Truma |
| Model Number | 34020-00241 |
| Item Weight | 1.06 ounces (approx. 30 grams) |
| Product Dimensions | 4.37 x 6.65 x 1.54 inches (11.1 x 16.9 x 3.9 cm) |
| Manufacturer Part Number | 34020-00241 |
8. Warranty Information
Specific warranty terms and conditions for the Truma 34020-00241 Thermostat Plate are provided by the manufacturer, Truma. Please refer to the warranty documentation included with your original Truma appliance or visit the official Truma website for detailed information regarding warranty coverage, duration, and claims procedures. Keep your proof of purchase for warranty purposes.
9. Customer Support
For technical assistance, spare parts, or service inquiries regarding your Truma 34020-00241 Thermostat Plate or the associated Truma appliance, please contact Truma customer support directly. Contact information can typically be found on the official Truma website or in the documentation provided with your main Truma product.
You may also visit the Truma Store on Amazon for additional product information and resources.


