
1. Introduction
This manual provides detailed instructions for the installation, operation, and maintenance of the Weelye RX74 24V 2.4G Bluetooth Remote Control and Receiver Kit. This kit is designed as a replacement part for children's electric ride-on toys.
Compatibility Check: Before installation, open your electric ride-on car and inspect the existing control box. If the appearance of the control box is identical to the RX74, this part should be compatible with your vehicle. The RX74 24V CE FC model can replace the RX30 24V FC CE model.

Image: Comparison of RX30 and RX74 control boxes, highlighting their interchangeability.
2. Product Overview
The Weelye RX74 kit includes a 2.4G Bluetooth remote control and a 24V receiver control box. Key features include:
- 2.4G Bluetooth remote control for wireless operation.
- 24V control box with 40A relay for higher power and stable performance.
- Integrated slow start function, eliminating the need for additional slow starter installation.
- Features a 7-pin four-sided socket for connections.

Image: Weelye RX74 24V Control Box and Remote Control.
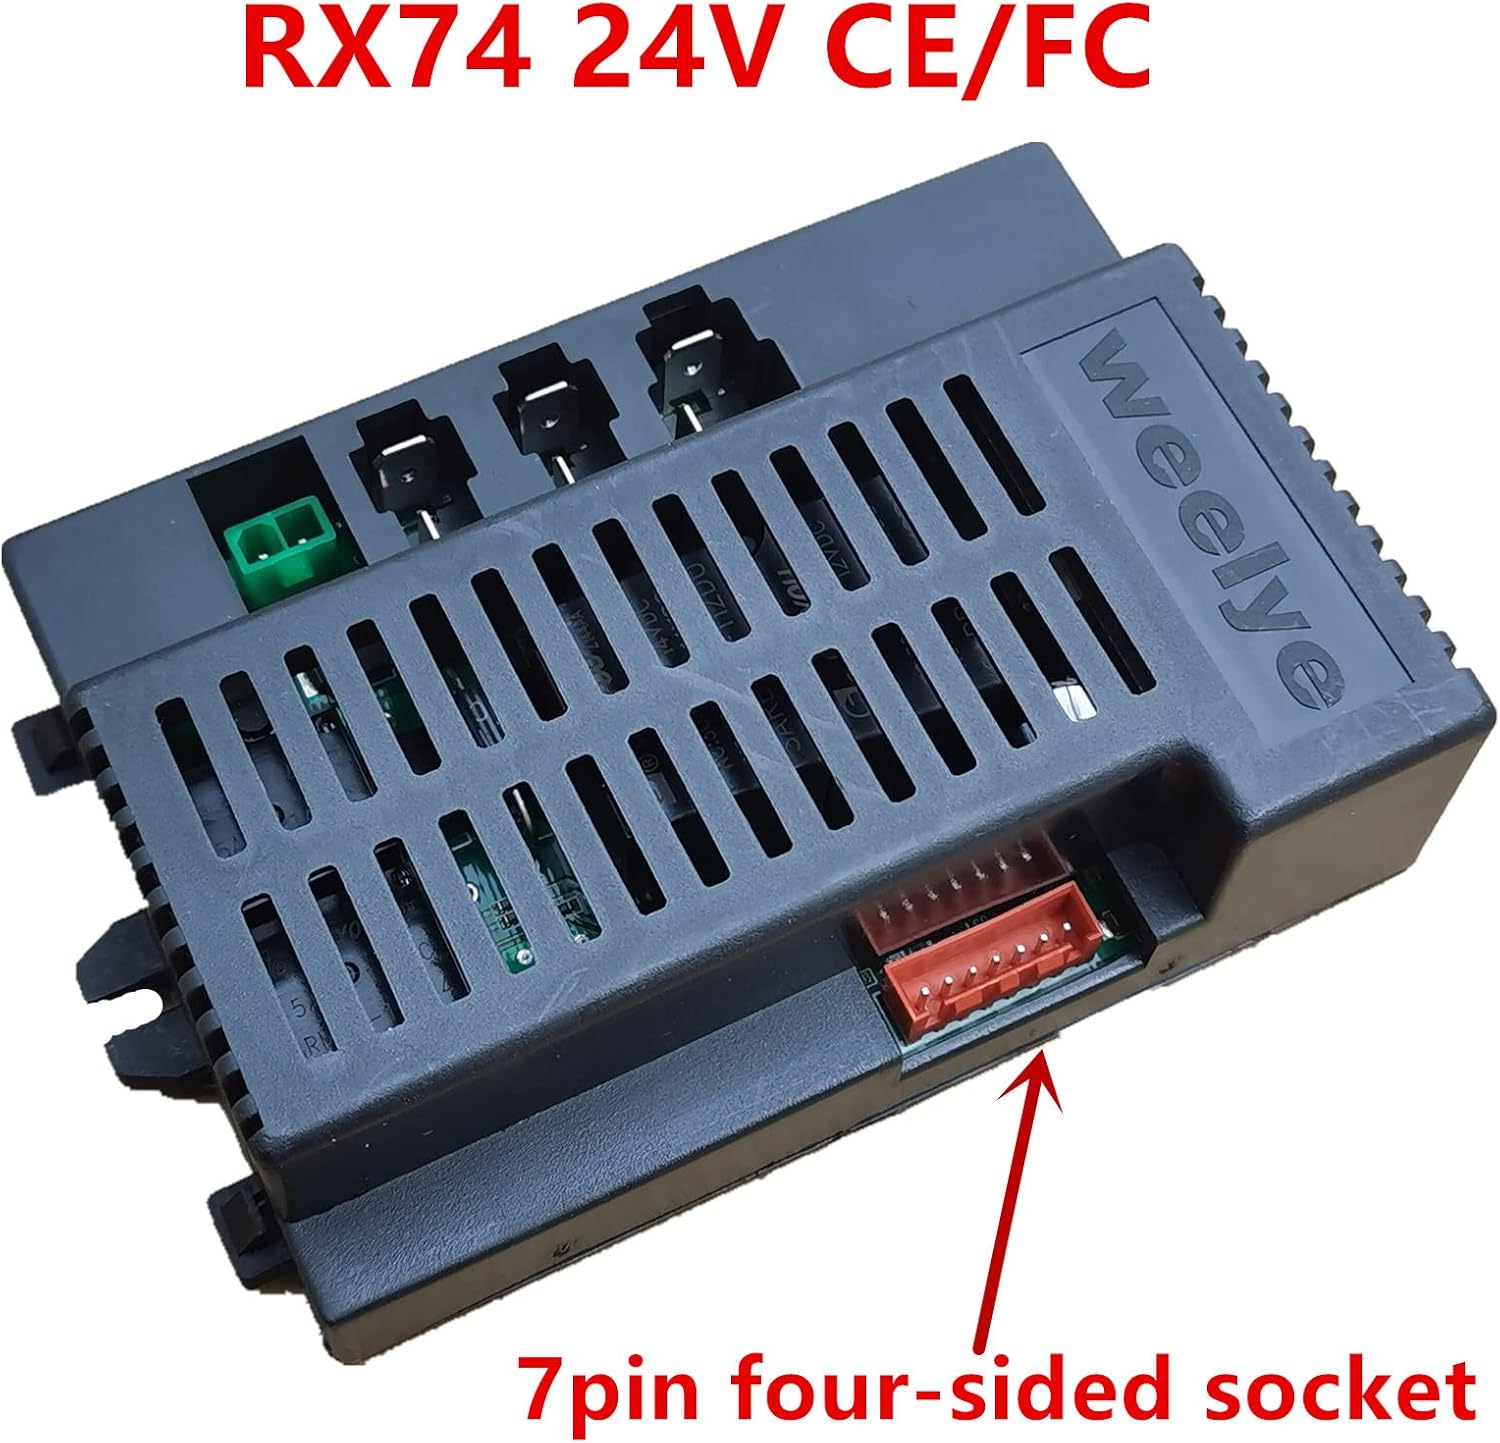
Image: Detail of the 7-pin four-sided socket on the RX74 control box.
3. Setup and Installation
3.1. Remote Control Battery Installation
- Open the battery compartment on the back of the remote control.
- Insert two AAA 1.5V batteries, ensuring correct positive (+) and negative (-) polarity.
- Close the battery cover. The indicator light will flash three times, confirming correct battery installation.

Image: Weelye Remote Control.
3.2. Frequency Matching (Pairing)
This procedure is required for first-time use or after replacing the remote control batteries.
- Ensure the remote control has fresh batteries installed (refer to Section 3.1).
- Press and hold the "Frequency Key" (often labeled "car select" or "S" button) on the remote control for approximately 2 seconds. The indicator light on the remote will begin to flash.
- While the remote's indicator is flashing, turn on the power supply of the electric ride-on car.
- The indicator light on the remote control should turn off, indicating successful frequency matching.
- If the indicator light does not turn off, the matching was unsuccessful. Turn off the car's power supply and repeat steps 2 and 3.

Image: Remote Control with Frequency Key and Button Diagram.

Image: Remote Control with detailed operation manual text.
3.3. Wiring Diagram
Ensure all connections are secure and correctly aligned according to the diagram below. Incorrect wiring can damage the control box or the ride-on toy.

Image: RX74 24V Control Box Wiring Diagram.
- Steering Motor: Connects to the steering mechanism.
- Drive Motor 1 & 2: Connects to the vehicle's drive motors.
- Power Supply: Main power input for the control box.
- 7-Pin Connector:
- Yellow: High/low speed switch
- Orange: Forward
- Blue: Back
- Black: Ground wire
- Red: Power Output
- Red: Battery positive
4. Operating Instructions
Once the remote control is paired and the control box is installed, you can operate the ride-on toy using the remote control buttons:
- Forward (Triangle Up): Moves the vehicle forward.
- Backward (Triangle Down): Moves the vehicle backward.
- Turn Left (Triangle Left): Turns the vehicle left.
- Turn Right (Triangle Right): Turns the vehicle right.
- Speed (S button): Adjusts the speed setting (High, Medium, Low). The remote's LED lights indicate the current speed.
- Emergency Brake (P button): Press to engage the emergency brake, stopping the vehicle. Press again to release.
The control box features a slow start function, ensuring a smooth acceleration when the vehicle begins to move.
5. Maintenance
- Cleaning: Keep the control box and remote control clean and free from dust and moisture. Use a dry, soft cloth for cleaning.
- Battery Replacement: Replace remote control batteries when the indicator light becomes dim or the remote's range decreases. Always use new AAA 1.5V batteries.
- Storage: Store the product in a cool, dry place away from direct sunlight and extreme temperatures.
- Inspection: Periodically check all wiring connections for looseness or damage. Ensure the control box is securely mounted within the vehicle.
6. Troubleshooting
- Remote Control Not Responding:
- Check if the remote control batteries are correctly installed and have sufficient charge. Replace if necessary.
- Perform the frequency matching procedure again (refer to Section 3.2).
- Ensure the vehicle's power is on.
- Vehicle Not Moving or Intermittent Operation:
- Verify all wiring connections to the control box, motors, and power supply are secure and correct.
- Check the vehicle's main battery for charge.
- Ensure the remote control is successfully paired.
- Inspect the control box for any visible damage or signs of overheating. If the control box becomes excessively hot and shuts off, it may indicate an overload or internal fault.
- Indicator Light Not Turning Off During Pairing:
- This indicates unsuccessful frequency matching. Turn off the car's power supply and repeat the pairing steps (Section 3.2) carefully.
- Remote Control Shuts Off After 10 Seconds:
- The remote control enters power-saving mode if no operation is detected for 10 seconds. This is normal behavior. Press any button to reactivate.
7. Specifications
| Feature | Specification |
|---|---|
| Model Number | Weelye RX74 24V CE FC (Replaces RX30 24V FC CE) |
| Voltage | 24V |
| Remote Control Frequency | 2.4G Bluetooth |
| Relay Type | 40A Relay (High Power) |
| Socket Type | 7-pin Four-sided socket |
| Product Dimensions | 5 x 3.6 x 2.6 inches |
| Item Weight | 8 ounces |
| Remote Control Batteries | 2 x AAA 1.5V (not included) |
| Manufacturer Recommended Age | 16 years and up |
8. Warranty and Support
For warranty information or technical support, please contact the manufacturer directly. You can find more information about Weelye products by visiting their official store:
Visit the Weelye Store on Amazon
Please retain your purchase receipt for any warranty claims.