
1. Introduction
This manual provides detailed instructions for the installation, operation, and maintenance of your Orbit 50021 2-Zone All-in-One Automatic Watering System. This system is designed to provide efficient and convenient irrigation for large areas, utilizing a standard hose faucet as its water source. Please read this manual thoroughly before beginning installation or operation to ensure proper use and longevity of your system.
2. Safety Information
- Water Pressure: Before installation, test your water pressure to ensure it meets the system requirements of at least 50 PSI and 5 GPM flow. Insufficient pressure may affect system performance.
- Freezing Conditions: To prevent damage from freezing, ensure auto drain valves are properly installed and the system is completely drained before the first frost.
- Blu-Lock Fittings: Do not use solvents or sealant tape with Blu-Lock fittings. These fittings are designed for a secure, tool-free connection without additional sealants. Using improper materials can compromise the seal and damage the system.
- Electrical Safety: If using an electronic timer, ensure it is protected from direct water exposure and installed according to electrical safety guidelines.
- Children and Pets: Keep all components, especially small fittings and the pipe cutter, out of reach of children and pets.
3. Package Contents
Verify that all components listed below are present in your kit:
- Digital Timer
- Tubing (Blu-Lock)
- Sprinklers (Gear Drive Pop-Up)
- Fittings (Blu-Lock Push-Fit)
- Pipe Cutter
- Pressure Gauge

Image: All components included in the Orbit 50021 2-Zone All-in-One Automatic Watering System Kit.
4. Setup and Installation
The Orbit 50021 system features Blu-Lock push-fit technology for quick and easy installation without the need for glue or clamps.
4.1. Planning Your Layout
Before digging, plan the layout of your sprinkler system. Consider the area to be watered, water pressure, and sprinkler spacing. The included pressure gauge will help determine optimal sprinkler head spacing based on your water pressure.

Image: Example sprinkler system layouts for effective coverage.
4.2. Connecting Blu-Lock Tubing and Fittings
The Blu-Lock system allows for simple push-fit connections. Cut the tubing to the desired length using the provided pipe cutter. Ensure cuts are clean and straight. To connect, simply push the tubing firmly into the Blu-Lock fitting until it is fully seated. No tools or adhesives are required.

Image: Blu-Lock push-fit fittings for secure, tool-free connections.

Image: Blu-Lock fittings require no glue or clamps for installation.
4.3. Installing Sprinkler Heads
The kit includes gear drive pop-up sprinkler heads. These heads feature a 1/2-inch threaded inlet for easy connection to the Blu-Lock system using appropriate threaded fittings. Install the sprinkler heads at the planned locations, ensuring they are flush with the ground when retracted.

Image: Sprinkler head with 1/2 inch threaded inlet for connection.
4.4. Connecting the Digital Timer
Attach the digital timer to your hose faucet. Connect the Blu-Lock tubing to the timer's outlets. The timer allows for two independent watering zones.
Video: An introductory overview of the Orbit 2-Zone In-Ground Sprinkler System, demonstrating key features and components.
5. Operating Instructions
The digital timer allows for flexible programming of your watering schedule.
5.1. Programming the Digital Timer
Use the oversized dial and buttons on the digital timer to set the current time, start time, watering duration (1 to 240 minutes), and frequency (6-hour to 7-day intervals). Refer to the timer's specific instructions for detailed programming steps.
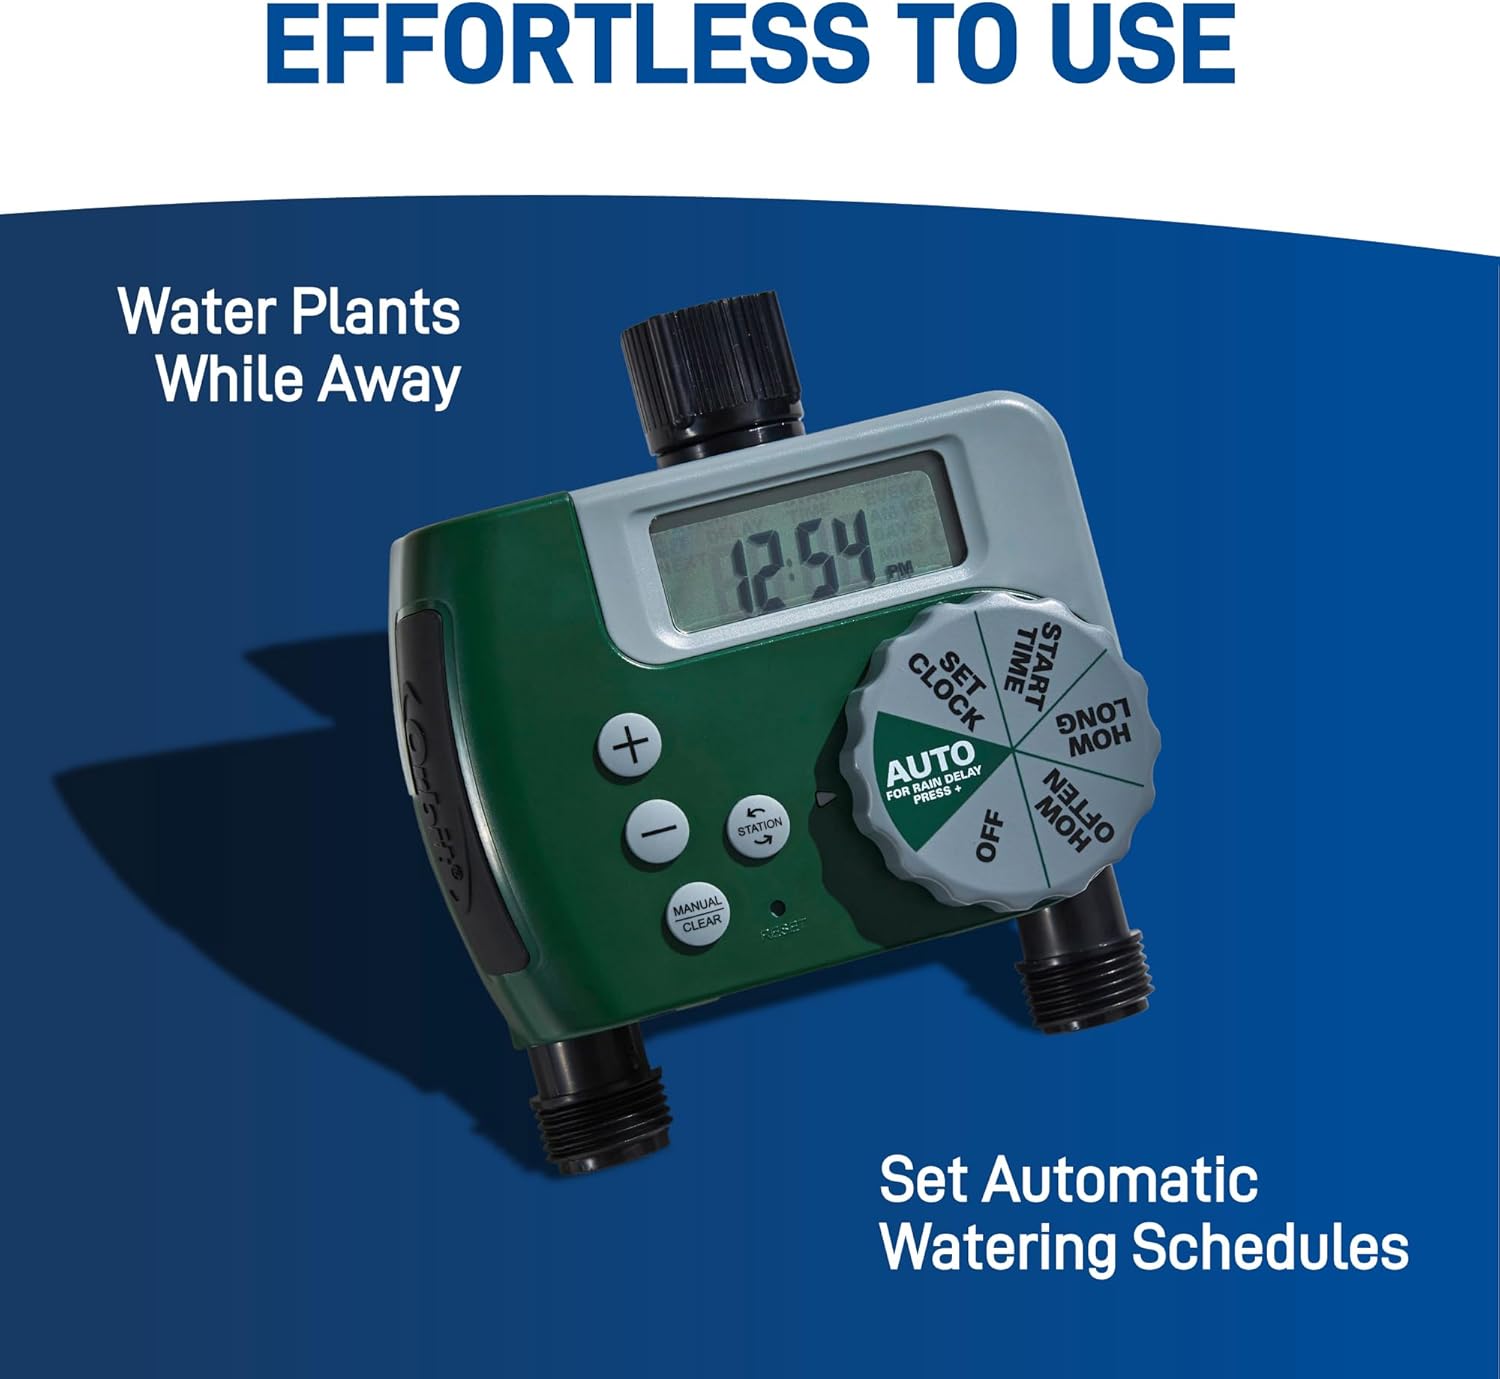
Image: Digital timer for setting automatic watering schedules.
5.2. Manual Rain Delay
The timer includes a manual rain delay option. This feature allows you to pause your watering schedule for a set period, conserving water during inclement weather. Consult the timer's instructions for activating and setting the rain delay.
5.3. Adjusting Sprinkler Heads
The gear drive sprinkler heads offer adjustable coverage from 40 to 360 degrees and a distance range of 15-20 feet, which varies based on water pressure. Adjust the radius and arc of each sprinkler head to ensure uniform watering and prevent overspray onto non-lawn areas.

Image: Sprinkler head with adjustable radius and arc settings.
6. Maintenance
6.1. Winterization
Before the first frost, it is crucial to winterize your system to prevent damage from freezing. This involves completely draining all water from the tubing and sprinkler heads. Auto drain valves, if installed, will assist in this process. Disconnect the timer from the faucet and store it indoors.

Image: Reminder to protect the system from freezing temperatures.
6.2. Sprinkler Head Cleaning
The gear drive sprinkler heads include a filter to prevent clogging. Periodically inspect and clean these filters to ensure optimal performance and consistent water distribution.

Image: Sprinkler heads feature a filter to prevent clogging.
7. Troubleshooting
- Low Water Pressure/Sprinklers Not Popping Up: Ensure your water source provides at least 50 PSI and 5 GPM. Check for kinks in the tubing or blockages in the sprinkler heads. If multiple sprinklers are on one zone, consider reducing the number or adjusting the layout to balance pressure.
- Leaking Connections: For Blu-Lock fittings, ensure the tubing is pushed in completely and securely. The connection should feel firm. If a leak persists, disconnect and re-seat the tubing, ensuring a clean, straight cut.
- Timer Not Functioning: Check the battery in the digital timer. Ensure the timer is correctly programmed and the water source is turned on.
- Uneven Watering: Adjust the radius and arc settings on individual sprinkler heads to ensure overlapping coverage and eliminate dry spots.
8. Specifications
| Brand | Orbit |
| Model Number | 50021 |
| Style | Large Area |
| Material | Plastic |
| Item Dimensions | 19.5 x 17.75 x 10.25 inches |
| Item Weight | 21.1 Pounds |
| Number of Pieces | 18 |
| Pattern | Sprinkler System |
| Power Source | Battery Powered (for timer) |
| Fit Type | Blu-Lock |
| Maximum Pressure | 50 Pound per Square Inch |
| Included Components | Timer, Tubing, Sprinklers, Fittings, Pipe Cutter, Pressure Gauge |
9. Warranty and Support
Warranty: The manufacturer states that there is no explicit warranty description provided for this product.
Support: For technical assistance, troubleshooting beyond this manual, or inquiries about replacement parts, please contact Orbit customer support directly. Refer to the product packaging or the official Orbit website for current contact information.


