
1. Introduction
This manual provides detailed instructions for the installation, operation, maintenance, and troubleshooting of your EVERSECU 3MP PoE Home Security Camera System. Please read this manual thoroughly before using the product to ensure proper setup and functionality.
2. Package Contents
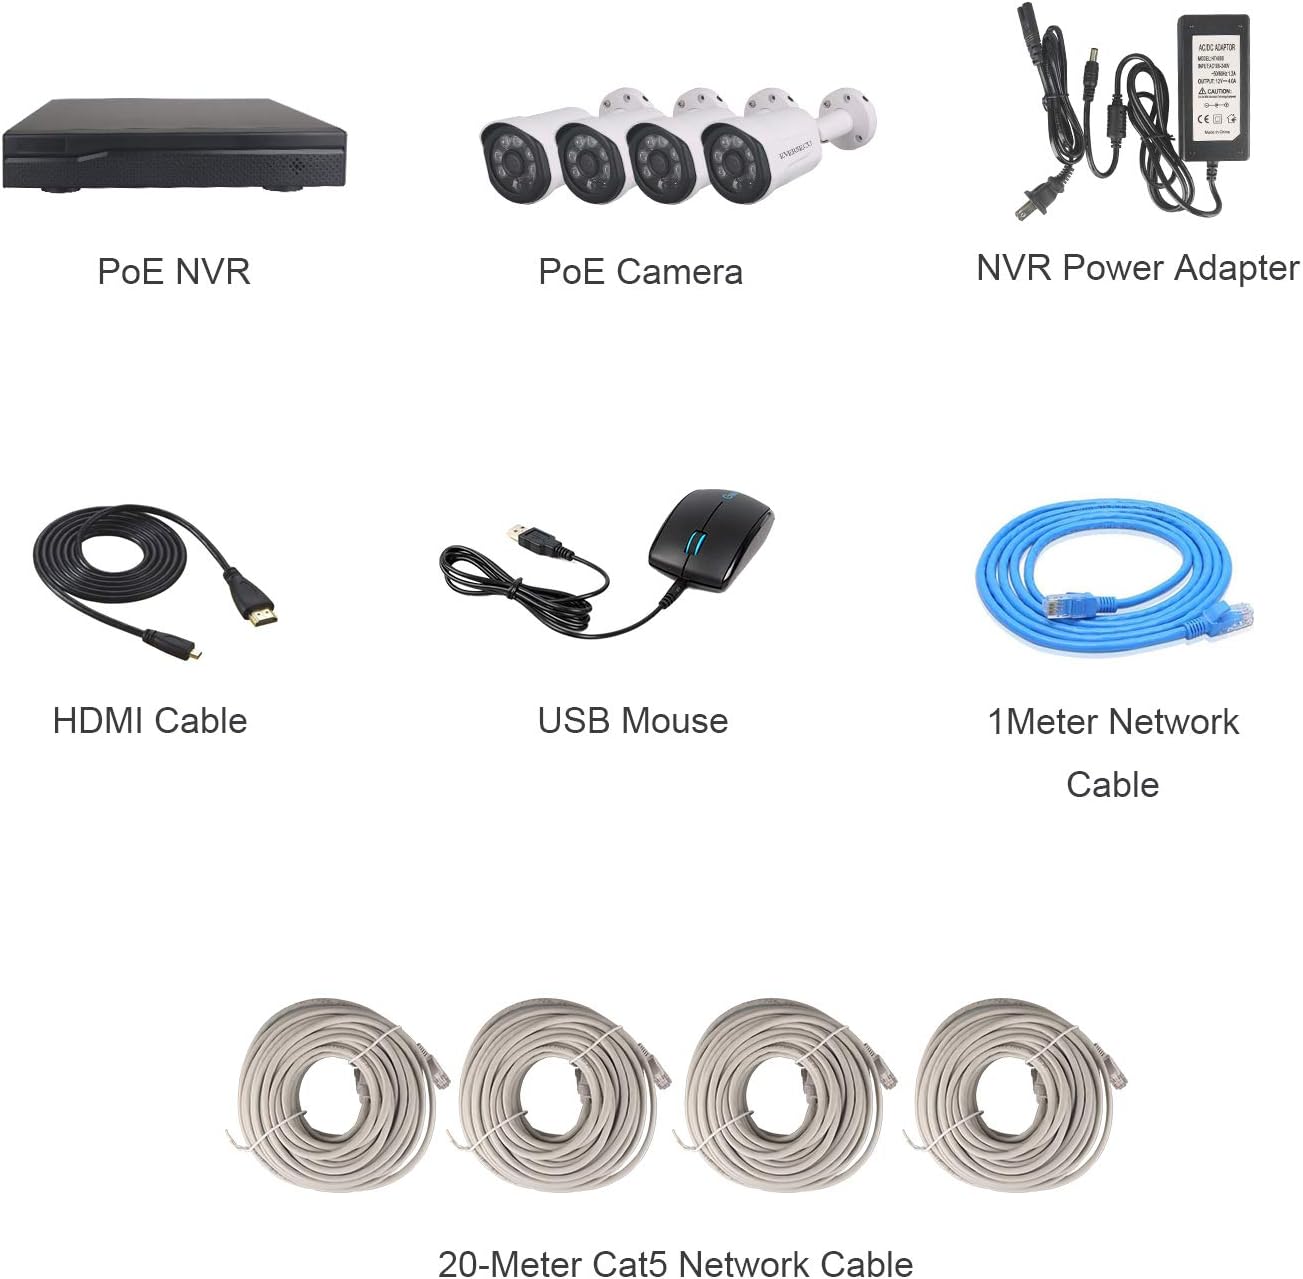
Before beginning installation, verify that all components listed below are included in your package. If any items are missing or damaged, please contact EVERSECU customer support.
- PoE NVR (Network Video Recorder)
- PoE Cameras (8 units, 3.0MP Bullet IP Cameras)
- NVR Power Adapter
- HDMI Cable
- USB Mouse
- 1-Meter Network Cable
- 20-Meter Cat5 Network Cables (8 units)
3. Setup and Installation
The EVERSECU PoE Home Security Camera System is designed for straightforward setup. A single Ethernet cable powers each camera and transmits video signals, simplifying wiring.
3.1 NVR and Camera Connections
- Connect Cameras to NVR: Connect each PoE camera to an available LAN port on the NVR using the provided Cat5 network cables. The NVR will automatically power the cameras and receive video feeds.
- Connect NVR to Monitor: Connect the NVR to a monitor or TV using the HDMI cable or VGA cable.
- Connect USB Mouse: Plug the USB mouse into a USB port on the NVR for system navigation.
- Connect NVR to Network (Optional for Remote Access): For remote viewing, connect the NVR's WAN port to your router using an Ethernet cable.
- Power On NVR: Connect the NVR power adapter to the NVR and then to a power outlet. The system will boot up automatically.

3.2 Mobile Access Setup
To view your security system remotely on your mobile device, follow these steps:
- Ensure NVR is Connected to Router: Verify that your NVR is connected to your home or office router via an Ethernet cable.
- Download the App: Download the free "Eseecloud" application from your mobile device's app store (compatible with Android and iOS systems).
- Register and Add Device: Open the Eseecloud app, register an account, and follow the in-app instructions to add your NVR device. This typically involves scanning a QR code on the NVR or entering its device ID.
- Enjoy Live View: Once the device is added, you can access live video feeds from your cameras and playback recordings from anywhere with an internet connection.

4. Operation
Your EVERSECU security system offers various operational features for effective surveillance.
4.1 Live Monitoring and Recording
The system provides 24/7 real-time monitoring. Once set up, cameras continuously record footage to the NVR. You can view live feeds directly from a connected monitor or remotely via the Eseecloud app.

4.2 Remote Viewing and Playback
The Eseecloud app allows you to remotely view live camera feeds and playback recorded footage from your mobile device, tablet, or PC. Ensure your NVR is connected to the internet for this functionality.

4.3 Motion Detection and Alerts
The system supports motion detection. When motion is triggered, the NVR can send email alerts or app notifications. It is crucial to properly configure motion detection settings to avoid excessive alerts. You can adjust sensitivity and define specific detection zones within the NVR's settings.
4.4 Night Vision
The 3.0MP bullet PoE cameras are equipped with 6 IR Array LEDs, providing up to 100ft of night vision. This ensures clear and detailed images even in low-light or complete darkness.
5. Maintenance
Regular maintenance ensures optimal performance and longevity of your security system.
5.1 Storage Management
The NVR utilizes H.265+ compression technology, which significantly reduces file sizes compared to H.264, allowing for more storage capacity. However, an HDD (Hard Disk Drive) is not included with this system and must be purchased separately for recording storage. The NVR supports up to 4 TB memory storage capacity.
- Install HDD: Refer to the NVR's internal instructions for installing a compatible 3.5-inch SATA HDD.
- Format HDD: After installation, format the HDD through the NVR's system settings.
- Backup Recordings: Regularly back up important recordings to an external storage device via the NVR's USB port or network.
- Overwrite Settings: Configure the NVR to automatically overwrite older footage when the HDD is full, or set it to stop recording.
5.2 Cleaning
Periodically clean the camera lenses with a soft, dry cloth to ensure clear image quality. Do not use harsh chemicals or abrasive materials.
5.3 Firmware Updates
Check the EVERSECU official website or the Eseecloud app for available firmware updates for your NVR and cameras. Keeping your system updated ensures the latest features and security patches.
6. Troubleshooting
This section addresses common issues you might encounter with your EVERSECU security system.
6.1 No Video Display
- Check Power: Ensure the NVR and cameras are properly powered.
- Check Cables: Verify all Ethernet and video cables are securely connected.
- Monitor Input: Confirm your monitor is set to the correct input source (HDMI/VGA).
- Camera Status: Check if the camera's IR LEDs are active in low light, indicating it has power.
6.2 Remote Viewing Not Working
- Network Connection: Ensure the NVR is connected to your router and has internet access. Check the network status indicator on the NVR.
- App Login: Verify you are logged into the Eseecloud app with the correct account.
- Device Added: Confirm the NVR device is correctly added to your Eseecloud account.
- Router Settings: Check your router's firewall settings; some may block P2P connections.
6.3 Excessive Motion Detection Alerts
- Adjust Sensitivity: Lower the motion detection sensitivity in the NVR's settings.
- Define Detection Zones: Exclude areas with constant movement (e.g., trees swaying, busy roads) from the motion detection zone.
- Environmental Factors: Changes in light (e.g., shadows, reflections) can sometimes trigger motion detection.
6.4 Hard Drive Not Recording
- HDD Installed: Ensure a compatible HDD is correctly installed in the NVR.
- HDD Formatted: Verify the HDD has been formatted by the NVR system.
- Recording Schedule: Check the recording schedule settings to ensure continuous or motion-triggered recording is enabled.
- HDD Status: Check the HDD status in the NVR's system information.
7. Specifications
| Feature | Detail |
|---|---|
| Brand | EVERSECU |
| Connectivity Technology | Wired (PoE) |
| Video Capture Resolution | 3.0MP (1536p) |
| Number of Channels | 8 |
| Video Compression | H.265+ |
| Memory Storage Capacity (NVR) | Up to 4 TB (HDD not included) |
| Special Features | Frame Rate, Motion Sensor, Night Vision |
| Night Vision Range | 100 Feet |
| Frame Rate | 30 fps |
| Operating System (App) | Android, iOS |
| Power Source | Corded Electric |
| Item Weight | 17.49 pounds (System) |
| ASIN | B07QK6GRMW |

8. Warranty and Support
8.1 Warranty Information
Please refer to the warranty card included in your product packaging or visit the official EVERSECU website for detailed warranty terms and conditions. Keep your proof of purchase for warranty claims.
8.2 Customer Support
For technical assistance, troubleshooting not covered in this manual, or any product-related inquiries, please contact EVERSECU customer support through their official website or the contact information provided in your product documentation.