1. Introduction
The SeeedStudio Grove - Blue LED Button is a digital input module designed for easy integration into Grove-compatible systems. It combines a tactile push-button with an integrated blue LED, allowing for both user input and visual feedback. This module is suitable for a wide range of microcontroller projects requiring simple interaction and status indication.
2. Features
- Integrated Blue LED: Provides visual feedback for button status or other application-specific indications.
- High-Quality N-Channel MOSFET: Ensures efficient and reliable control of the LED with high switching speed and low power consumption.
- Long Operating Life: Designed for durability with an estimated 100,000 operational cycles.
- Grove Digital Interface: Simplifies connection to Grove base shields and microcontrollers, requiring no soldering or complex wiring.
- Compact Design: Small form factor for easy integration into various projects.
3. Specifications
| Model | Grove - Blue LED Button |
| Interface | Digital (Grove compatible) |
| LED Color | Blue |
| Button Type | Tactile Push Button |
| Operating Life | Approximately 100,000 cycles |
| Dimensions | Refer to product images for detailed measurements. |
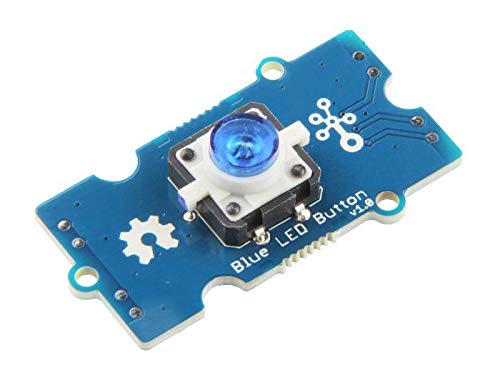
Image 1: Top-down view of the Grove - Blue LED Button module, showing its dimensions in both inches and centimeters. The blue PCB features the central blue LED button, a Grove connector, and mounting holes.
4. Setup
To set up the Grove - Blue LED Button, follow these steps:
- Connect to Grove Base Shield: Use a standard Grove cable to connect the Grove - Blue LED Button to any digital port (e.g., D2, D3, etc.) on a Grove Base Shield.
- Connect Base Shield to Microcontroller: Attach the Grove Base Shield to your compatible microcontroller board (e.g., Arduino, Raspberry Pi).
- Power On: Ensure your microcontroller board is powered on.
- Install Libraries (if necessary): Depending on your development environment and microcontroller, you may need to install specific Grove libraries to easily interact with the module. Refer to the SeeedStudio Wiki for detailed library installation instructions for your platform.

Image 2: Close-up view of the Grove - Blue LED Button module, highlighting the blue LED within the tactile button and the surrounding circuitry on the blue PCB.
5. Operating Instructions
The Grove - Blue LED Button functions as both an input (button press) and an output (LED control).
5.1 Reading Button State
The button provides a digital signal. When pressed, it typically outputs a LOW signal, and when released, it outputs a HIGH signal (or vice-versa, depending on internal pull-up/pull-down configuration and library implementation). You can read this state using your microcontroller's digital input functions.
// Example Arduino-like pseudocode for reading button state
const int buttonPin = 2; // Connect to digital pin D2 on Grove Base Shield

void setup() {
  pinMode(buttonPin, INPUT_PULLUP); // Use internal pull-up resistor
  Serial.begin(9600);
}

void loop() {
  int buttonState = digitalRead(buttonPin);
  if (buttonState == LOW) { // Button is pressed
    Serial.println("Button Pressed!");
  } else {
    Serial.println("Button Released.");
  }
  delay(100); // Debounce delay
}
5.2 Controlling the LED
The integrated blue LED can be controlled independently via a digital output pin. When the LED control pin is set HIGH, the LED will illuminate; when set LOW, it will turn off.
// Example Arduino-like pseudocode for controlling the LED
const int ledPin = 3; // Connect to digital pin D3 on Grove Base Shield (or same as button if multiplexed)

void setup() {
  pinMode(ledPin, OUTPUT);
}

void loop() {
  digitalWrite(ledPin, HIGH); // Turn LED on
  delay(1000);
  digitalWrite(ledPin, LOW);  // Turn LED off
  delay(1000);
}
Note: In many Grove LED button modules, the button and LED share the same digital pin, with the LED being controlled by setting the pin as OUTPUT and the button read by setting it as INPUT. Consult the specific wiring diagram or library documentation for your module and platform.
6. Maintenance
- Cleaning: Use a soft, dry cloth to clean the module. Avoid using liquids or abrasive cleaners.
- Storage: Store the module in a dry, anti-static environment when not in use.
- Handling: Handle the module by its edges to avoid touching the electronic components directly.
- Environmental Conditions: Operate within recommended temperature and humidity ranges to ensure optimal performance and longevity.
7. Troubleshooting
- LED Not Lighting Up:
- Check power supply to the microcontroller and Grove Base Shield.
- Verify the LED control pin is correctly set as an OUTPUT and driven HIGH in your code.
- Ensure the Grove cable is securely connected.
- Button Press Not Detected:
- Confirm the button pin is correctly configured as an INPUT (with or without PULLUP/PULLDOWN).
- Check for proper Grove cable connection.
- Implement software debouncing in your code to prevent false readings from mechanical button bounce.
- Module Not Recognized:
- Ensure the Grove cable is connected to a digital port.
- Verify that the correct libraries are installed and imported in your code.
8. Warranty and Support
This product is covered by the standard SeeedStudio warranty. For detailed warranty information, technical support, or further assistance, please visit the official SeeedStudio website or contact their customer service. Product documentation and community forums are also available online for additional resources.
Official Website: www.seeedstudio.com


