Introduction
This manual provides essential information for the safe and efficient operation, setup, maintenance, and troubleshooting of your Wiltec 50L Air Compressor, Model 61016. Please read these instructions carefully before using the compressor and retain them for future reference.
Safety Instructions
Always observe basic safety precautions to reduce the risk of fire, electric shock, and personal injury.
- Read all instructions: Familiarize yourself with the compressor's controls and operation.
- Electrical Safety: Ensure the power supply matches the compressor's voltage (230V). Do not operate in wet conditions.
- Personal Protective Equipment (PPE): Wear safety glasses or goggles, hearing protection, and appropriate clothing.
- Ventilation: Operate the compressor in a well-ventilated area.
- Pressure Release: Always release air pressure from the tank before performing maintenance or moving the unit.
- Maintenance: Disconnect power before servicing.
- Children and Bystanders: Keep children and bystanders away from the operating compressor.
- Oil Lubrication: This compressor uses oil lubrication. It is not suitable for applications requiring oil-free air, such as certain painting tasks.
Product Overview
The Wiltec 50L Air Compressor is designed for various tasks requiring compressed air, such as powering pneumatic tools and inflating tires. It features a 50-liter tank, a 1500W motor, and is equipped with wheels and a handle for portability.

Figure 1: Front-side view of the Wiltec 50L Air Compressor, showing the motor, tank, pressure gauges, and wheels.
Key Components:
- Air Tank: 50-liter capacity for compressed air storage.
- Motor: 1500W (2 HP) electric motor.
- Pressure Switch: Automatically turns the compressor on/off to maintain tank pressure.
- Pressure Gauges: Displays tank pressure and regulated output pressure.
- Pressure Regulator: Adjusts the output air pressure.
- Quick Connect Couplers: For attaching air hoses and tools.
- Drain Valve: Located at the bottom of the tank for moisture drainage.
- Wheels and Handle: For easy transport.
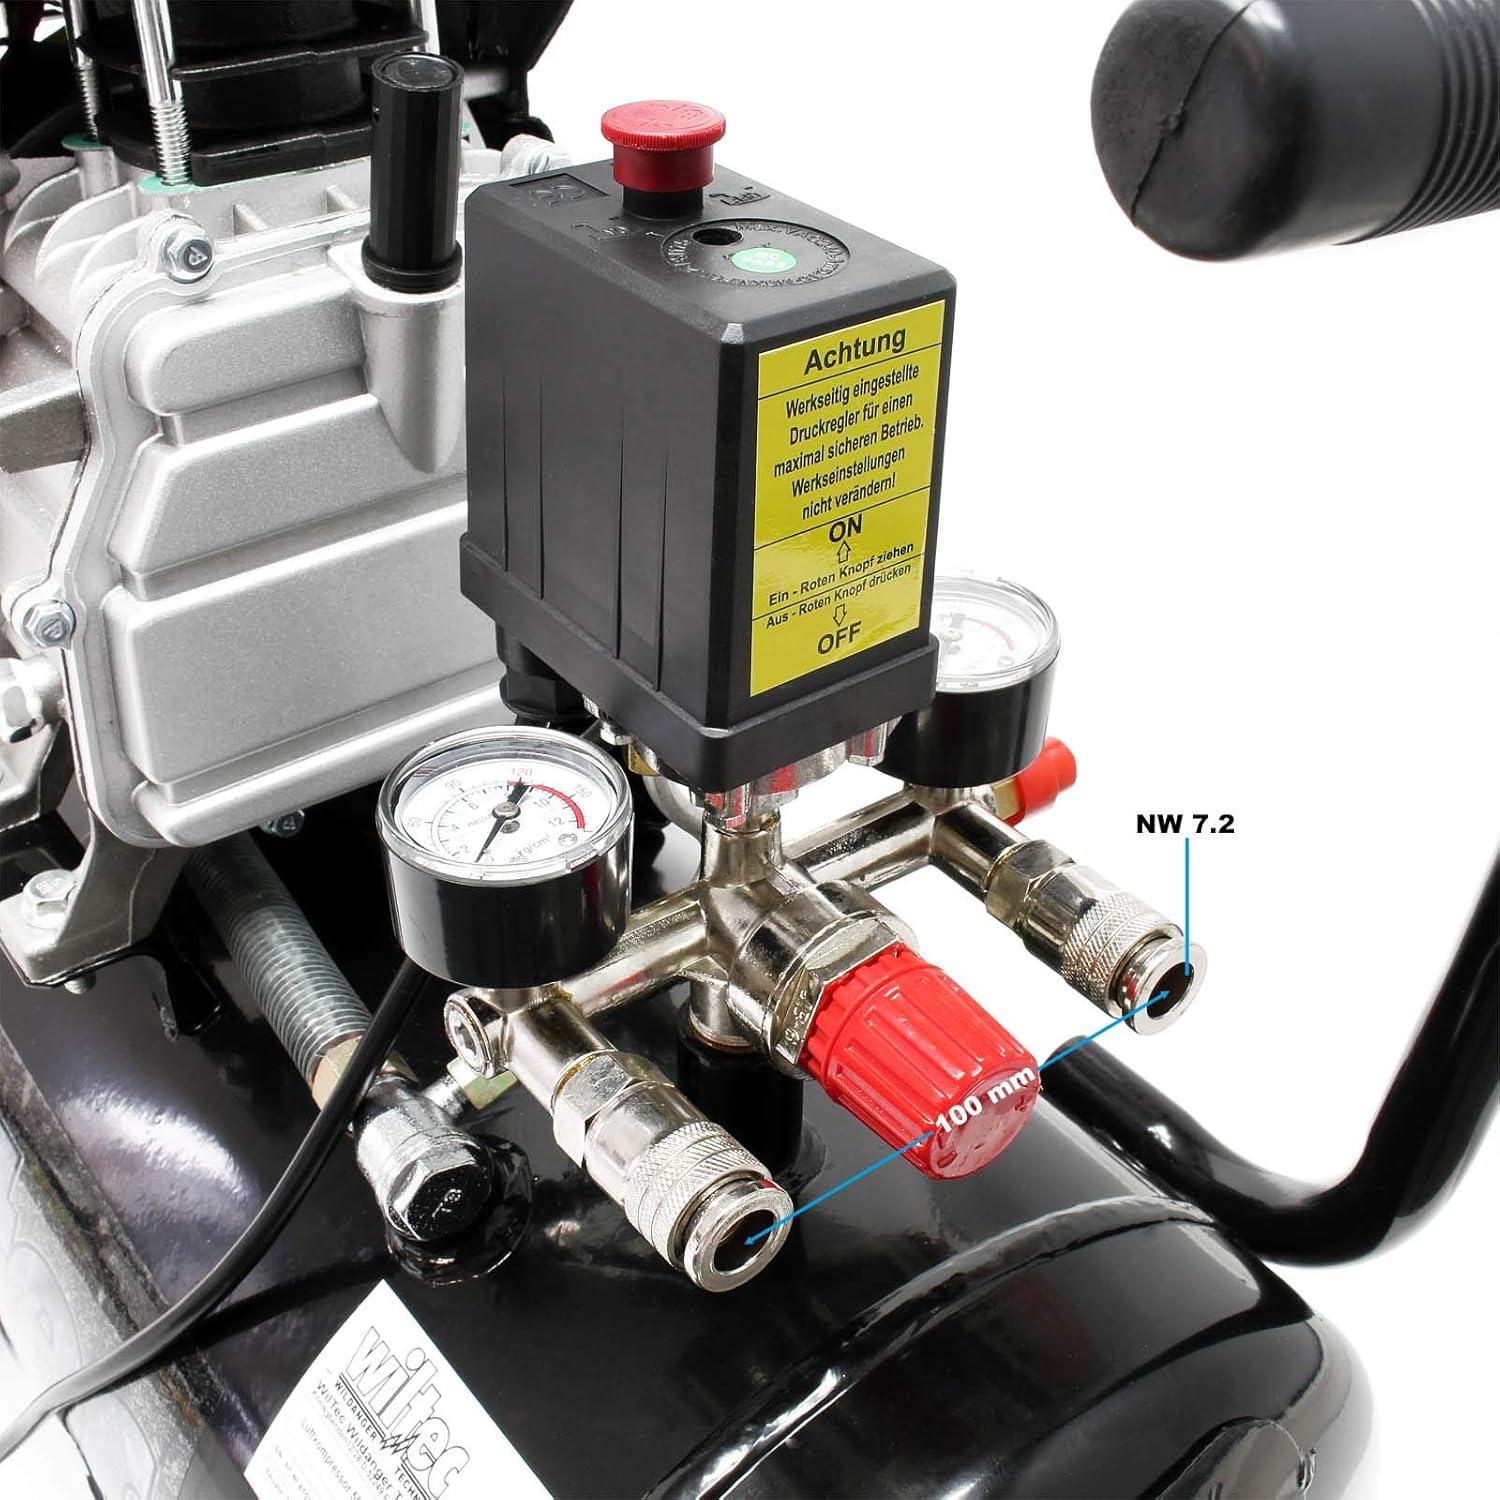
Figure 2: Close-up view of the compressor's control panel, showing the pressure switch, two pressure gauges, and the red pressure regulator knob.
Setup
- Unpacking: Carefully remove the compressor from its packaging. Inspect for any shipping damage.
- Attach Wheels and Handle: Securely attach the wheels and handle using the provided hardware.
- Add Oil: Before first use, ensure the crankcase is filled with the appropriate compressor oil to the correct level. Refer to the oil dipstick or sight glass.
- Placement: Position the compressor on a stable, level surface in a well-ventilated area. Ensure adequate clearance around the unit for air circulation.
- Electrical Connection: Connect the power cord to a grounded 230V electrical outlet.
Operating Instructions
- Initial Start-up (Break-in):
- Open the drain valve at the bottom of the tank.
- Turn on the compressor.
- Allow the compressor to run for 15-20 minutes with the drain valve open to break in the motor and pump. This helps to properly seat the piston rings.
- Turn off the compressor and close the drain valve.
- Normal Operation:
- Ensure the drain valve is closed.
- Connect your air tool or hose to one of the quick connect couplers.
- Turn on the compressor. It will build pressure until it reaches its maximum (8 bar / 115 psi) and then shut off automatically.
- Adjust the output pressure using the red pressure regulator knob to suit your application (e.g., 2.7 bar / 40 psi or 6.2 bar / 90 psi). The regulated pressure will be shown on one of the gauges.
- When the tank pressure drops below a certain threshold, the compressor will automatically restart to replenish the air supply.
- Shutting Down:
- Turn off the compressor using the power switch.
- Disconnect the power cord.
- Slowly open the drain valve to release all air pressure from the tank. This prevents moisture buildup and extends tank life.
Maintenance
Regular maintenance ensures optimal performance and extends the lifespan of your compressor.
- Daily:
- Drain moisture from the air tank by opening the drain valve.
- Check oil level and add if necessary.
- Weekly:
- Clean the air filter. Replace if damaged or excessively dirty.
- Inspect all hoses and connections for leaks.
- Monthly / Every 50 Hours:
- Change the compressor oil. Use only recommended compressor oil.
- Inspect the safety valve for proper operation.

Figure 3: Close-up of the air tank label, indicating tank capacity (50L) and pressure ratings.
Troubleshooting
| Problem | Possible Cause | Solution |
|---|---|---|
| Compressor does not start. | No power, tripped circuit breaker, faulty switch. | Check power connection, reset breaker, contact service. |
| Compressor runs continuously. | Air leak, faulty pressure switch, drain valve open. | Check for leaks, inspect pressure switch, close drain valve. |
| Low air pressure. | Air leak, clogged air filter, regulator set too low. | Check for leaks, clean/replace air filter, adjust regulator. |
| Excessive noise or vibration. | Loose components, worn parts, low oil. | Tighten fasteners, inspect for worn parts, check oil level. |
Specifications
| Model Number | 61016 |
| Brand | WilTec |
| Power | 1500 W (2 HP) |
| Voltage | 230 Volts |
| Speed | 2850 rpm |
| Air Tank Capacity | 50 Liters |
| Maximum Operating Pressure | 8 bar / 115 psi |
| Maximum Air Flow Capacity | 212 Liters per minute |
| Noise Level | 68 Decibels |
| Dimensions (L x W x H) | 67 x 36 x 63 cm |
| Weight | 26.78 Kilograms |
| Material | Metal |
| Special Feature | Portable (with wheels and handle) |

Figure 4: Side view of the compressor with key dimensions indicated in millimeters (e.g., 670mm length, 260mm tank diameter).
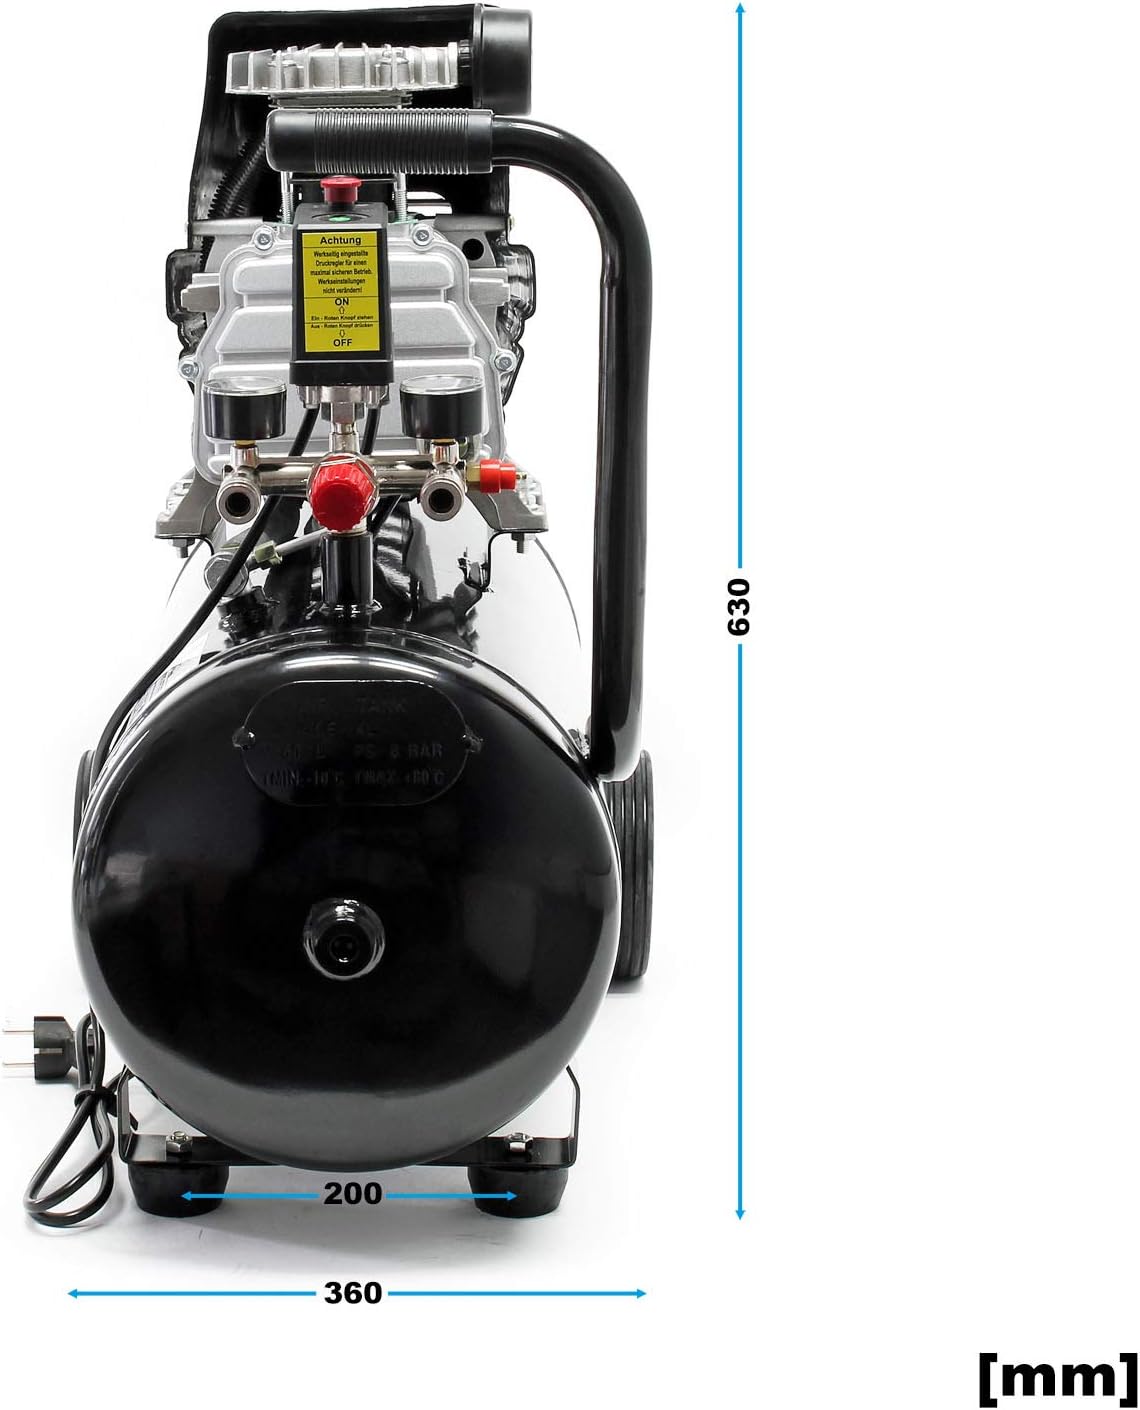
Figure 5: Front view of the compressor with key dimensions indicated in millimeters (e.g., 630mm height, 360mm width).
Warranty and Support
For warranty information or technical support, please contact Wiltec customer service. Keep your purchase receipt and model number (61016) handy for faster service.
The manufacturer's return policy allows for returns within 30 days for refund or replacement. Specific details regarding warranty duration are not provided in this document; please refer to your purchase documentation or the manufacturer's official website for comprehensive warranty terms.


