
1. Introduction
The Air Vent Roof Mount Attic Vent is an electric-powered ventilation system designed to regulate attic temperature and humidity. Equipped with both a thermostat and a humidistat, this unit automatically activates to combat heat buildup during warm periods and reduce moisture accumulation, helping to protect your home's structure and improve energy efficiency. Its low-profile dome design ensures an unobtrusive appearance on your roof.
2. Safety Information
- Read all instructions: Before installation or operation, thoroughly read and understand this manual.
- Electrical Safety: Ensure power is disconnected at the circuit breaker before attempting any installation, maintenance, or repair. All electrical wiring must comply with local codes and ordinances.
- Professional Installation Recommended: Installation of this product involves working on a roof and with electrical connections. It is highly recommended that installation be performed by a qualified professional to ensure safety and proper function.
- Moving Parts: Keep hands and foreign objects away from the fan blades during operation.
- Thermal Overload Protection: This unit includes thermal overload protection, which will shut off the motor if it overheats. If this occurs, disconnect power, allow the unit to cool, and inspect for obstructions before restoring power.
3. Package Contents
Verify that all components are present before beginning installation:
- Air Vent Roof Mount Attic Vent Unit (with integrated thermostat and humidistat)
- Mounting hardware (screws painted to match dome color)
- Instruction Manual
4. Installation
Proper installation is crucial for the efficient operation of your attic vent. Due to the complexity and safety considerations, professional installation is strongly advised.
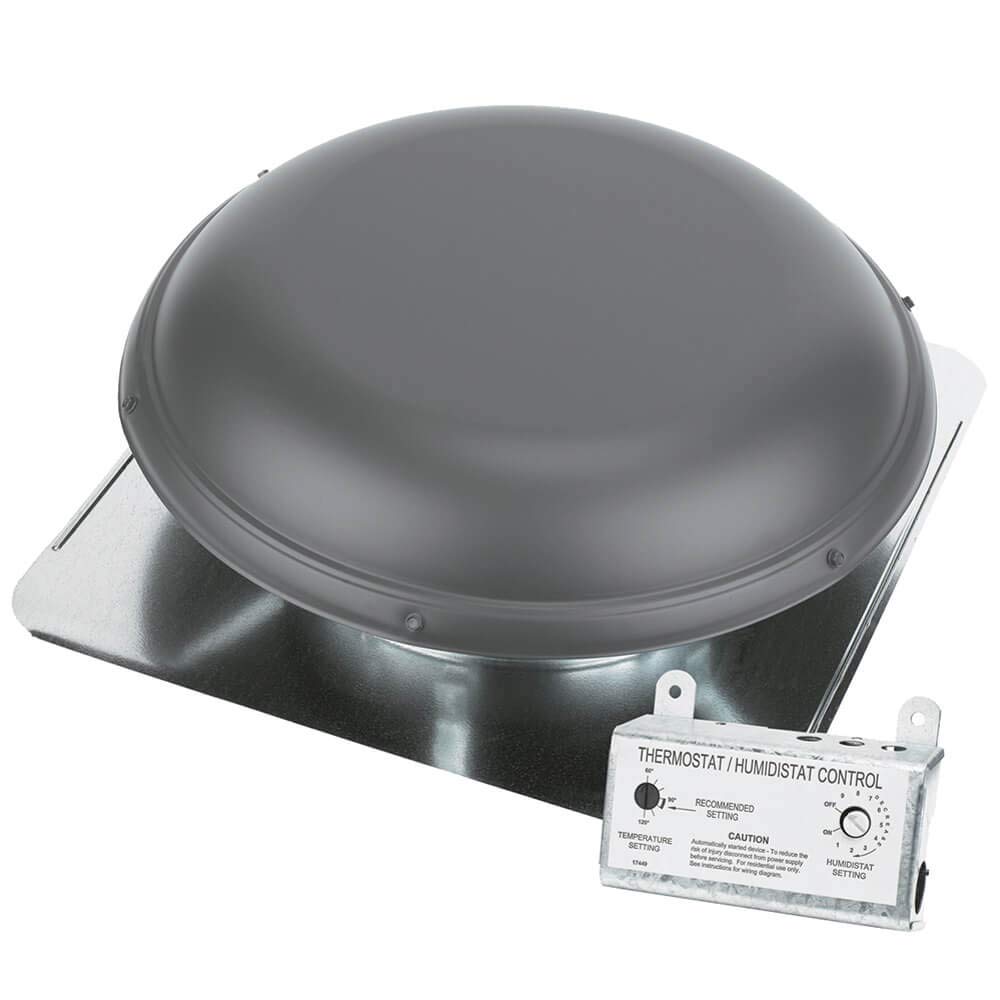
Image: Air Vent Roof Mount Attic Vent, Weather Wood color, showing the dome and base. This image illustrates the overall design of the attic vent unit.
Key Installation Considerations:
- Location: Install the vent on the roof face slanting away from the front of your home for optimal aesthetic integration.
- Base: The oversized 24" x 24" G-90 galvanized base facilitates easy nailing and flashing, ensuring a secure and weather-tight seal.
- Airflow: The raised dome design promotes greater airflow, enhancing ventilation efficiency.
- Screen: The plastic screen prevents pests and debris from entering the attic without corroding, rusting, or vibrating.
- CFM Calculation: To determine the required fan capacity for adequate ventilation (at least 10 air exchanges per hour), use the formula: Attic Square Feet x 0.7 = CFM (Cubic Feet per Minute). Select a power vent that meets or exceeds this CFM requirement.
- Roof Pitch Adjustment: For roofs with a pitch of 7/12 or higher, consider adding 20% more CFM capacity. For roofs 11/12 and higher, add 30% more CFM capacity to account for the larger attic volume.
- Roof Types: Roof-mount power vents are particularly suitable for hip roofs.
5. Operating Instructions
The Air Vent Roof Mount Attic Vent operates automatically based on its integrated thermostat and humidistat settings.
Automatic Operation:
- Thermostat: The preset adjustable thermostat monitors the attic temperature. When the temperature exceeds the set point, the fan will activate to exhaust hot air, helping to cool the attic and reduce heat transfer into living spaces.
- Humidistat: The humidistat monitors the attic's relative humidity. If humidity levels rise above the set point, the fan will activate to remove moist air, preventing condensation and potential moisture-related issues like mold and mildew.
- The unit is designed to operate efficiently, activating only when necessary to maintain optimal attic conditions.
6. Maintenance
Regular, simple maintenance can help ensure the longevity and efficient operation of your attic vent.
- Annual Inspection: Annually, or more frequently if located in an area with heavy debris, inspect the vent from the exterior.
- Clear Debris: Ensure the plastic screen and fan blades are free from leaves, twigs, bird nests, or other obstructions. Gently remove any accumulated debris.
- Check for Damage: Inspect the pre-painted 22-gauge galvanized steel dome and base for any signs of damage, corrosion, or loose components.
- Electrical Connections: If accessible and safe to do so (with power disconnected), check electrical connections for tightness and signs of wear.
7. Troubleshooting
If your attic vent is not operating as expected, consider the following common issues:
- Fan Not Running:
- Check if the circuit breaker for the vent is tripped.
- Verify that the attic temperature or humidity is above the thermostat/humidistat set points.
- The thermal overload protection may have activated. Disconnect power, allow the motor to cool, and check for obstructions.
- Excessive Noise:
- Ensure there are no obstructions (e.g., debris) in the fan blades.
- Check for loose mounting screws or components that may be vibrating.
- Ineffective Ventilation:
- Confirm the vent's CFM capacity is appropriate for your attic size (refer to CFM calculation in Installation section).
- Ensure adequate intake ventilation is present in the attic (e.g., soffit vents) to allow for proper air exchange.
If troubleshooting steps do not resolve the issue, contact a qualified professional or Air Vent customer support.
8. Specifications
| Brand | Air Vent |
| Model | Roof Mount Attic Vent with Humidistat/Thermostat |
| CFM Rating | 1170 CFM (suitable for attics up to 1650 sq. ft.) |
| Material | Pre-painted 22-gauge galvanized steel dome, plastic screen |
| Base Dimensions | 24"D x 24"W (G-90 galvanized) |
| Overall Dimensions | 24"D x 24"W x 8.5"H |
| Power Source | Corded Electric (4.3 amp) |
| Special Features | Automatic thermostat, automatic humidistat, thermal overload protection |
| Color | Weather Wood |
9. Warranty and Support
For warranty information, technical support, or service inquiries, please refer to the documentation included with your purchase or visit the official Air Vent website. Keep your proof of purchase for warranty claims.


