
Introduction
Thank you for choosing the CHKOSDA Large 18-inch Digital LED Wall Clock. This manual provides detailed instructions for the proper setup, operation, and maintenance of your new clock. Please read this manual thoroughly before use to ensure optimal performance and longevity of the product. Keep this manual for future reference.
Product Overview and Features
The CHKOSDA Digital LED Wall Clock is designed for clear visibility and versatile functionality. Its large display and various features make it suitable for a wide range of environments.
- Large 18-inch LED Display: Provides excellent readability from a distance.
- Automatic Dimmer: Adjusts display brightness based on ambient light.
- 8 Levels of Manual Brightness Adjustment: Allows customization of display intensity.
- Countdown Timer: Supports countdowns up to 364 days, 23 hours, 59 minutes, and 59 seconds.
- Multiple Alarms: Features up to 16 programmable alarms.
- 12/24 Hour Display: User-selectable time format.
- Temperature Display: Shows current ambient temperature.
- Energy-Saving Design: Efficient LED technology minimizes power consumption.
- Memory Function: CR2032 button battery (not included) preserves settings during power outages.

Figure 1: Product Diagram and Key Features. This image illustrates the clock's dimensions (45cm L x 16cm H x 2cm W), the location of the hanging hole, power cable passage, CR2032 battery compartment, and lists features like time display, date display, remote control, countdown, stopwatch, alarm, automatic dimmer, temperature, memory, and 12/24 hour mode.
Setup Instructions
1. Unpacking
Carefully remove the clock and all accessories from the packaging. Ensure all components are present: the LED wall clock, USB power cable, and remote control.
2. Power Connection
Connect the provided USB power cable to the clock's power input port. Plug the other end of the USB cable into a compatible USB power adapter (included) or a USB port on a computer/power bank. The clock requires continuous power to operate its display.

Figure 2: Power Supply Methods. The clock can be powered via a wall adapter, laptop, PC, or external battery pack using its USB cable.
3. Battery Installation (Memory Backup)
For memory backup during power interruptions, install one CR2032 button battery (not included) into the battery compartment located on the back of the clock. This battery does not power the display but saves your time and settings.
4. Remote Control Batteries
Insert 2 AAA batteries (not included) into the remote control. Ensure correct polarity.
5. Mounting
The clock is designed for wall mounting. Use the hanging holes on the back of the clock to secure it to a wall using appropriate screws or hooks (not included). Ensure the clock is level and securely fastened.
Operating Instructions
All functions are controlled using the provided remote control.
1. Setting Time and Date
- Press the SET button on the remote control. The hour digits will flash.
- Use the UP and DOWN arrows to adjust the hour.
- Press SET again to confirm the hour and move to minute adjustment.
- Use the UP and DOWN arrows to adjust the minute.
- Press SET again to confirm the minute and move to year adjustment.
- Continue this process for setting the year, month, and day.
- Press SET one last time to exit time/date setting mode.
2. 12/24 Hour Display Mode
Press the 12/24H button on the remote control to toggle between 12-hour and 24-hour time formats. In 12-hour mode, 'PM' will be indicated on the display.

Figure 3: 12/24 Hour Display Mode. The clock can show time in either 12-hour format (e.g., 10:53) or 24-hour format (e.g., 22:53).
3. Brightness Adjustment
The clock features an automatic dimmer that adjusts brightness based on ambient light. You can also manually adjust the brightness:
- Press the BRIGHTNESS button on the remote control.
- Use the UP and DOWN arrows to cycle through 8 levels of brightness.
- To re-enable automatic brightness, press the AUTO button (if available on remote) or cycle through manual levels until 'Auto' mode is indicated.
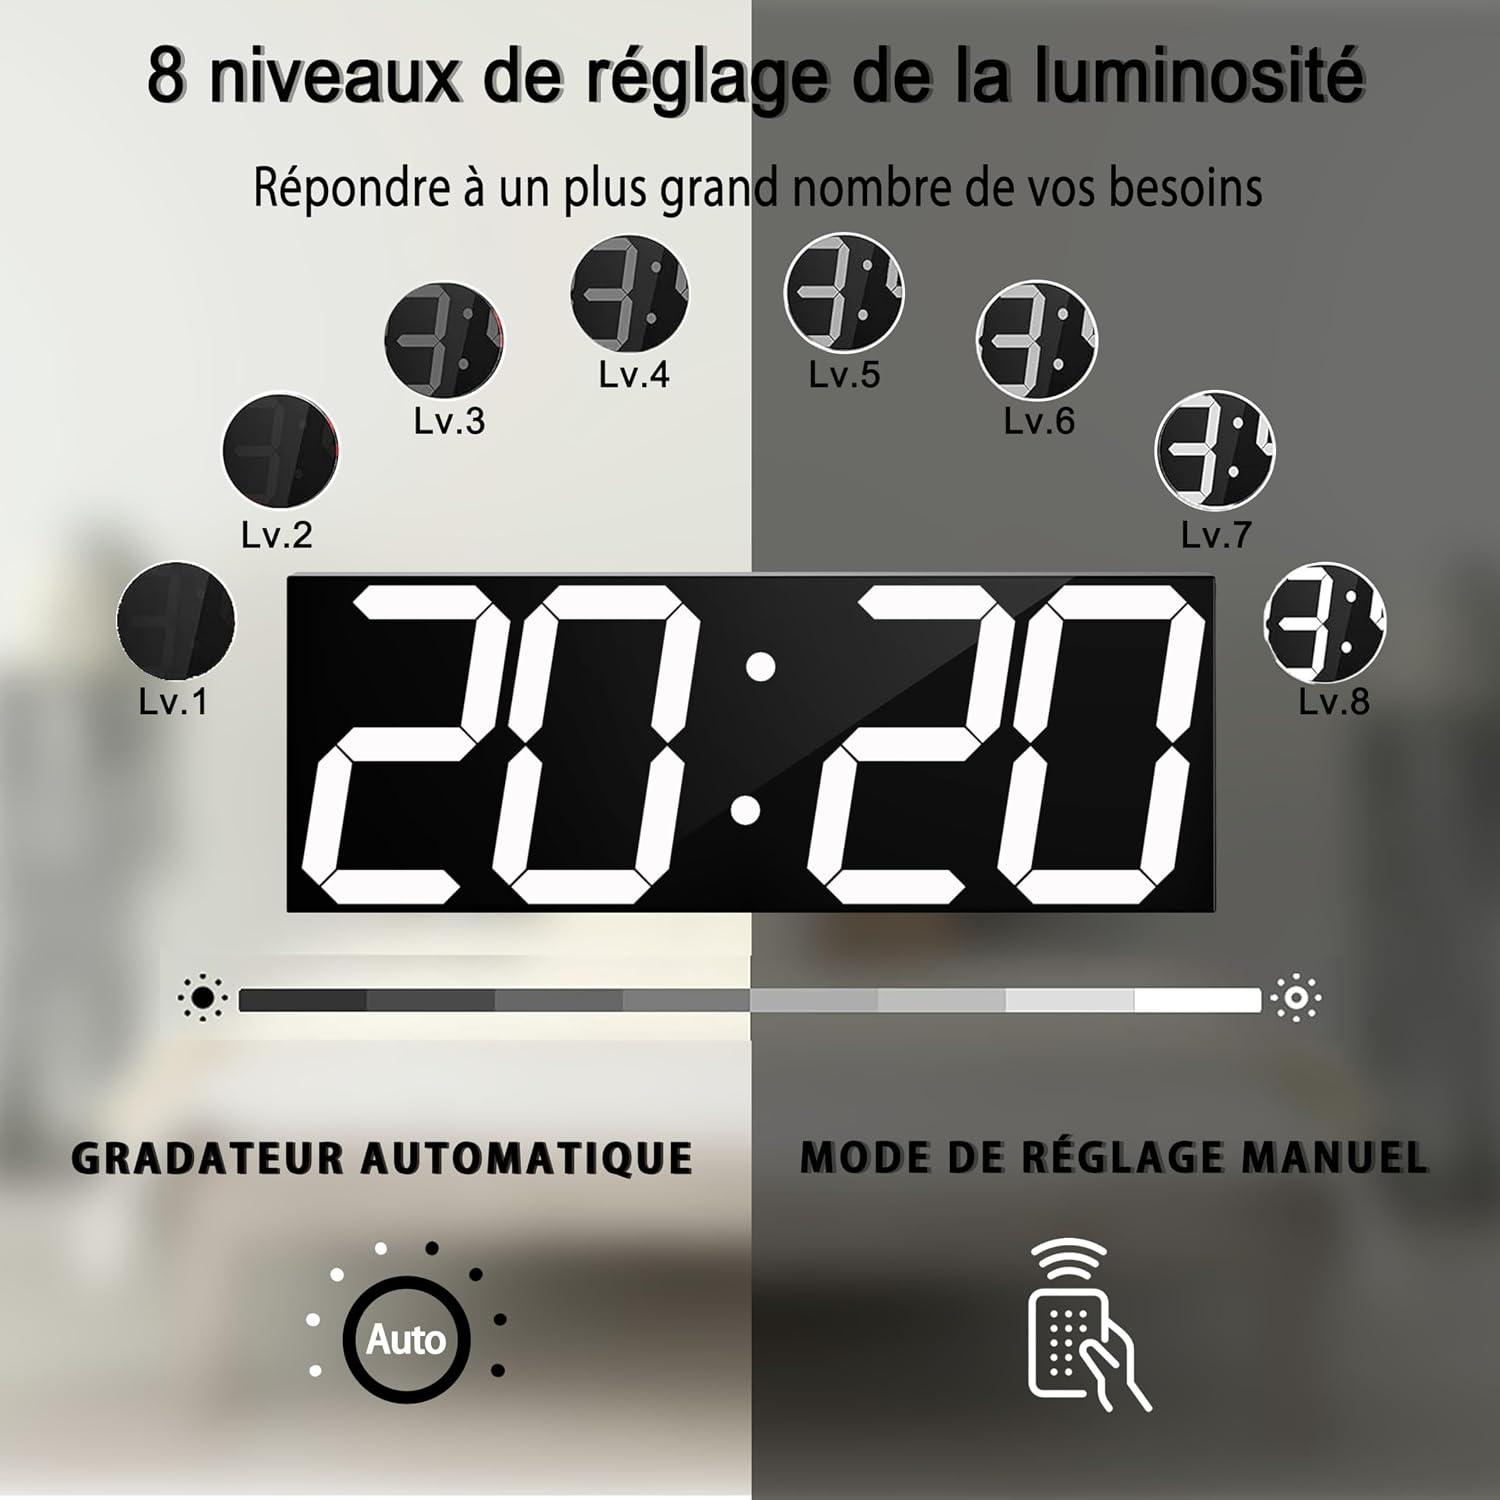
Figure 4: 8 Levels of Brightness Adjustment. This image demonstrates the range of brightness settings available, from level 1 to level 8, and the automatic dimming feature.
4. Setting Alarms
The clock supports up to 16 alarms.
- Press the ALARM button on the remote control.
- Use the UP and DOWN arrows to select an alarm slot (e.g., A1, A2).
- Press SET to enter alarm time setting. The hour digits will flash.
- Use the UP and DOWN arrows to adjust the hour.
- Press SET again to confirm the hour and move to minute adjustment.
- Use the UP and DOWN arrows to adjust the minute.
- Press SET to confirm and activate the alarm.
- To deactivate an alarm, select the alarm slot and press the ALARM ON/OFF button (if available) or cycle through settings until it's off.
5. Countdown Timer
The countdown timer can be set for durations up to 364 days.
- Press the COUNTDOWN button on the remote control.
- The display will show '00:00'.
- Use the SET button to cycle through days, hours, minutes, and seconds.
- Use the UP and DOWN arrows to set the desired countdown duration for each segment.
- Press START/STOP to begin the countdown.
- An alarm will sound 5 seconds before the countdown ends (this can be deactivated).
- The clock saves countdown settings, allowing you to resume or reuse them.

Figure 5: Countdown Timer Function. The display shows a minute countdown, and the feature supports day, hour, minute, second countdowns with an optional 5-second pre-alarm.
6. Temperature Display
The clock automatically displays the ambient temperature. This display may cycle with the time and date. Refer to your remote control for a dedicated temperature display button if you wish to view it continuously or switch units (Celsius/Fahrenheit, if supported).
Maintenance
1. Cleaning
To clean the clock, gently wipe the display and casing with a soft, dry, or slightly damp cloth. Avoid using abrasive cleaners, solvents, or chemical sprays, as these can damage the finish or electronic components.
2. Battery Replacement (Memory Backup)
If the clock loses its time and settings after a power outage, the CR2032 button battery for memory backup may need replacement. Open the battery compartment on the back of the clock, remove the old battery, and insert a new CR2032 battery with the correct polarity.
3. Remote Control Battery Replacement
If the remote control becomes unresponsive, replace its 2 AAA batteries. Ensure correct polarity when inserting new batteries.
Troubleshooting
| Problem | Possible Cause | Solution |
|---|---|---|
| Clock display is off. | No power supply. | Check if the USB power cable is securely connected and the power adapter is plugged into a working outlet. |
| Clock loses time/settings after power outage. | CR2032 backup battery is dead or missing. | Install or replace the CR2032 button battery in the battery compartment. |
| Remote control is unresponsive. | AAA batteries are dead or incorrectly inserted. | Replace the 2 AAA batteries in the remote control, ensuring correct polarity. |
| Display is too dim or too bright. | Manual brightness setting is active or automatic dimmer is not optimal for environment. | Use the BRIGHTNESS buttons on the remote to adjust to a comfortable level, or ensure automatic dimmer is enabled. |
| Alarm does not sound. | Alarm is not activated or volume is too low (if adjustable). | Ensure the alarm is set correctly and activated. Check for any volume settings on the remote. |
Specifications
| Feature | Detail |
|---|---|
| Model Number | CH3387-W |
| Dimensions (L x W x H) | 44.7 x 2 x 16 cm (18 x 0.8 x 6.3 inches) |
| Weight | 800 grams |
| Display Type | Digital LED |
| Power Source | Electric Cable (USB) |
| Memory Backup Battery | 1 x CR2032 button battery (not included) |
| Remote Control Batteries | 2 x AAA batteries (not included) |
| Material | Plastic, Acrylic |
| Mounting Type | Wall Mount |
| Special Features | Temperature display, Calendar display, Alarm, Large screen |
| Country of Origin | China |
Warranty and Support
This CHKOSDA product comes with a 1-year warranty from the date of purchase. This warranty covers manufacturing defects and issues arising from normal use.
If you encounter any problems with your clock or have questions not covered in this manual, please contact our customer support. For warranty claims or technical assistance, please refer to the contact information provided with your purchase or visit the official CHKOSDA website.
Please have your model number (CH3387-W) and proof of purchase ready when contacting support.


