Introduction
This manual provides detailed instructions for the proper use of the Sealey SCS901 Windscreen Repair Kit. This kit is designed to repair minor chips and cracks on vehicle windscreens, restoring structural integrity and improving optical clarity. Please read all instructions carefully before beginning any repair.
Safety Information
Always prioritize safety when using this product. Failure to follow safety guidelines may result in injury or damage.
- Wear appropriate personal protective equipment, including eye protection, to prevent contact with repair resin.
- Avoid direct skin contact with the repair resin. If contact occurs, wash thoroughly with soap and water.
- Use the kit in a well-ventilated area.
- Keep all components, especially the resin, out of reach of children and pets.
- Dispose of used materials according to local regulations.
Kit Contents
The Sealey SCS901 Windscreen Repair Kit includes the following components:
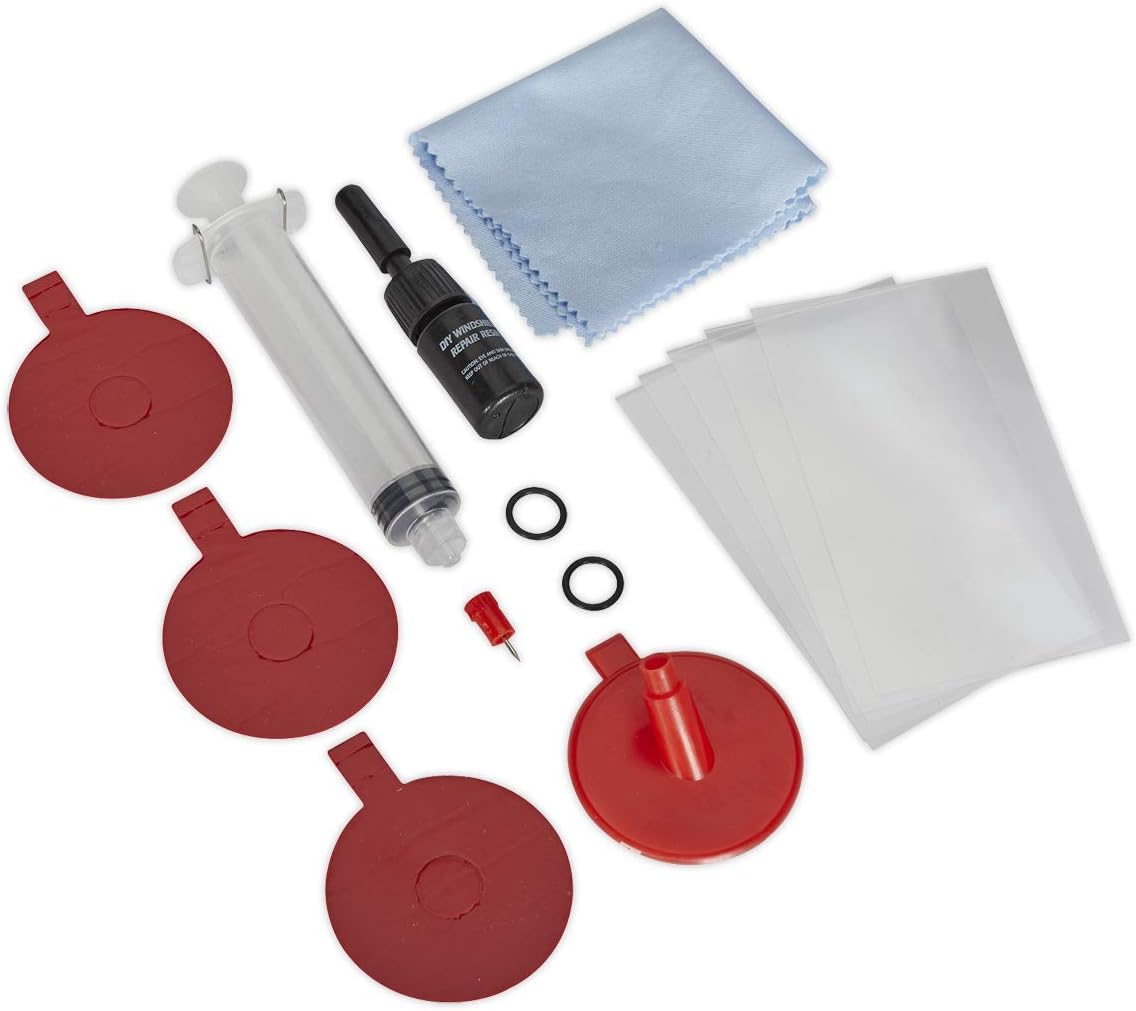
An overview of all items included in the Sealey SCS901 Windscreen Repair Kit, featuring the resin, applicator, curing strips, and cleaning cloth.
- Repair Resin (Bottle)
- Applicator Pedestal with Adhesive Seal
- Syringe with Plunger
- Curing Strips
- Razor Blade
- Cleaning Cloth
- O-rings (Spares)
- Push Pin
Setup
Proper preparation is crucial for a successful repair.
- Clean the Windscreen: Thoroughly clean the damaged area and surrounding glass with the provided cleaning cloth or a suitable glass cleaner. Ensure the area is completely dry before proceeding.
- Remove Loose Fragments: Use the push pin or a sharp object to carefully remove any loose glass fragments from the center of the chip or crack. Be gentle to avoid further damage.
- Position Vehicle: Park the vehicle in a shaded area or indoors to prevent premature curing of the resin by direct sunlight.
Operating Instructions: Repair Procedure
Follow these steps carefully to repair your windscreen damage.
Step 1: Attach the Applicator Pedestal
Peel the backing from one side of the adhesive seal and firmly press it onto the windscreen, centering the hole directly over the damage. Ensure a tight seal. Then, attach the pedestal to the adhesive seal, ensuring it is securely seated.
Step 2: Inject the Repair Resin

Repair resin is carefully dispensed from its bottle into the pedestal, ensuring the damaged area is filled.
Carefully cut the tip of the resin bottle. Squeeze approximately 3-6 drops of repair resin into the pedestal, ensuring the damaged area is covered. The amount may vary depending on the size of the damage.
Step 3: Create Pressure and Vacuum

The syringe applicator is connected to the pedestal, positioned over the windshield damage, ready for resin injection.
Attach the syringe to the top of the pedestal. Pull the plunger upwards to create a vacuum, holding it for 10 minutes. This draws air out of the crack. Then, push the plunger down to create pressure, holding it for 20 minutes. This forces the resin into the crack. Repeat this vacuum/pressure cycle 2-3 times for optimal penetration.
Step 4: Apply Curing Film

After resin application, a clear curing film is placed over the repair to protect it during the curing process under sunlight.
Carefully remove the syringe and pedestal from the windscreen. Apply a curing strip directly over the filled damaged area, ensuring it lies flat and smooth without air bubbles.
Step 5: Cure the Resin
Move the vehicle into direct sunlight or use a UV lamp. Allow the resin to cure for at least 15-20 minutes under direct sunlight. In cooler temperatures or overcast conditions, extend the curing time.
Step 6: Finish the Repair

Once cured, the film is carefully peeled away, revealing the hardened resin beneath.
Once the resin is fully cured, carefully peel off the curing strip. Use the provided razor blade to gently scrape away any excess cured resin from the windscreen surface. Hold the blade at a shallow angle to avoid scratching the glass.

A razor blade is used to gently scrape away any excess cured resin, ensuring a smooth finish flush with the windshield surface.

The completed repair, demonstrating how the resin fills and strengthens the damaged area, significantly reducing its appearance.
Wipe the area clean with a soft cloth. The repair is now complete.
Maintenance
To ensure the longevity of your repair and the usability of the kit components:
- Clean the syringe and pedestal immediately after use with warm water to prevent resin from hardening inside.
- Store the repair resin in a cool, dark place, away from direct sunlight and heat, to prevent premature curing.
- Keep all kit components in their original packaging to protect them from dust and damage.
Troubleshooting
| Problem | Solution |
|---|---|
| Resin not curing properly. | Ensure the repair area is exposed to direct UV light (sunlight or UV lamp) for the recommended duration. Temperatures below 50°F (10°C) may inhibit curing. |
| Repair is not clear or visible. | Ensure the damaged area was thoroughly cleaned before application. Repeat the vacuum/pressure cycles to ensure maximum resin penetration and air removal. |
| Resin leaks from the pedestal. | Ensure the adhesive seal is firmly pressed onto the windscreen and the pedestal is securely attached. Replace O-rings if they appear worn. |
| Syringe plunger is stiff. | Ensure the syringe is clean and free of dried resin. Lubricate O-rings with a small amount of petroleum jelly if needed. |
Product Specifications
| Feature | Value |
|---|---|
| Manufacturer | SEALEY |
| Part Number | SCS901 |
| Item Weight | 2.11 ounces |
| Product Dimensions | 0.39 x 0.39 x 0.39 inches |
| Item Model Number | SCS901 |
| Item Package Quantity | 1 |
| Batteries Required? | No |
Warranty Information and Customer Support
For specific warranty details regarding your Sealey SCS901 Windscreen Repair Kit, please refer to the official Sealey website or contact their customer support directly. Keep your proof of purchase for any warranty claims.
For technical assistance or further inquiries, please visit the Sealey official website or consult your retailer.


