
1. Introduction
Thank you for choosing the Sanford Ceramic Steam Iron SF46CSI-BS. This manual provides essential information for the safe and efficient operation, maintenance, and troubleshooting of your new steam iron. Please read these instructions carefully before first use and retain them for future reference.
2. Important Safety Instructions
WARNING: To reduce the risk of fire, electric shock, or injury, always follow basic safety precautions when using electrical appliances.
- Ensure the voltage indicated on the appliance corresponds to your local mains voltage before connecting.
- Do not leave the iron unattended while it is connected to the power supply or on an ironing board.
- Keep the iron and its cord out of reach of children and pets when it is switched on or cooling down.
- Never immerse the iron, power cord, or plug in water or other liquids.
- Do not operate the iron with a damaged cord or plug, or if the iron has been dropped or damaged. Contact authorized service personnel for repair.
- Always unplug the iron from the electrical outlet before filling or emptying water, and when not in use.
- Use the iron only for its intended purpose: ironing clothes.
- The soleplate and steam vents become very hot during use and can cause burns. Handle with care.
3. Product Overview
Familiarize yourself with the components of your Sanford Ceramic Steam Iron.

Figure 1: Front view of the Sanford Ceramic Steam Iron, showing the water tank, temperature dial, and steam controls.

Figure 2: Underside view of the iron, highlighting the ceramic-coated soleplate with steam vents.
Key components include:
- Water Tank: For filling with water for steam functions.
- Temperature Control Dial: Adjusts the heat of the soleplate for different fabric types.
- Steam Control Slider: Regulates steam output (dry, variable steam).
- Spray Button: Activates the water spray function.
- Steam Burst Button: Provides an extra powerful burst of steam.
- Self-Clean Button: Initiates the self-cleaning process.
- Ceramic Soleplate: Non-stick surface for smooth gliding and even heat distribution.
- Power Cord: Connects the iron to the electrical outlet.
4. Setup
- Unpacking: Carefully remove the iron from its packaging. Remove any protective films or stickers from the soleplate.
- First Use Preparation: Before using for the first time, or after prolonged storage, it is recommended to iron an old piece of fabric to ensure no residue from manufacturing is transferred to your garments.
- Filling the Water Tank:
- Ensure the iron is unplugged.
- Open the water filler cap.
- Fill the water tank with clean tap water up to the 'MAX' indicator line. Do not overfill.
- Close the water filler cap securely.
- For areas with hard water, using distilled or demineralized water is recommended to prevent mineral buildup.
5. Operating Instructions
5.1 Dry Ironing
- Ensure the water tank is empty or the steam control is set to the 'DRY' position.
- Plug the iron into a suitable electrical outlet.
- Set the temperature control dial to the desired fabric setting (e.g., Silk, Wool, Cotton, Linen). The indicator light will illuminate.
- Wait for the indicator light to turn off, indicating the iron has reached the set temperature. It will cycle on and off during use.
- Begin ironing.
5.2 Steam Ironing
- Ensure the water tank is filled as described in Section 4.
- Plug the iron into a suitable electrical outlet.
- Set the temperature control dial to a steam-appropriate setting (usually Cotton, Linen, or Max). Steam functions require higher temperatures.
- Wait for the indicator light to turn off.
- Adjust the steam control slider to the desired steam level (variable steam).
- Begin ironing.
5.3 Spray Function
Press the spray button to release a fine mist of water, which helps to dampen stubborn creases. This function can be used during both dry and steam ironing.
5.4 Steam Burst Function
For tough wrinkles, press the steam burst button. This delivers a powerful shot of steam. Allow a few seconds between bursts for the steam to regenerate.
5.5 Vertical Steam
The steam burst function can also be used for vertical steaming of hanging garments, curtains, or drapes. Hold the iron vertically a few inches away from the fabric and press the steam burst button.
6. Maintenance and Cleaning
6.1 After Each Use
- Unplug the iron from the power outlet.
- Allow the iron to cool down completely.
- Empty any remaining water from the tank to prevent mineral buildup.
- Wipe the soleplate with a damp cloth to remove any starch or fabric residue. Do not use abrasive cleaners.
- Store the iron upright on its heel rest in a safe, dry place.
6.2 Self-Cleaning Function
The self-cleaning feature helps to remove scale and impurities from the steam chamber. Use this function monthly or as needed, especially if you notice steam vents becoming clogged.
- Fill the water tank to the MAX level.
- Plug in the iron and set the temperature dial to MAX.
- Once the indicator light turns off, unplug the iron.
- Hold the iron horizontally over a sink.
- Press and hold the self-clean button. Hot water and steam will be expelled from the soleplate, carrying impurities with it.
- Gently shake the iron back and forth until the water tank is empty.
- Release the self-clean button.
- Plug the iron back in, heat it up, and iron an old cloth to dry the soleplate.
7. Troubleshooting
| Problem | Possible Cause | Solution |
|---|---|---|
| Iron does not heat up. | Not plugged in; power outlet fault; temperature dial set to MIN. | Check plug connection; test outlet with another appliance; set temperature dial to a higher setting. |
| No steam or insufficient steam. | Water tank empty; temperature too low; steam vents clogged. | Fill water tank; set temperature to steam-appropriate level; perform self-cleaning. |
| Water leaks from soleplate. | Temperature too low for steam; water tank overfilled; self-clean button stuck. | Increase temperature; do not overfill; ensure self-clean button is not pressed. |
| White flakes or residue on clothes. | Mineral buildup in water tank/steam chamber. | Perform self-cleaning; use distilled water in hard water areas. |
8. Specifications
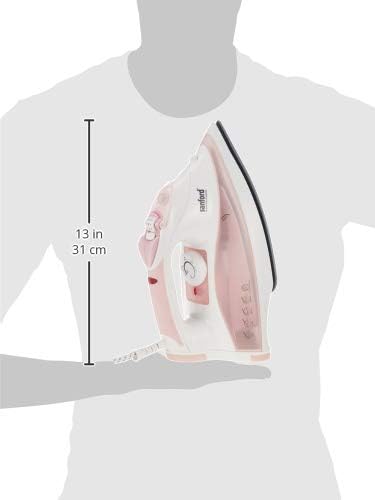
Figure 3: Size reference for the Sanford Ceramic Steam Iron, approximately 13 inches (31 cm) in length.
- Model: SF46CSI-BS
- Power: 2200 Watts
- Voltage: 220-240V (Assumed based on 2200W and typical regional standards)
- Frequency: 50 Hz
- Soleplate Material: Ceramic
- Special Features: Temperature Control, Dry Ironing, Spray, Variable Steam, Powerful Steam Burst, Vertical Steam, Self-Cleaning
- Recommended Use: Garment Ironing
- Included Components: 1 Steam Iron
9. Warranty and Support
This Sanford Ceramic Steam Iron SF46CSI-BS comes with a 2-year international warranty from the date of purchase. Please retain your purchase receipt as proof of purchase for warranty claims.
The warranty covers manufacturing defects and faults arising from normal use. It does not cover damage caused by misuse, neglect, unauthorized repairs, or normal wear and tear.
For warranty service or technical support, please contact your local Sanford authorized service center or the retailer where the product was purchased.