Introduction
Thank you for choosing the Techno Torch Refillable Dual Flame Lighter. This manual provides essential information for the safe and effective use, maintenance, and troubleshooting of your new lighter. Please read these instructions carefully before first use and retain them for future reference.
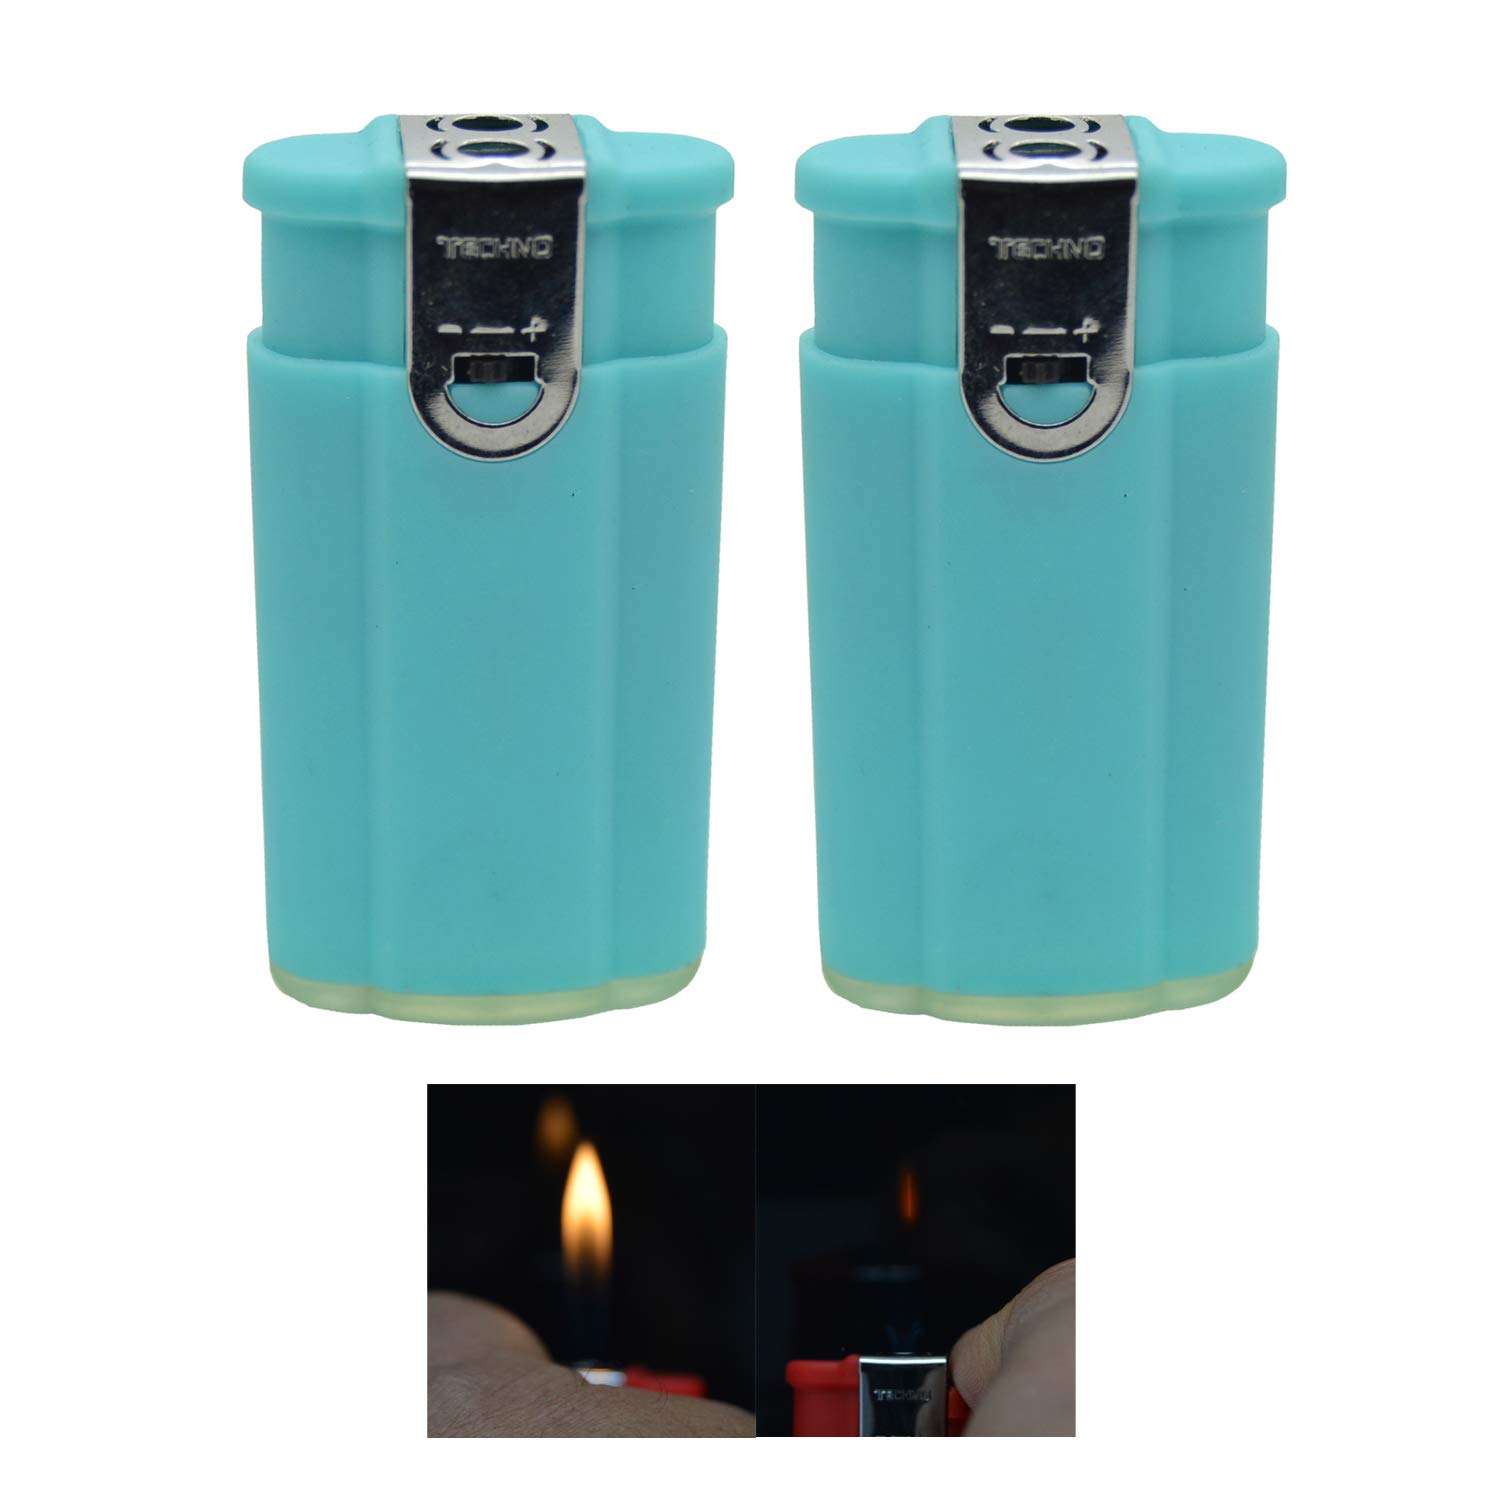
Image: The Techno Torch Refillable Dual Flame Lighter in light blue, showcasing its sleek design.
Important Safety Information
WARNING: Keep out of reach of children. Lighters are not toys.
- Always keep the lighter away from face and clothing when igniting.
- Contains flammable gas under pressure. Do not puncture or incinerate.
- Do not expose to heat above 120°F (49°C) or prolonged sunlight.
- Ensure flame is extinguished after each use.
- Do not attempt to repair or modify the lighter.
- Use only high-quality butane fuel for refilling.
- Avoid prolonged exposure to flame.
Product Overview
The Techno Torch Dual Flame Lighter features a compact design and offers two distinct flame types: a soft flame and a windproof torch flame. It is designed for convenience and reliability.
- Dimensions: Approximately 2.5" (H) x 1.25" (W) x 0.5" (T)
- Fuel Type: Butane (Liquefied Petroleum Gas)
- Flame Types: Soft flame and Windproof torch flame
- Refillable: Yes

Image: Side view of the lighter, highlighting the ignition button and flame adjustment valve.
Setup: Refilling Instructions
Your lighter is shipped without fuel for safety reasons. It must be refilled with butane before first use.
- Use Quality Butane: Ensure you use a high-quality butane fuel canister with a long nozzle.
- Bleed the Lighter (Optional but Recommended): Before refilling, invert the lighter and use a small screwdriver or pen to press the refill valve to release any residual air or gas. This helps prevent air pockets.
- Invert Lighter and Butane Canister: Hold the lighter upside down. Firmly press the nozzle of the butane canister into the refill valve located at the bottom of the lighter.
- Refill: Press down for 5-10 seconds. You may need to repeat this 2-3 times to ensure a full refill.
- Wait: After refilling, wait for at least 2-3 minutes before attempting to ignite the lighter. This allows the gas to stabilize and reach room temperature.
- Adjust Flame (if necessary): After refilling, you may need to adjust the flame height using the adjustment screw on the bottom of the lighter.
Note: A "hissing" sound during refilling is normal. If butane leaks excessively, ensure the nozzle is properly aligned with the valve.
Operating Instructions
This lighter features two distinct flame types. The ignition mechanism is typically a single button or lever that activates both.
Activating the Soft Flame
To activate the soft, traditional flame:
- Hold the lighter upright.
- Press and hold the ignition button/lever. The soft flame will ignite.
- Release the button/lever to extinguish the flame.

Image: A soft, yellow flame emanating from the lighter, suitable for general use.
Activating the Windproof Torch Flame
To activate the powerful, windproof torch flame:
- Hold the lighter upright.
- Press and hold the ignition button/lever. Continue holding past the soft flame stage; the torch flame will then ignite. Some models may require a secondary action or a firmer press.
- Release the button/lever to extinguish the flame.

Image: A blue, concentrated torch flame, ideal for windy conditions or specific tasks.
Adjusting Flame Height
The flame height can be adjusted using the small screw located on the bottom of the lighter. Use a small flathead screwdriver or a similar tool.
- Turn towards the '+' sign for a larger flame.
- Turn towards the '-' sign for a smaller flame.
Caution: Do not adjust the flame to an excessively high setting, as this can be dangerous and consume fuel quickly. Do not adjust while the flame is active.
Maintenance
- Cleaning: Periodically wipe the lighter with a soft, dry cloth to remove dirt and grime. Do not use abrasive cleaners or solvents.
- Nozzle Care: Keep the flame nozzle clear of debris. Use a small brush or compressed air if necessary.
- Storage: Store the lighter in a cool, dry place, away from direct sunlight and heat sources, and out of reach of children.
Troubleshooting
| Problem | Possible Cause | Solution |
|---|---|---|
| Lighter does not ignite. | No fuel, air in tank, low flame setting, clogged nozzle. | Refill with butane. Bleed air from tank. Adjust flame setting. Clean nozzle. |
| Flame is too small or inconsistent. | Low fuel, low flame setting, air in tank. | Refill with butane. Adjust flame setting. Bleed air from tank. |
| Lighter leaks butane during refill. | Canister nozzle not properly aligned, valve issue. | Ensure canister nozzle is firmly and straightly inserted into the refill valve. Try a different butane canister. |
| Torch flame melts plastic casing. | Prolonged use of torch flame, especially on plastic components. | Avoid extended use of the torch flame. Use the soft flame for general purposes. |
Specifications
- Brand: Techno Torch
- Model: B07NZ2MP21
- Color: Light Blue
- Material: Metal (body), Plastic (some internal/external components)
- Product Dimensions: 2.5"L x 1.25"W x 0.5"Th
- Fuel Type: Liquefied Petroleum Gas (Butane)
- Manufacturer: JK Imports
- First Available Date: June 19, 2017
Warranty and Support
Specific warranty information for the Techno Torch Refillable Dual Flame Lighter is not provided in the product details. For support or warranty inquiries, please contact the retailer or manufacturer directly using the contact information provided at the point of purchase.


