
Introduction
The NZXT H500 Overwatch Edition is a compact ATX mid-tower PC chassis designed for gaming enthusiasts. This special edition case features an all-steel construction, a tempered glass side panel, and an integrated cable management system for a streamlined building experience. It incorporates the signature Black, White, and Orange colors of Overwatch, along with a brightly lit Overwatch logo. This manual provides comprehensive instructions for the assembly, installation, and maintenance of your PC components within this chassis.
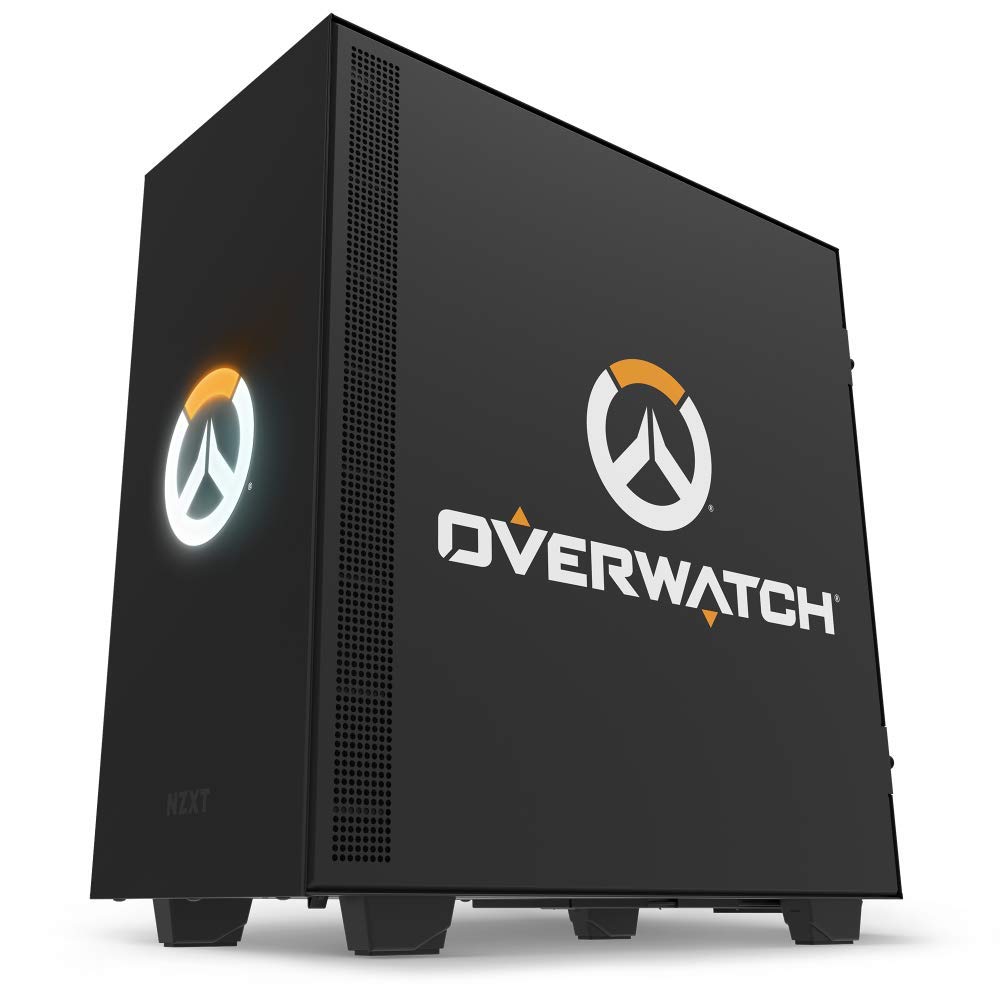
Image: Front-left view of the NZXT H500 Overwatch Edition PC case, showcasing the tempered glass side panel and the Overwatch logo on the front.
Safety Information
Please read and understand all safety precautions before installing components into the chassis. Failure to do so may result in damage to the product or personal injury.
- Static Electricity: Always ground yourself before handling internal components to prevent electrostatic discharge (ESD) damage. Use an anti-static wrist strap if available.
- Sharp Edges: Exercise caution when handling the chassis and internal components, as some edges may be sharp.
- Power Supply: Ensure the power supply is disconnected from the main power outlet before installing or removing any components.
- Ventilation: Do not obstruct the ventilation openings of the chassis to ensure proper airflow and prevent overheating.
- Weight: The chassis with components can be heavy. Lift with care and seek assistance if necessary.
Setup and Component Installation
This section guides you through the process of installing your PC components into the NZXT H500 Overwatch Edition chassis.
1. Unpacking and Preparation
- Carefully remove the chassis from its packaging.
- Place the chassis on a stable, flat surface.
- Remove the tempered glass side panel by unscrewing the two thumbscrews at the rear and gently pulling the panel away.
- Remove the solid steel side panel by unscrewing the two thumbscrews at the rear and sliding it backward.
- Identify the accessory box containing screws, zip ties, and other small parts.

Image: Interior view of the NZXT H500 Overwatch Edition PC case with both side panels removed, highlighting the internal structure and cable management features.
2. Motherboard Installation
- The H500 supports ATX, Micro-ATX, and Mini-ITX motherboards.
- Ensure the correct standoffs are installed for your motherboard form factor. The chassis comes with pre-installed standoffs for ATX.
- Install the I/O shield into the rear opening of the chassis.
- Carefully align your motherboard with the standoffs and I/O shield, then gently lower it into place.
- Secure the motherboard with the provided screws.
3. Power Supply Unit (PSU) Installation
- The H500 features a bottom-mount PSU design.
- Slide your PSU into the dedicated compartment at the bottom rear of the chassis.
- Secure the PSU to the chassis with screws from the rear.
- Route necessary power cables through the cutouts to the motherboard and other components.
4. Storage Device Installation
- 2.5" SSDs: Mount up to two 2.5" drives on the SSD trays located behind the motherboard tray. Secure them with screws.
- 3.5" HDDs: Install up to two 3.5" drives in the drive cage located under the PSU shroud. Remove the cage, install drives, and re-secure the cage.
5. Graphics Card and Expansion Card Installation
- Remove the necessary PCIe slot covers from the rear of the chassis.
- Insert your graphics card or other expansion cards into the appropriate PCIe slots on the motherboard.
- Secure the cards with screws.
6. Cooling System Installation
- The H500 includes two Aer F 120mm fans (one rear, one top) for optimal airflow.
- Front Radiator/Fans: The front bracket supports radiators up to 280mm or two 120mm/140mm fans. Remove the front panel to access the mounting points.
- Integrated Reservoir Mount: A dedicated mount is available for custom liquid cooling systems.

Image: Detailed interior view of the NZXT H500 Overwatch Edition, highlighting the prominent orange cable management bar and the motherboard mounting area.
7. Cable Management
- Utilize the pre-installed cable routing channels and straps located behind the motherboard tray.
- The iconic cable bar is adjustable to simplify routing main power cables.
- Connect all front panel I/O cables (USB, audio, power/reset switches) to your motherboard.
- Once all cables are routed and connected, re-install the solid steel side panel and then the tempered glass side panel.
Operation
After successful assembly, connect your peripherals and power cable to the PC. Press the power button located on the top panel to start your system.
- Front I/O Ports: The top panel features 2x USB 2.0 ports and audio jacks for convenient access.
- Power Button: Located on the top panel, used to power on/off the system.
- Overwatch Logo Illumination: The front panel Overwatch logo is illuminated.

Image: Top-down view of the NZXT H500 Overwatch Edition, showing the front I/O panel with USB ports and audio jacks, along with the top fan mounting area.
Maintenance
Regular maintenance helps ensure optimal performance and longevity of your PC components.
- Dust Filters: The H500 includes removable dust filters for the front and PSU intakes. Periodically remove and clean these filters with compressed air or water (ensure they are completely dry before re-installation).
- Exterior Cleaning: Wipe the exterior of the chassis with a soft, damp cloth. Avoid abrasive cleaners.
- Interior Cleaning: Use compressed air to remove dust from internal components and fan blades. Ensure the system is powered off and unplugged before cleaning.

Image: Front view of the NZXT H500 Overwatch Edition PC case, showcasing the illuminated Overwatch logo.
Troubleshooting
This section addresses common issues you might encounter during or after building your PC.
- System Does Not Power On:
- Check all power connections: PSU to wall, PSU to motherboard (24-pin and CPU 8-pin), and power button cable to motherboard.
- Ensure the PSU switch is in the 'ON' position.
- Verify that the front panel power button cable is correctly connected to the motherboard's front panel header.
- No Display Output:
- Ensure your monitor is connected to the graphics card (not the motherboard's integrated graphics, unless you are using integrated graphics).
- Reseat the graphics card and its power cables.
- Check monitor input selection.
- Excessive Noise:
- Identify the source of the noise (fans, HDD).
- Ensure all fan screws are tightened and cables are not interfering with fan blades.
- Clean dust from fans and filters.
- Components Not Fitting:
- Refer to the specifications section for maximum component clearances (e.g., GPU length, CPU cooler height, radiator size).
- Double-check installation steps for specific components.
Specifications
| Model Name | H500 Overwatch Edition |
| Item Model Number | CA-H500B-OW |
| Brand | NZXT |
| Case Type | Mid Tower |
| Motherboard Compatibility | ATX, Micro-ATX, Mini-ITX |
| Material | Premium, all-steel construction, Tempered Glass |
| Color | Black/Orange |
| Dimensions (LxWxH) | 16.85 x 8.26 x 18.11 inches (428 x 210 x 460 mm) |
| Item Weight | 19.5 pounds (8.85 kg) |
| Front I/O Ports | 2x USB 2.0, Audio In/Out |
| Drive Bays | 2x 3.5" (internal), 2+1x 2.5" (internal) |
| Expansion Slots | 7 |
| Cooling Support (Front) | 2x 120mm or 2x 140mm fans / 240mm or 280mm radiator |
| Cooling Support (Top) | 1x 120mm or 1x 140mm fan (1x 120mm Aer F included) |
| Cooling Support (Rear) | 1x 120mm fan (1x 120mm Aer F included) |
| Radiator Support (Front) | Up to 280mm |
| Radiator Support (Rear) | 120mm |
| Clearance (CPU Cooler) | Up to 165mm |
| Clearance (GPU) | Up to 381mm |
| Clearance (Front Radiator) | 60mm |
Warranty and Support
For detailed warranty information and technical support, please visit the official NZXT website. You can find FAQs, troubleshooting guides, and contact information for customer service.
Official NZXT Support: https://www.nzxt.com/support
