
1. Introduction
The HB-DIGITAL Octagon SX8 HD ONE is a compact and powerful Full HD digital satellite receiver. Designed for DVB-S2 reception, it delivers clear images up to 1080p resolution. Its small size, external infrared (IR) receiver, and LED segment display allow for flexible placement, including wall mounting. The device supports media playback via USB 2.0 ports and can connect to a home Wi-Fi network with an optional USB Wi-Fi adapter for network applications.
Key Features
- Full HD digital satellite receiver (DVB-S2)
- Supports resolutions up to 1080p
- External IR receiver with 4-digit LED display
- Two USB 2.0 ports for media and Wi-Fi adapter
- Integrated media player (photos, videos, music)
- Conax card reader
- Supports DiSEqC 1.0, 1.1, 1.2, USALS, Unicable, and FastScan
- Electronic Program Guide (EPG), subtitles, and teletext
- Network applications (with optional USB Wi-Fi adapter)
- Wall mount support included
- 12V power supply
2. Safety Information
- Ensure the power supply voltage matches the device requirements (12V).
- Do not expose the receiver to rain or moisture.
- Avoid placing the device near heat sources or in direct sunlight.
- Do not open the casing; refer servicing to qualified personnel.
- Keep out of reach of children.
- Disconnect power before cleaning or when not in use for extended periods.
3. Product Overview
Package Contents
Verify that all items are present in the package:
- Octagon SX8 HD ONE Mini Satellite Receiver
- Remote Control
- External IR Receiver with LED Display
- Power Adapter (12V)
- HDMI Cable
- Wall Mount Bracket
- User Manual
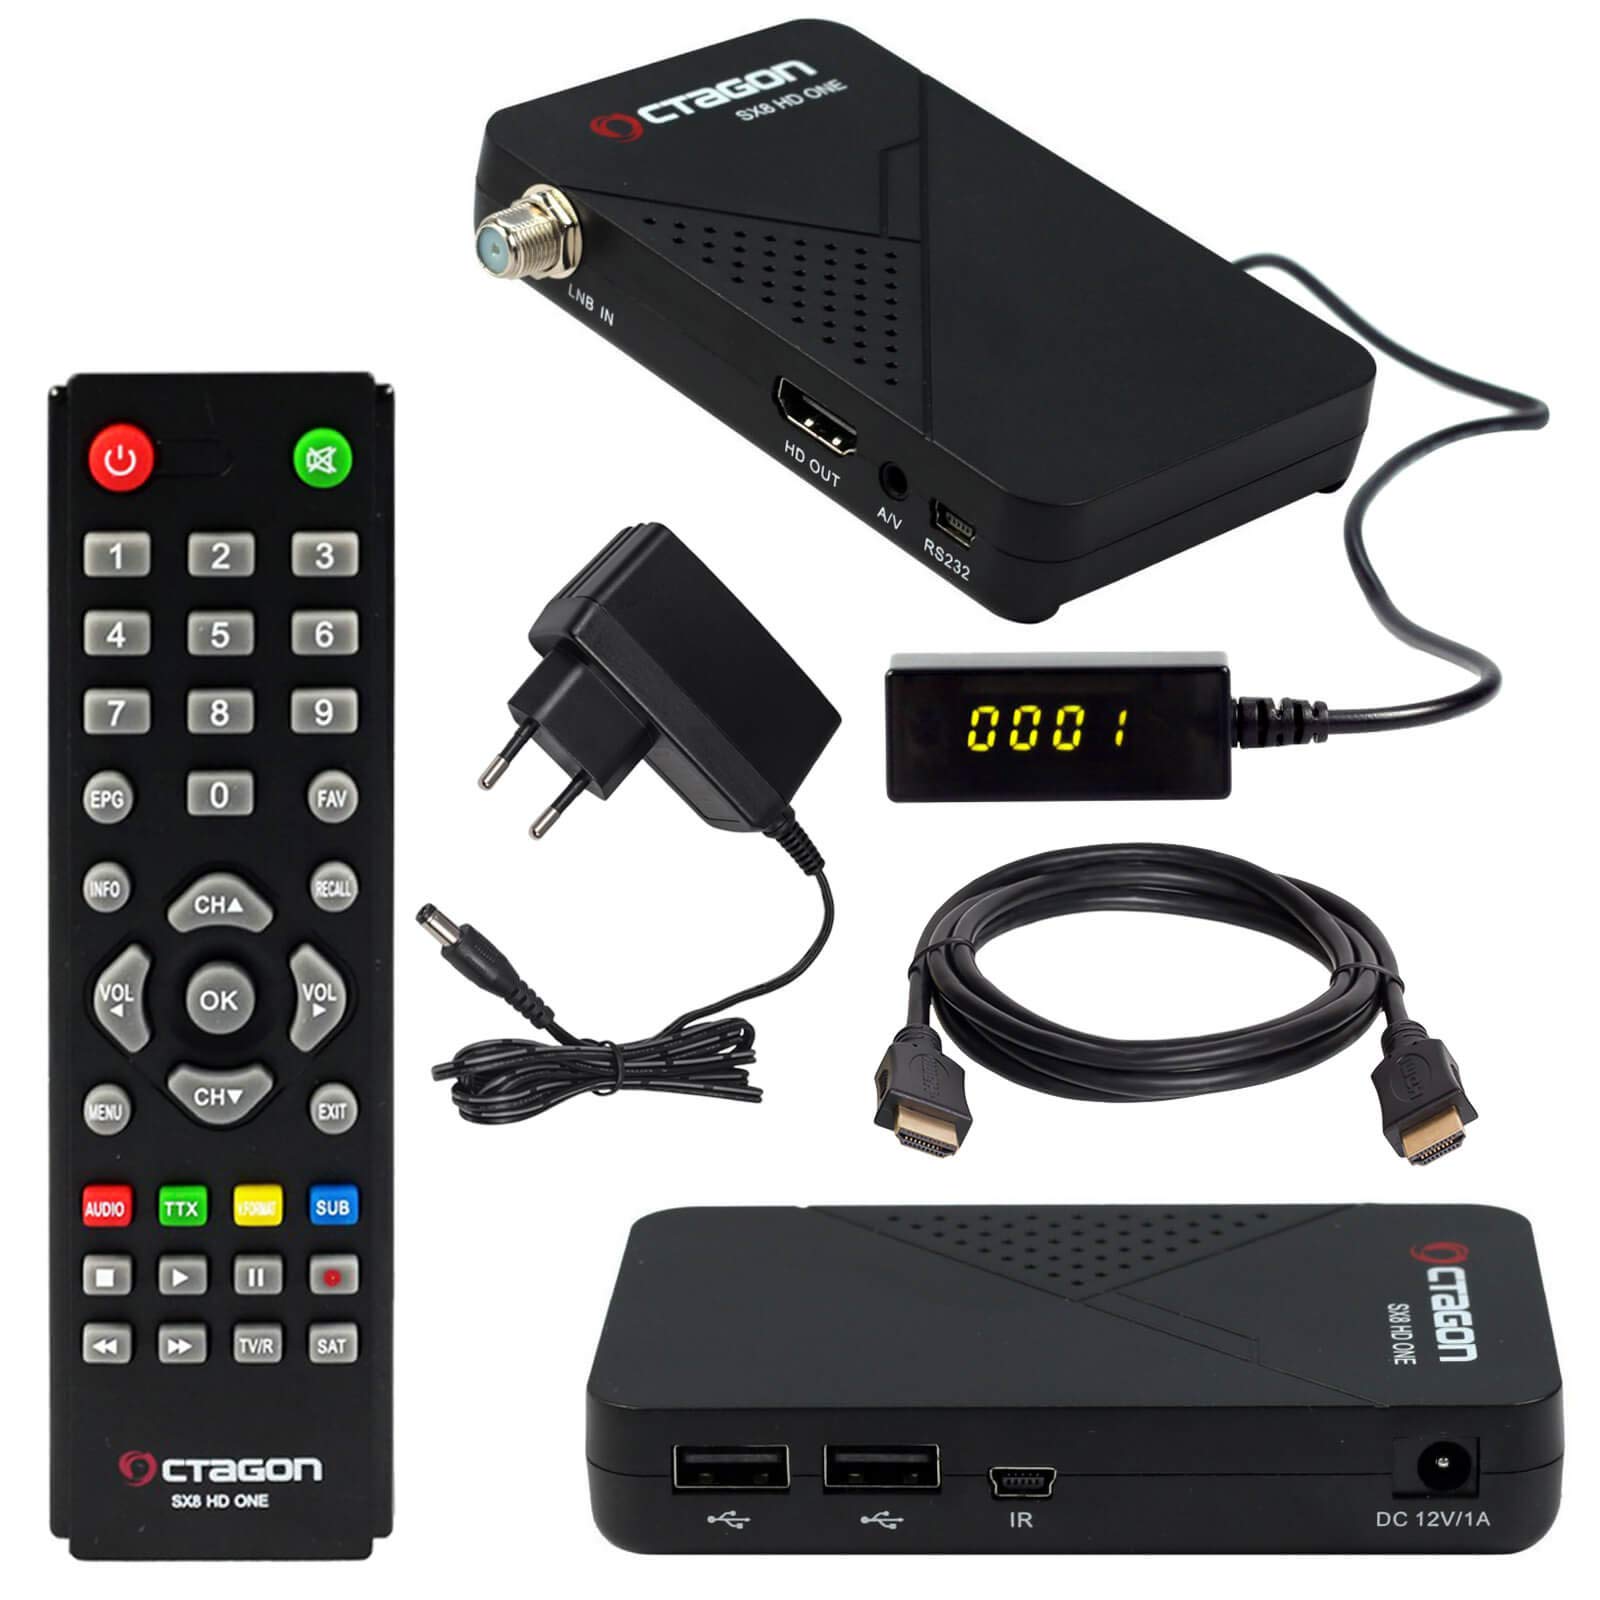
Image 3.1: Octagon SX8 HD ONE Receiver and included accessories.
Device Layout and Connections
Familiarize yourself with the ports and indicators on your receiver.
Side Panel
- USB 2.0 Ports (x2): For connecting USB storage devices (flash drives, external hard drives) or an optional USB Wi-Fi adapter.
- IR Port: For connecting the external IR receiver.
- DC 12V/1A: Power input for the included power adapter.

Image 3.2: Side view of the receiver with USB and IR connections.
Rear Panel
- LNB IN: Connect your satellite dish LNB cable here.
- HD OUT: HDMI output for connecting to your TV or display.
- A/V: Audio/Video jack for analog output.
- RS232: Service port.

Image 3.3: Rear view of the receiver with LNB, HDMI, A/V, and RS232 connections.
Bottom Panel
- Mounting Points: Use these points with the included bracket for wall mounting.

Image 3.4: Bottom view of the receiver, indicating mounting points.
4. Setup
Connecting the Receiver
- Connect the satellite dish LNB cable to the "LNB IN" port on the receiver.
- Connect one end of the HDMI cable to the "HD OUT" port on the receiver and the other end to an HDMI input on your TV.
- Connect the external IR receiver to the "IR" port on the receiver. Position the IR receiver in a location where it can receive signals from the remote control.
- Connect the power adapter to the "DC 12V/1A" input on the receiver, then plug the adapter into a power outlet.
- Turn on your TV and select the correct HDMI input source.
Initial Configuration
- Upon first power-on, the receiver will guide you through the initial setup wizard.
- Select your preferred language.
- Perform a satellite scan to find available channels. Follow the on-screen instructions for satellite selection (e.g., Astra 19.2° E, which is pre-programmed).
- Save the scanned channels.
5. Operating Instructions
Basic Operation
- Use the remote control to navigate menus, change channels, adjust volume, and access features.
- The external LED display will show channel numbers or other status information.
Channel Management
- Access the main menu to scan for new channels, edit existing channels (move, delete, lock), and create favorite lists.
- The EPG (Electronic Program Guide) provides program information for upcoming broadcasts.
Media Playback
- Insert a USB storage device into one of the USB 2.0 ports.
- Navigate to the "Media Player" section in the menu to browse and play photos, videos, or music files stored on the USB device.
Network Features (Optional)
- To use network applications (e.g., weather reports), connect an optional USB Wi-Fi adapter to a USB port.
- Access the network settings in the menu to configure the Wi-Fi connection.
- Once connected, you can access available network features.
6. Maintenance
Cleaning
- Wipe the receiver and remote control with a soft, dry cloth.
- Do not use liquid cleaners or abrasive materials.
- Ensure ventilation openings are clear of dust.
Software Updates
- Periodically check the manufacturer's website for firmware updates.
- Follow the specific instructions provided with the update file for safe installation via USB. Incorrect updates can damage the device.
7. Troubleshooting
| Problem | Possible Cause | Solution |
|---|---|---|
| No picture/sound | Incorrect HDMI input selected | Select the correct HDMI input on your TV. |
| Loose cable connections | Check all cable connections (LNB, HDMI, power). | |
| Receiver not powered on | Ensure the power adapter is connected and the receiver is turned on. | |
| No channels found | Incorrect satellite settings | Verify satellite configuration and perform a new channel scan. |
| LNB cable issue | Check LNB cable for damage or loose connection. | |
| Remote control not working | Batteries are dead or inserted incorrectly | Replace batteries (2x AAA) or check polarity. |
| IR receiver blocked or disconnected | Ensure the external IR receiver is connected and has a clear line of sight to the remote. | |
| Media files not playing | Unsupported file format | Check the receiver's specifications for supported media formats. |
| USB device not recognized | Ensure the USB device is properly formatted (e.g., FAT32) and functioning correctly. | |
| No Wi-Fi connection | USB Wi-Fi adapter not connected or incompatible | Ensure a compatible USB Wi-Fi adapter is connected. |
| Incorrect network settings | Verify Wi-Fi network name (SSID) and password in network settings. |
8. Specifications
| Feature | Detail |
|---|---|
| Brand | HB-DIGITAL |
| Model Number | hb_sx8_hdmi |
| ASIN | B07NWTYK1Z |
| Tuner Type | DVB-S2 |
| Video Resolution | Up to 1080p Full HD |
| USB Ports | 2 x USB 2.0 |
| Card Reader | Conax |
| HDMI Ports | 1 |
| Connectivity Technology | USB, WLAN (with adapter), Infrared |
| Audio Output Mode | Surround |
| Supported Audio Formats | Dolby Digital, DTS |
| Power Supply | 230V / 12V |
| Item Weight | 300 Grams |
| Compatible Devices | Samsung, LG, etc. (TVs/Displays) |
| Battery Composition (Remote) | Alkaline (2x AAA included) |
9. Support Information
For technical support or inquiries, please contact HB-DIGITAL:
- Email: info@hb-digital.de
- Phone: +49211545577
- Operating Hours: Monday - Friday, 09:00 - 16:00 (CET)
Warranty
Information regarding specific warranty terms is not provided in the product details. Please refer to your purchase documentation or contact HB-DIGITAL support for warranty details.
