Introduction
The Thule T2 Classic 2 is a robust platform-style bike carrier designed for secure and convenient transport of your bicycles. It features a frame-free clamping system, making it suitable for various bike types, including carbon frames, mountain bikes, e-bikes, and fat bikes. This manual provides essential information for the proper setup, operation, and maintenance of your Thule T2 Classic 2 bike rack.

Figure 1: The Thule T2 Classic 2 - 2" hitch-mount bike rack.
Key Features
- Frame-Free Ratcheting Arm: Securely holds bikes without making contact with the bike frame, ideal for carbon frames.
- Adjustable Bike Mounts: Side-to-side adjustability allows for generous spacing between bikes, preventing interference.
- Wide Compatibility: Accommodates 20 - 29 inch wheels and tires up to 5 inches wide without requiring adapters, suitable for mountain, downhill, e-bikes, and fat bikes.
- HitchSwitch Lever: Provides convenient access to the rear of your vehicle by allowing the rack to tilt away, even with bikes loaded.
- Integrated Lock: The rack locks to the vehicle with the included SnugTite Lock for added security.
- High Load Capacity: Supports a load capacity of up to 120 pounds.
- Important Note: Not intended for tandems or recumbents. Do not install on a trailer or other towed vehicle. Do not use with bikes that have tire fenders, as this prevents snug hook grip on the tire.
Setup and Installation
Carefully unpack all components and verify against the parts list in your packaging. Assembly requires basic tools, some of which are included. It is recommended to have assistance for certain steps due to the size and weight of the components.
1. Assemble the Main Hitch Unit
- Begin by identifying the main hitch arm and the folding mechanism.
- Remove any pre-installed bolts or pins that secure the folding mechanism for shipping.
- Rotate the folding mechanism 180 degrees to its operational position. Ensure all holes align correctly.
- Re-insert the main bolt and secure it with the washer and nut. Tighten firmly.
- Insert the safety pin through the designated hole to prevent accidental folding.
Figure 2: The main hitch unit and its components.
2. Attach Wheel Trays and Upright Arms
- Slide the wheel trays onto the main horizontal bars of the rack. Ensure they are oriented correctly (front and rear).
- Secure the wheel trays using the provided bolts and tools. Do not overtighten, as this may damage plastic components.
- Attach the upright arms (with the ratcheting mechanism) to the main horizontal bars. These arms will secure the front wheel of your bike.
- Adjust the position of the upright arms and wheel trays according to the markings on the rack to ensure proper bike fit and spacing.

Figure 3: Fully assembled rack with bikes.
3. Mount Rack to Vehicle Hitch
- Slide the main hitch arm into your vehicle's 2-inch receiver hitch.
- Align the hitch pin hole on the rack with the hole on your vehicle's receiver.
- Insert the SnugTite Lock pin through both holes and secure it. This pin is designed to reduce wobble and provide security.
- Ensure the rack is firmly seated and does not wobble excessively.
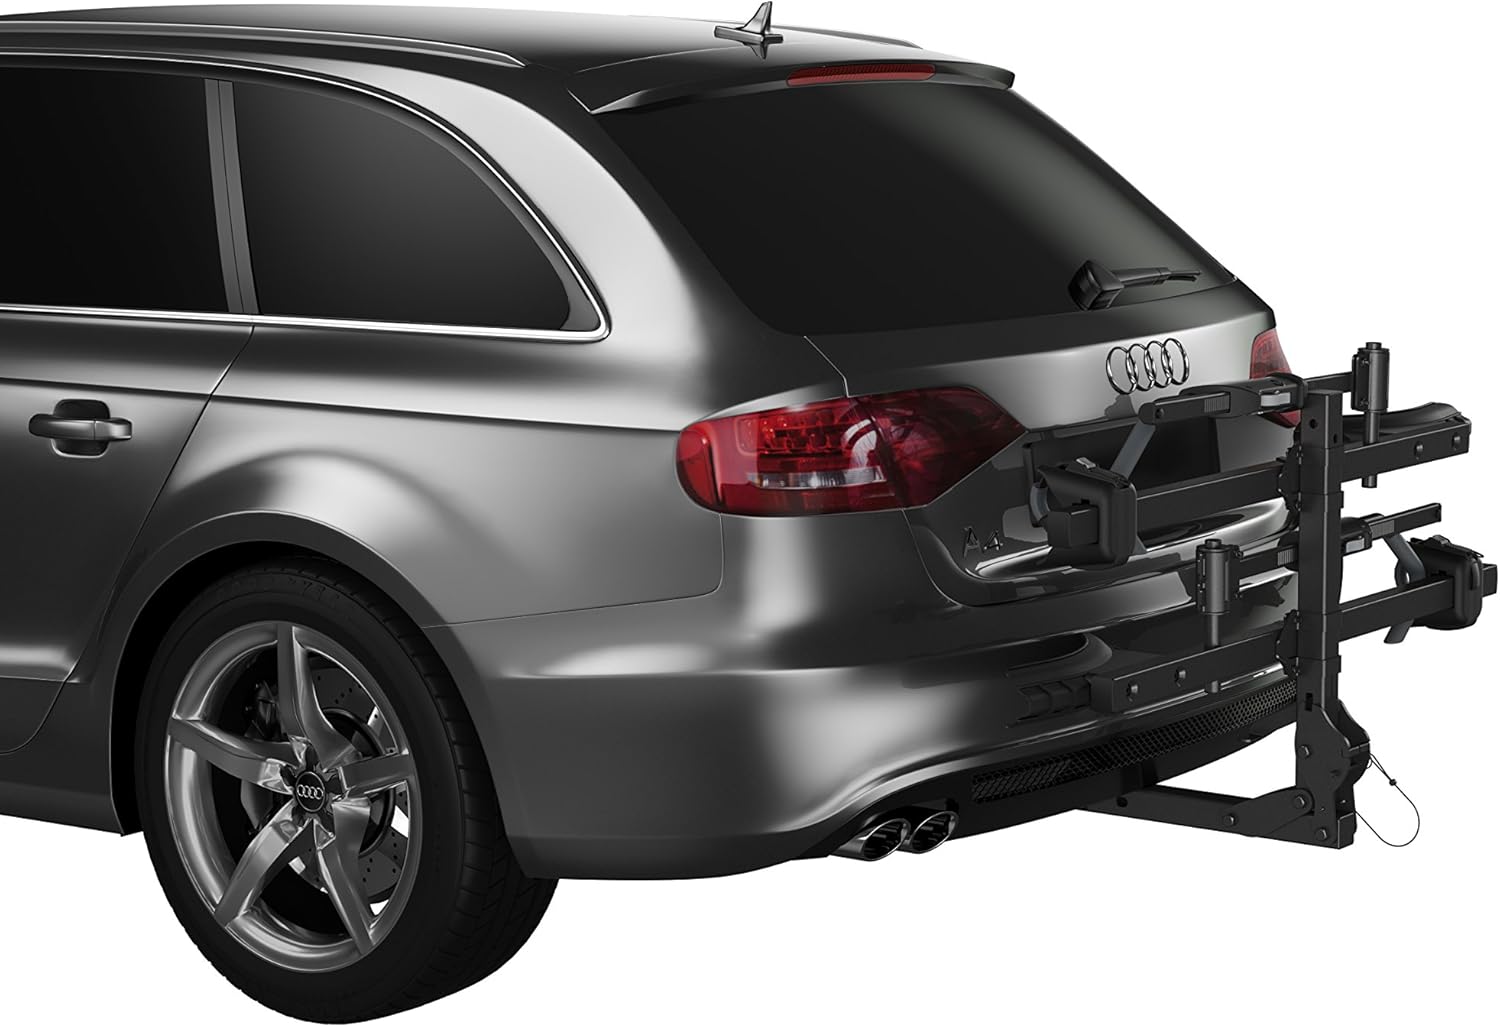
Figure 4: Rack mounted to vehicle in folded position.
Note on Videos: No official seller-provided installation videos were available for this product. Please refer to the detailed text instructions and figures provided.
Operating the Bike Rack
1. Loading Bicycles
- Place the bike onto the wheel trays, ensuring both wheels are seated properly.
- Bring the ratcheting arm over the front wheel and push it down until it firmly clamps the tire. The arm should not touch the bike frame.
- Use the rear wheel strap to secure the rear wheel to the tray. Tighten until snug.
- Repeat for the second bike, adjusting the side-to-side position of the mounts as needed to prevent contact between bikes.
Figure 5: Two bikes securely loaded on the rack.
2. Tilting the Rack (HitchSwitch Lever)
The HitchSwitch lever allows you to tilt the rack down for rear vehicle access or fold it up for storage when not in use.
- To tilt down: Locate the HitchSwitch lever near the base of the rack. Pull the lever and carefully lower the rack. Be mindful of the weight of the bikes.
- To return upright: Lift the rack until it clicks securely into the upright position.
- To fold up for storage: With no bikes on the rack, pull the HitchSwitch lever and fold the main arm upwards until it locks into the vertical position.

Figure 6: Rack tilted down for rear vehicle access.

Figure 7: Another view of the rack in the tilted position.
Maintenance
- Regular Cleaning: Clean the rack regularly with mild soap and water, especially after exposure to dirt, salt, or harsh weather conditions. Rinse thoroughly and dry.
- Check Fasteners: Periodically inspect all bolts, nuts, and straps for tightness. Re-tighten as necessary to ensure secure operation.
- Lubrication: Apply a small amount of silicone spray or light grease to moving parts, such as the HitchSwitch lever mechanism, to ensure smooth operation.
- Storage: When not in use, store the bike rack in a dry, protected area to prevent corrosion and prolong its lifespan.
Troubleshooting
- Rack Wobbles in Hitch: Ensure the SnugTite Lock pin is fully inserted and tightened. Check that the hitch receiver on your vehicle is free of debris.
- Ratcheting Arm Not Securing Bike: Verify that the bike tire is fully seated in the wheel tray. Ensure the ratcheting arm is pulled down firmly over the tire and not obstructed by fenders.
- Difficulty Tilting Rack: Check for any obstructions or debris in the HitchSwitch lever mechanism. Ensure the rack is not overloaded beyond its 120-pound capacity. Lubricate moving parts if necessary.
- Bikes Touching Each Other: Adjust the side-to-side position of the individual bike mounts on the rack to create more clearance.
Specifications
| Attribute | Value |
|---|---|
| Brand | Thule |
| Model | T2 Classic |
| Item Model Number | 9044 |
| Color | Black |
| Mounting Type | Hitch Rack |
| Load Capacity | 120 Pounds |
| Item Weight | 40 pounds |
| Product Dimensions (L x W x H) | 54 x 15 x 43 inches |
| Is Foldable | Yes |
| UPC | 091021881402 |
Warranty and Support
Thule products are tested and are subject to strict quality controls and are guaranteed against defects in material and workmanship. For detailed warranty information, product support, or to purchase replacement parts, please visit the official Thule website or contact their customer service.
You can often find additional support and product information by visiting the Thule Store on Amazon.
Related Documents - T2 Classic 2 - 2"
 |
Thule EasyFold XT Tow Bar Bike Rack: Installation, Usage, and Safety Guide Comprehensive instructions for installing, mounting, and safely using the Thule EasyFold XT tow bar bike rack. Includes step-by-step assembly, loading guidelines, safety warnings, maintenance tips, and warranty information. |
 |
Thule Apex Swing XT (4 Bike Carrier) 9027XT: Installation, Usage, and Safety Guide Comprehensive guide for the Thule Apex Swing XT 4 Bike Carrier (Model 9027XT). Includes step-by-step installation, loading instructions, safety warnings, driving regulations, and maintenance tips for optimal performance and safety. |
 |
Thule Verse Bike Rack Installation and User Manual Comprehensive instructions for installing and using the Thule Verse 2-Bike 2" and 2-Bike 1.25" bike racks. Includes safety information, load capacity details, and step-by-step assembly guides. |
 |
Thule Verse 2-Bike Rack Installation Guide (903452, 903651) Comprehensive installation and user manual for the Thule Verse 2-bike rack (model 903452) and its add-on (model 903651). Includes parts, assembly, safety, and compatibility information. |
 |
Thule EasyFold XT 2: Tow Bar Bike Carrier Installation and User Guide Comprehensive instructions for the Thule EasyFold XT 2 tow bar bike carrier. Learn how to safely install, use, and maintain your carrier for transporting bicycles. Features include easy folding, secure bike mounting, and compatibility with various bike types. |
 |
Thule Epos 2-bike Hitch Rack - Installation and User Manual Comprehensive instructions for installing and using the Thule Epos 2-bike hitch-mounted bike rack (Model 903210). Includes safety warnings, compatibility checks, and step-by-step guides. |