
1. Introduction
This manual provides comprehensive instructions for the proper installation, operation, and maintenance of your JOPIX PT31 Mobile CB/27 MHz Transmitter. Please read this manual thoroughly before using the device to ensure safe and efficient operation.
The JOPIX PT31 is a compact, multimode CB radio designed for mobile use, offering AM and FM modulation, a multi-function LCD display, and various features for reliable communication.
2. Safety Information
- Power Supply: Operate the device only with a 12 Volts DC power supply. Incorrect voltage can damage the unit and void the warranty.
- Antenna: Always connect a properly tuned CB antenna before transmitting. Transmitting without an antenna or with a poorly tuned antenna can damage the transmitter.
- Installation: Ensure the device is securely mounted in a stable location, away from excessive heat, moisture, and direct sunlight.
- Water Resistance: The device has an IP67 international protection rating, indicating it is waterproof. However, avoid submerging the unit unnecessarily and ensure all connections are secure to maintain water resistance.
- Maintenance: Do not attempt to open or repair the unit yourself. Refer all servicing to qualified personnel.
- Driving Safety: Do not operate the radio in a manner that distracts you from driving. Prioritize road safety.
3. Package Contents
Verify that all items are present in the package:
- JOPIX PT31 Mobile Transmitter Unit
- Handheld Microphone with UP/DOWN buttons
- Mounting Bracket and Hardware
- Power Cable
- User Manual (this document)
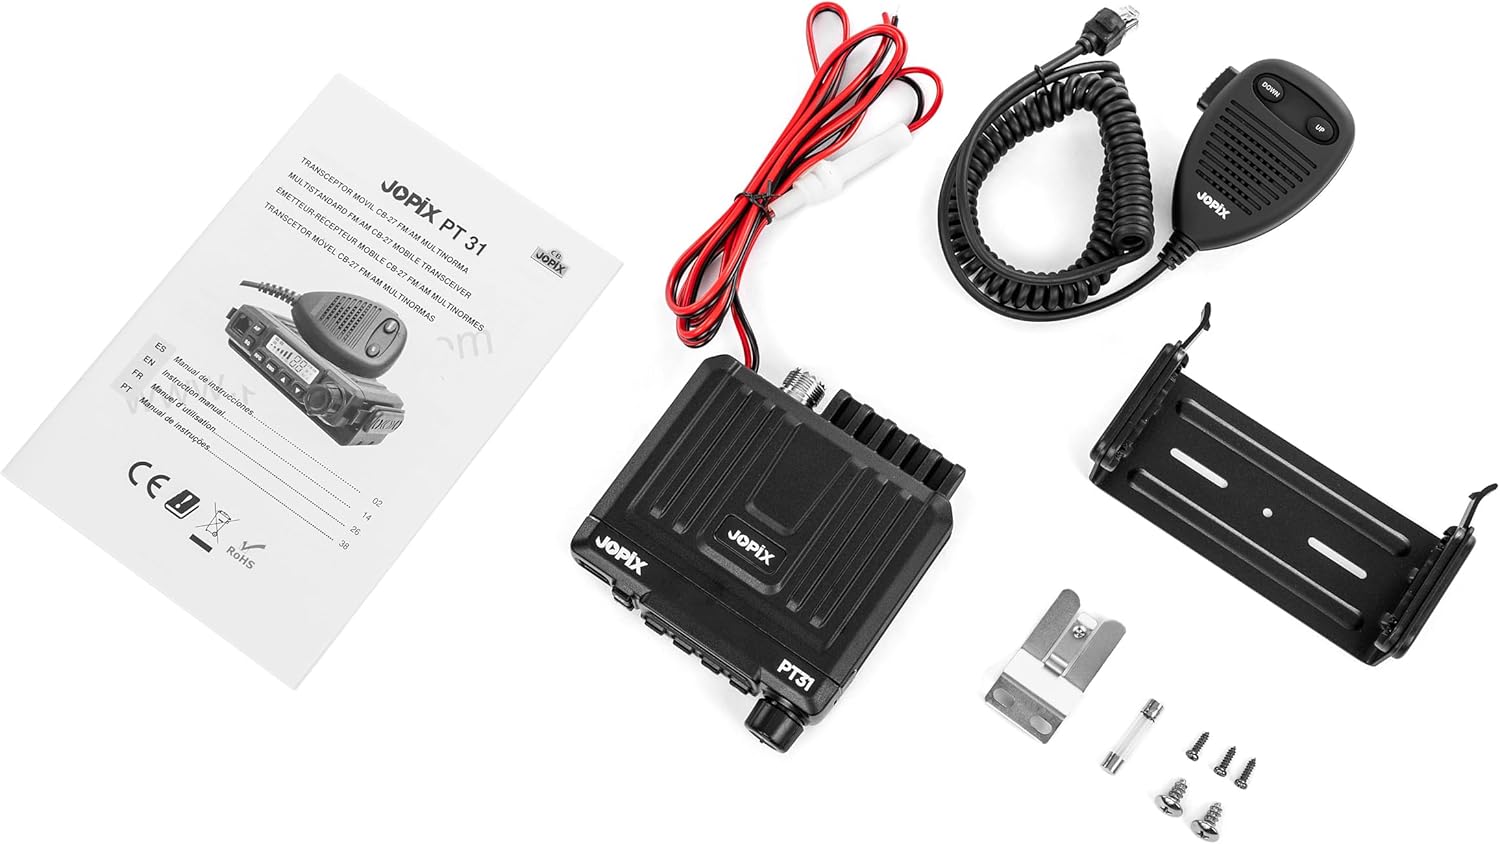
Image 3.1: Contents of the JOPIX PT31 package, showing the main unit, microphone, power cable, mounting accessories, and instruction manual.
4. Product Overview
The JOPIX PT31 is a compact and versatile CB radio. Key features include:
- Multi-normal operation with approved channels for various countries.
- 40 channels within the 26.965 MHz to 27.405 MHz frequency range.
- 4W transmission power.
- Handheld microphone with detachable RJ45 connector and channel UP/DOWN buttons.
- Backlit LCD display showing channel and operational status.
- Manual and Automatic Squelch (ASQ) functions.
- Scanner function for monitoring channels.
- Compact design for easy installation in vehicles.

Image 4.1: Front view of the JOPIX PT31 unit with the microphone connected, showing the display and control buttons.

Image 4.2: The compact size of the JOPIX PT31 transmitter, shown resting in a hand.
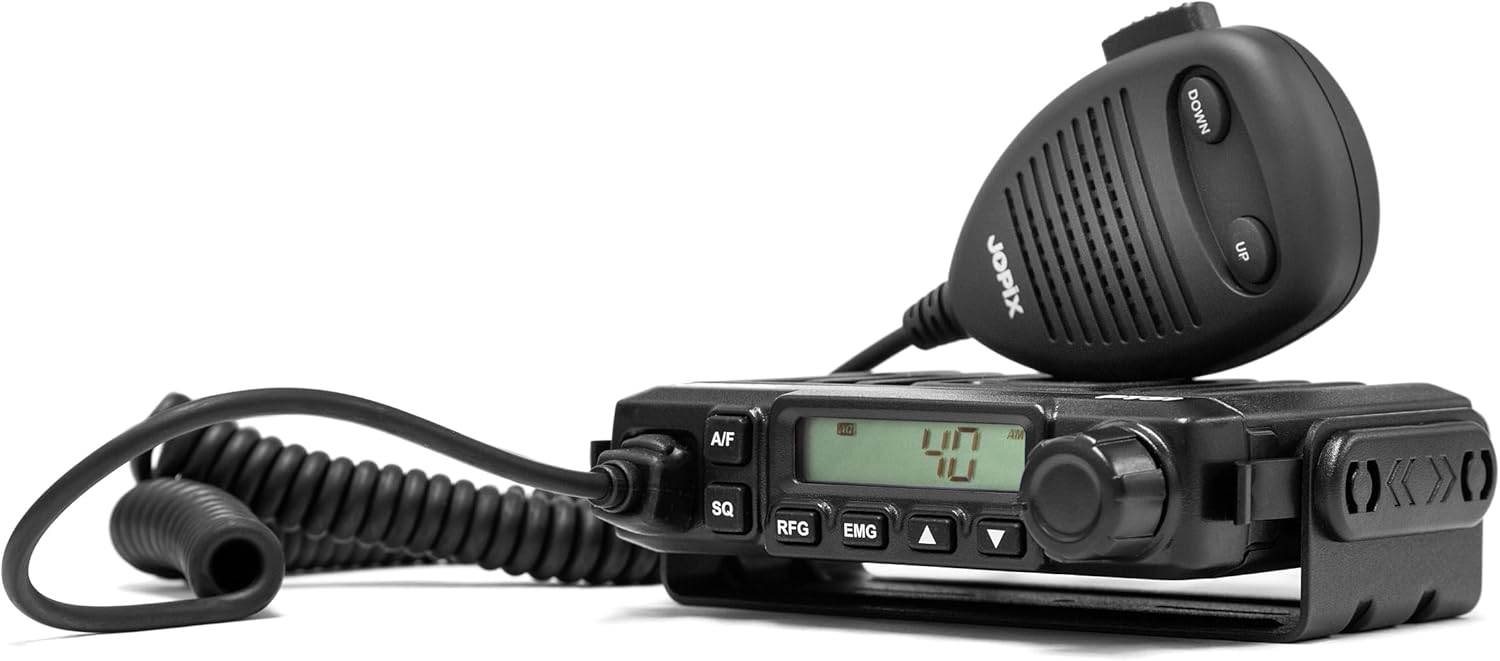
Image 4.3: Side view of the JOPIX PT31, highlighting its profile and microphone connection.
5. Setup and Installation
- Mounting the Unit:
Use the provided mounting bracket and hardware to securely install the JOPIX PT31 in your vehicle. Choose a location that allows easy access to controls and the microphone, without obstructing your view or interfering with vehicle operation.
- Power Connection:
Connect the red wire of the power cable to the positive (+) terminal of your vehicle's 12V DC power source, and the black wire to the negative (-) terminal or chassis ground. Ensure a secure connection to prevent power fluctuations.
- Antenna Connection:
Connect your CB antenna cable to the antenna connector on the rear of the JOPIX PT31 unit. Ensure the antenna is properly tuned for the 27 MHz band to prevent damage to the transmitter and ensure optimal performance.

Image 5.1: Rear panel of the JOPIX PT31, illustrating the antenna connector and power input.
- Microphone Connection:
Plug the RJ45 connector of the handheld microphone into the designated port on the front of the transmitter.
- External Speaker (Optional):
If desired, connect an external speaker to the dedicated external speaker jack on the unit for enhanced audio output.
6. Operating Instructions
6.1. Powering On/Off
Turn the volume knob clockwise to power on the unit. The LCD display will illuminate. Turn counter-clockwise until it clicks to power off.
6.2. Channel Selection
- Front Panel Buttons: Use the UP and DOWN arrow buttons on the front panel to change channels.
- Microphone Buttons: The handheld microphone also features UP and DOWN buttons for convenient channel changing.
6.3. Modulation Type (AM/FM)
Press the A/F button on the front panel to switch between AM (Amplitude Modulation) and FM (Frequency Modulation) modes. The selected mode will be indicated on the LCD display.
6.4. Squelch Control (SQ / ASQ)
Squelch eliminates background noise when no signal is being received.
- Manual Squelch (SQ): Press the SQ button. Use the rotary knob (often combined with volume) or specific squelch control if available, to adjust the squelch level. Turn it clockwise to increase the squelch threshold (reduce noise, but may miss weak signals) and counter-clockwise to decrease it.
- Automatic Squelch (ASQ): The JOPIX PT31 features an Automatic Squelch (ASQ) function. This automatically adjusts the squelch level for optimal performance. Refer to the specific button or menu option for ASQ activation, usually by pressing the SQ button briefly or holding it.
6.5. Scanner Function
Activate the scanner function to automatically scan through active channels. This feature is useful for monitoring multiple channels for activity. Consult the display for scanner activation and control, typically via a dedicated button or a combination of buttons (e.g., RFG or EMG buttons might have secondary scanner functions).
6.6. LCD Display
The backlit LCD display shows the current channel number, modulation type (AM/FM), signal strength, and other operational indicators. Familiarize yourself with the icons and readings for effective use.
6.7. Transmitting
To transmit, press and hold the PTT (Push-To-Talk) button on the side of the microphone. Speak clearly into the microphone. Release the PTT button to listen.
7. Maintenance
- Cleaning: Use a soft, dry cloth to clean the exterior of the unit. Do not use abrasive cleaners or solvents.
- Connections: Periodically check all cable connections (power, antenna, microphone) to ensure they are secure and free from corrosion.
- Antenna Tuning: Regularly check your antenna's SWR (Standing Wave Ratio) to ensure it remains properly tuned for optimal performance and to prevent damage to the transmitter.
- Environmental Protection: While the unit is waterproof (IP67), prolonged exposure to extreme conditions should be avoided. Ensure the unit is dry before making or breaking connections.
8. Troubleshooting
| Problem | Possible Cause | Solution |
|---|---|---|
| No power to the unit. | Loose power connection, blown fuse, incorrect voltage. | Check power cable connections. Inspect and replace fuse if necessary. Ensure 12V DC power source. |
| Cannot transmit or receive. | Antenna not connected, antenna SWR too high, microphone not connected, incorrect channel/mode. | Verify antenna connection and SWR. Check microphone connection. Confirm correct channel and AM/FM mode. |
| Poor audio quality (receive). | Squelch set too high, weak signal, external interference. | Adjust squelch level. Check antenna. Move away from sources of electrical interference. |
| Poor audio quality (transmit). | Microphone faulty, speaking too far/close to microphone. | Ensure microphone is working correctly. Speak clearly at a consistent distance from the microphone. |
If the problem persists after attempting these solutions, please contact customer support.
9. Specifications
| Feature | Specification |
|---|---|
| Brand | Jopix |
| Model | PT-31 |
| Frequency Range | 26.965 MHz - 27.405 MHz |
| Number of Channels | 40 |
| Modulation Type | AM/FM |
| Output Power | 4W |
| Antenna Impedance | 50 ohm |
| Voltage | 12 Volts (DC) |
| Dimensions (L x W x H) | 120 x 110 x 27 mm (4.72 x 4.33 x 1.06 inches) |
| Weight | 320g |
| Water Resistance Level | IP67 (Waterproof) |
| Compatible Devices | Microphone, other Jopix devices, 27MHz devices |
| Special Features | Compact design, Multi-normal, Backlit display, Automatic Squelch (ASQ), Scanner |
10. Warranty and Support
For warranty information, please refer to the documentation provided at the time of purchase or contact your retailer. For technical support or service inquiries, please contact Jopix customer service through their official website or the contact information provided with your product.
Keep your purchase receipt as proof of purchase for warranty claims.
