
Introduction
This manual provides essential instructions for the safe operation, installation, maintenance, and troubleshooting of your Farberware FW-WD211 Countertop Hot and Cold Water Dispenser. Please read this manual thoroughly before using the appliance and retain it for future reference.
The Farberware FW-WD211 is a compact, top-loading water dispenser designed for convenience in homes or offices with limited space. It provides both instant hot and cold water, featuring an energy-saving thermoelectric heating and cooling system and a child safety lock for hot water dispensing.
Important Safety Instructions
To reduce the risk of injury or property damage, basic safety precautions should always be followed when using electrical appliances. Read all instructions before using this appliance.
- Always plug the dispenser into a grounded electrical outlet.
- Do not operate the dispenser if the power cord is damaged.
- Keep the dispenser away from direct sunlight and heat sources.
- Ensure proper ventilation around the unit.
- Do not immerse the dispenser, cord, or plug in water or other liquids.
- Supervise children when they are near the dispenser, especially when dispensing hot water. The hot water faucet has a child safety lock.
- Unplug the dispenser before cleaning or performing any maintenance.
- This appliance is intended for household and similar applications only.
Package Contents
Upon unpacking, please ensure all items are present and undamaged:
- Farberware FW-WD211 Water Dispenser Unit
- Drip Tray and Grid
- User Manual (this document)
Note: A 3 or 5-gallon water bottle is not included and must be purchased separately.
Setup
- Unpacking: Carefully remove the dispenser from its packaging. Place it upright on a flat, stable, and level surface.
- Placement: Position the dispenser in a cool, dry place, away from direct sunlight and at least 10 cm (4 inches) from a wall to allow for proper ventilation. Ensure it is on a countertop or sturdy surface capable of supporting the unit's weight plus a full water bottle.
- Install Drip Tray: Slide the drip tray and grid into place at the base of the dispensing area.
- Water Bottle Installation:
- Clean the neck of a new 3 or 5-gallon water bottle.
- Remove the protective cap from the water bottle.
- Carefully invert the water bottle and place it firmly onto the water dispenser's bottle support. Ensure it is seated correctly to prevent leaks.
- Initial Flushing: Before plugging in the unit, dispense at least 1 liter (approximately 4 cups) of water from both the hot and cold faucets to ensure the internal tanks are filled and to flush out any air. This prevents dry heating of the hot tank.
- Power Connection: Plug the power cord into a grounded 120V AC electrical outlet.

Image: The Farberware FW-WD211 water dispenser with a 5-gallon water bottle in place, ready for use. This illustrates the top-loading design.
Operating Instructions
Once the dispenser is set up and plugged in, allow approximately 15-30 minutes for the water to reach optimal hot and cold temperatures.

Image: Front view of the dispenser, highlighting the "HOT" and "COLD" indicator lights and the red (hot) and blue (cold) water spigots.
- Indicator Lights:
- The "HOT" indicator light illuminates when the hot water heating element is active. It will turn off once the desired hot temperature is reached.
- The "COLD" indicator light illuminates when the cold water cooling system is active. It will turn off once the desired cold temperature is reached.
- Dispensing Cold Water: Place a cup under the blue (cold) faucet. Push the blue lever down to dispense cold water. Release the lever to stop.
- Dispensing Hot Water (Child Safety Lock): Place a cup under the red (hot) faucet. Push the red child safety lock button inward, then push the red lever down to dispense hot water. Release both the button and lever to stop. Always exercise caution when dispensing hot water.
- Energy Saving: The unit utilizes an energy-saving thermoelectric heating and cooling system. To further conserve energy, you may turn off the hot or cold functions using the switches located on the back of the unit if not needed for extended periods.
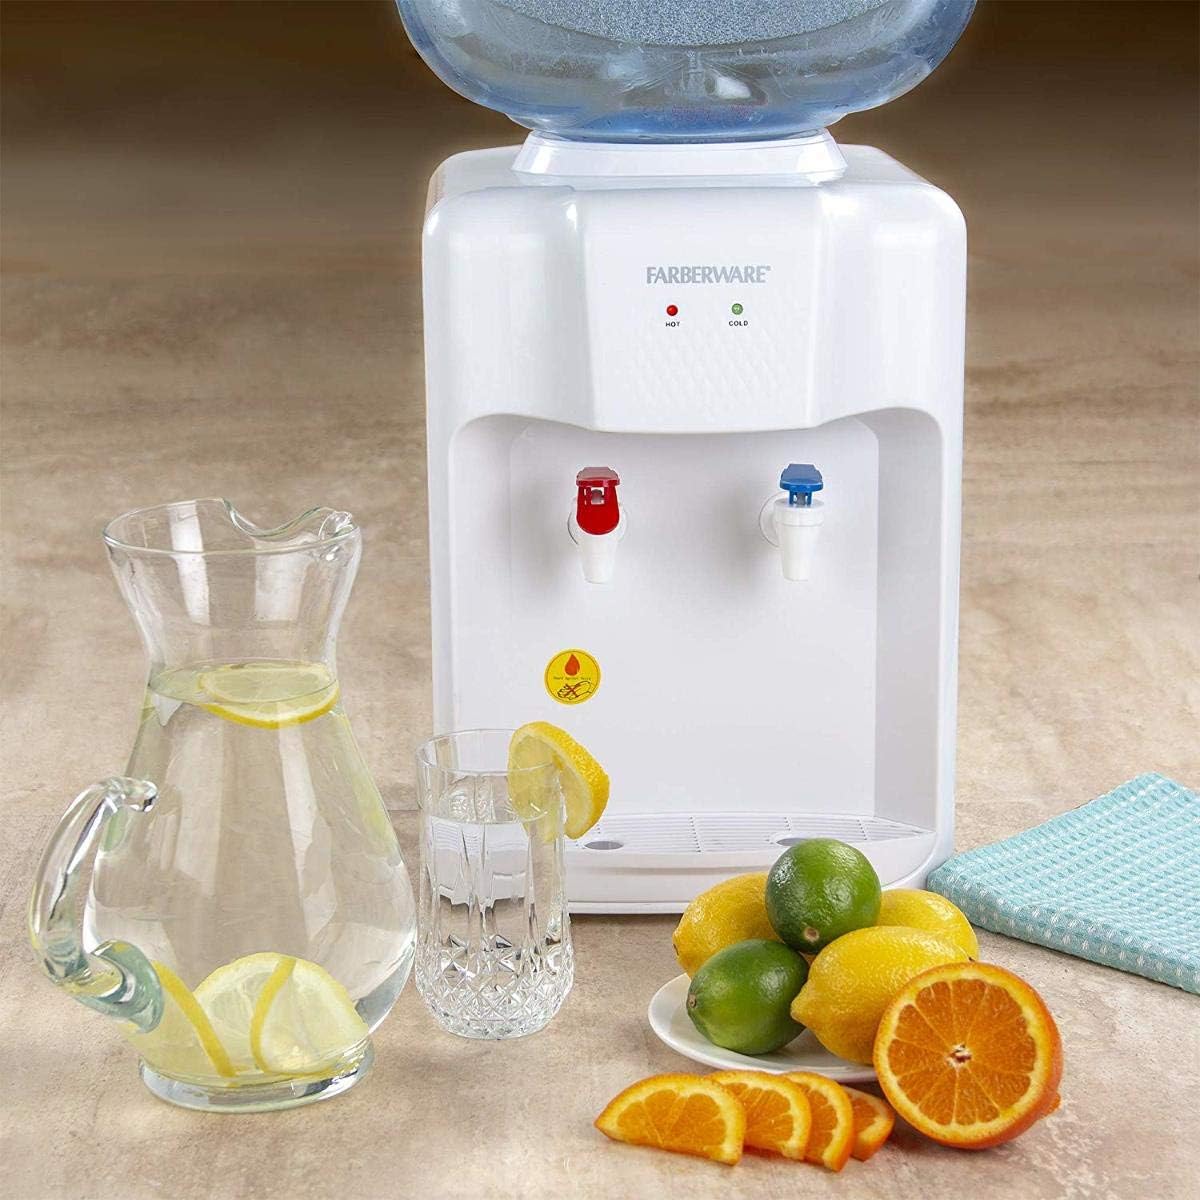
Image: The Farberware FW-WD211 water dispenser in a kitchen setting, demonstrating its use for refreshing beverages with a pitcher and glass.
Maintenance
Regular cleaning and maintenance will ensure optimal performance and hygiene of your water dispenser.
- Unplug Before Cleaning: Always unplug the dispenser from the power outlet before cleaning or performing any maintenance.
- Empty Water: Drain all water from both hot and cold tanks by dispensing until no more water comes out.
- Clean Water Barrel Seat: The water barrel seat is removable for easy cleaning.
- Gently lift and remove the water barrel seat from the top of the dispenser.
- Wash it with mild soap and warm water. Rinse thoroughly and dry completely before reattaching.
- Clean Drip Tray: Remove the drip tray and grid. Wash them with mild soap and warm water, rinse, and dry.
- External Cleaning: Wipe the exterior of the dispenser with a soft, damp cloth. Do not use abrasive cleaners or solvents.
- Internal Cleaning (Recommended Quarterly): For thorough internal cleaning, a food-grade cleaning solution or a mixture of water and white vinegar can be used. Follow the instructions provided with the cleaning solution or use a 1:4 vinegar-to-water ratio. Flush thoroughly with clean water afterward.
Troubleshooting
Review the following common issues and solutions before contacting customer support.
| Problem | Possible Cause | Solution |
|---|---|---|
| No water dispensing | Water bottle empty or not properly seated; airlock in system. | Replace water bottle. Re-seat bottle firmly. Dispense from both faucets to release air. |
| No hot water | Hot water switch off; heating element malfunction. | Check the hot water switch on the back of the unit. Ensure the unit is plugged in. Allow time for heating. |
| No cold water | Cold water switch off; cooling system malfunction. | Check the cold water switch on the back of the unit. Ensure the unit is plugged in. Allow time for cooling. |
| Water leaking | Water bottle cracked or not seated correctly; internal leak. | Check water bottle for cracks. Re-seat bottle firmly. If leak persists, unplug and contact support. |
| Unusual noise | Normal operation (cooling/heating cycles); unit not level. | Ensure the unit is on a level surface. Some noise during cooling/heating cycles is normal. |
Specifications
| Feature | Detail |
|---|---|
| Brand | Farberware |
| Model Number | FW-WD211 |
| Color | White |
| Product Dimensions (L x W x H) | 41.91 cm x 33.02 cm x 30.48 cm (16.5 x 13 x 12 inches) |
| Item Weight | 3.83 kg (8.44 lbs) |
| Compatible Water Bottle Capacity | 3 or 5 Gallons |
| Installation Type | Countertop, Freestanding |
| UPC | 765167970909 |

Image: Product packaging illustrating the dimensions and weight of the Farberware FW-WD211 water dispenser.
Warranty and Support
For warranty information and customer support, please refer to the manufacturer's official website or contact their customer service department. Keep your purchase receipt as proof of purchase.
For assistance, please visit the Farberware website or contact their customer support line. Specific contact details may vary by region.