
1. Introduction
Welcome to the user manual for your Philips PerfectCare Aqua Silence Steam Generator Iron GC9410/66. This appliance is designed to make your ironing experience efficient and effortless, providing powerful steam for excellent crease removal on all ironable fabrics without temperature adjustments. Please read this manual carefully before first use and keep it for future reference.
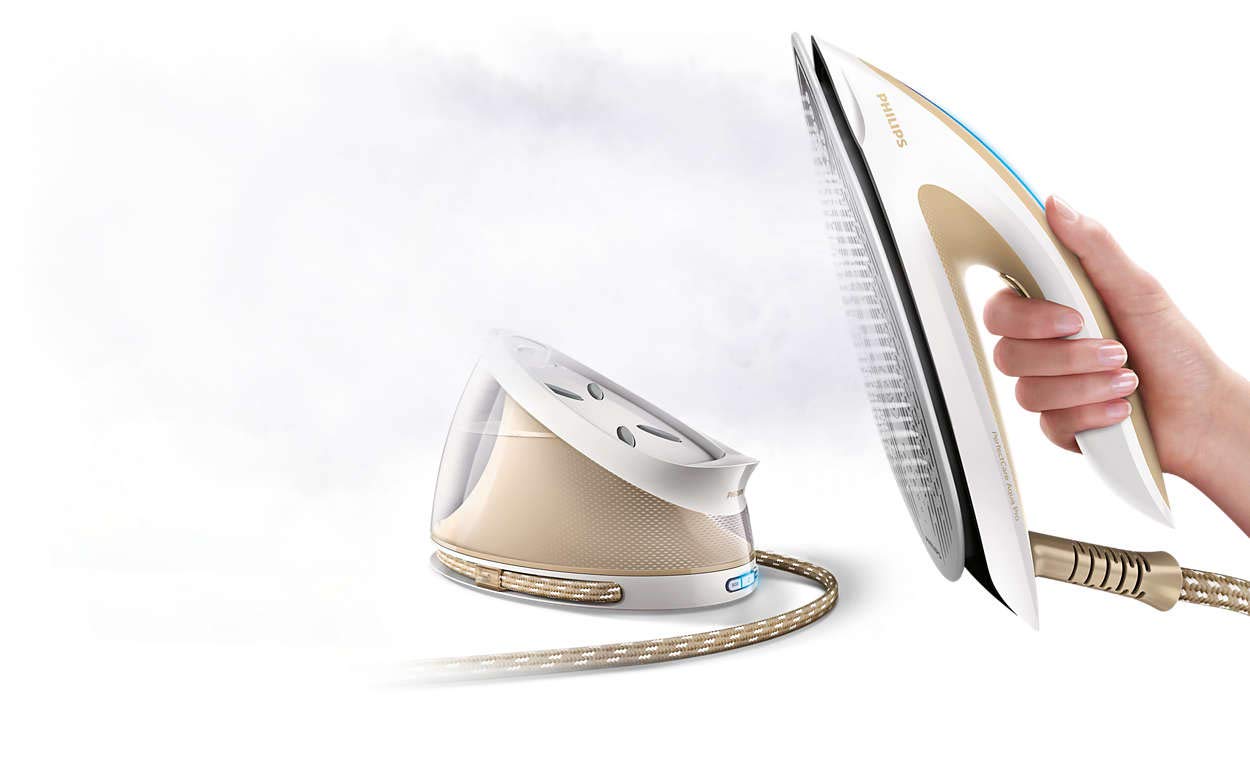
Figure 1: Philips PerfectCare Aqua Silence Steam Generator Iron GC9410/66. This image shows the complete steam generator iron unit, highlighting its beige color, large water tank, and the iron unit with its handle and steam hose.
2. Important Safety Information
Before using the appliance, read this user manual and the safety leaflet carefully and save them for future reference. Always follow basic safety precautions to reduce the risk of fire, electric shock, and personal injury.
- Do not leave the iron unattended while it is connected to the mains.
- Do not immerse the appliance in water or any other liquid.
- Keep the iron and its cord out of reach of children.
- Do not operate the appliance if it has been dropped, if there are visible signs of damage, or if it is leaking.
- Only use the appliance for its intended household use.
- The soleplate can become extremely hot and cause burns if touched.
3. Product Overview
Familiarize yourself with the components of your Philips PerfectCare Aqua Silence steam generator iron:
- Iron unit with T-ionicGlide soleplate
- Steam hose
- Water tank (removable)
- Easy De-Calc knob
- Carry lock
- Power cord and plug
- Steam trigger
- ECO mode button

Figure 2: Extra-large water tank. This image highlights the transparent, removable water tank of the steam generator iron, indicating its capacity for extended use.
4. Setup
4.1 Unpacking
Remove all packaging materials and stickers from the appliance. Keep packaging materials out of reach of children.
4.2 Filling the Water Tank
The appliance is designed to be used with tap water. If you live in an area with hard water, it is recommended to use a mixture of 50% tap water and 50% demineralized water to prolong the lifetime of the appliance. Do not add perfume, vinegar, starch, descaling agents, or other chemicals to the water tank.
- Remove the detachable water tank from the base.
- Fill the water tank with tap water up to the 'MAX' indication.
- Place the water tank back into the appliance until it clicks into place.

Figure 3: Filling the water tank. This image shows a close-up of the water tank being filled, with the 'MAX' level clearly visible.
4.3 First Use
During the first use, the appliance may produce some smoke and a metallic smell. This is normal and will stop after a few uses. It is also normal for steam to come out of the soleplate when you use the iron for the first time.
5. Operating Instructions
5.1 Powering On and Heating Up
- Place the steam generator on a stable, level surface.
- Plug the mains plug into an earthed wall socket.
- Press the on/off button. The blue power-on light will start flashing.
- The appliance is ready for use when the blue power-on light stops flashing and stays on continuously (approximately 2 minutes).
5.2 OptimalTEMP Technology
Your Philips PerfectCare Aqua Silence iron features OptimalTEMP technology, which means you do not need to adjust the temperature. It is safe for all ironable fabrics, from denim to silk, without the risk of burning. You can leave the hot soleplate directly on the ironing board cover without causing damage.

Figure 4: Safe soleplate placement. This image illustrates the safety feature allowing the hot soleplate to be left directly on the ironing board without damage.
5.3 Using Steam
Press and hold the steam trigger under the handle to release continuous steam. For an extra boost of steam to remove stubborn creases, press the steam trigger twice quickly (steam boost up to 450g).

Figure 5: Powerful steam output. This image demonstrates the strong steam output from the iron's soleplate, indicating its effectiveness in removing creases.
5.4 ECO Mode
For energy saving, you can activate the ECO mode by pressing the ECO button. This reduces the steam output while still providing effective ironing results.

Figure 6: ECO mode button. This image shows the ECO mode button, indicating its function for energy conservation during ironing.
5.5 Automatic Shut-off
For safety and energy saving, the appliance automatically switches off if it has not been used for a few minutes. The power-on light will go out. To switch the appliance on again, press the on/off button.

Figure 7: Automatic shut-off feature. This image illustrates the automatic safety shut-off function, which conserves energy and enhances safety.
6. Maintenance
6.1 Easy De-Calc System
The Easy De-Calc system protects your appliance from scale build-up and prolongs its lifetime. The 'DE-CALC' light will flash to remind you to perform the descaling procedure.
- Ensure the appliance is unplugged and has cooled down for at least 2 hours.
- Place the appliance on the edge of a table or sink.
- Hold a cup (at least 350ml) under the Easy De-Calc knob.
- Turn the Easy De-Calc knob counter-clockwise to remove it.
- Allow the water and scale particles to drain into the cup.
- Once the water stops flowing, reinsert the Easy De-Calc knob and turn it clockwise until it is securely fastened.

Figure 8: Easy De-Calc system. This image shows the Easy De-Calc knob, illustrating the simple and efficient descaling process.
6.2 Cleaning the Soleplate
To clean the soleplate, use a damp cloth and a non-abrasive (liquid) cleaner. Avoid using metal scouring pads or abrasive cleaners as they can scratch the T-ionicGlide soleplate.

Figure 9: T-ionicGlide soleplate. This image highlights the smooth, scratch-resistant T-ionicGlide soleplate, known for its excellent gliding performance.
6.3 Storage
After use, unplug the appliance and allow it to cool down. Secure the iron to the base with the carry lock. Wrap the power cord and steam hose around the base for neat storage.

Figure 10: Carry lock mechanism. This image shows the carry lock, which secures the iron to its base for safe and easy transport and storage.
7. Troubleshooting
| Problem | Possible Cause | Solution |
|---|---|---|
| No steam comes out. | Water tank is empty. Appliance is not heated up. Steam trigger not pressed. | Fill the water tank. Wait until the blue light stops flashing. Press and hold the steam trigger. |
| Water drips from the soleplate. | Appliance not hot enough. Steam boost used too frequently. | Wait until the blue light is continuously on. Allow more time between steam boosts. |
| White flakes come out of the soleplate. | Scale build-up. | Perform the Easy De-Calc procedure. Use demineralized water or a 50/50 mix with tap water. |
| Appliance switches off automatically. | Automatic shut-off activated. | Press the on/off button to restart the appliance. |
8. Specifications
- Model: GC9410/66
- Brand: Philips
- Type: Steam Generator Iron
- Color: Beige
- Power: 2000 Watts
- Steam Pressure: 6.7 bar
- Continuous Steam Output: 120 g/min
- Steam Boost: 450 g
- Soleplate: T-ionicGlide (Ceramic)
- Water Tank Capacity: Extra-large (specific volume not provided, but described as large for continuous use)
- Weight: 4.33 kg
- Special Features: OptimalTEMP Technology, Easy De-Calc, Carry Lock, Automatic Shut-off, Silent Operation (Aqua Silence), ECO Mode
9. Warranty and Support
9.1 Warranty
This Philips PerfectCare Aqua Silence Steam Generator Iron GC9410/66 comes with a two-year manufacturer's warranty. Please retain your proof of purchase for warranty claims. The warranty covers defects in materials and workmanship under normal use.
9.2 Customer Support
For further assistance, product registration, or to find answers to frequently asked questions, please visit the official Philips website or contact Philips customer support in your region. You can often find detailed support information, including service centers and contact numbers, on the Philips support pages.


