1. Introduction
This manual provides essential information for the proper installation, operation, and maintenance of your Dell Networking N2024 24-Port 1GbE Ethernet Switch. Please read this guide thoroughly before using the device to ensure optimal performance and safety. Keep this manual for future reference.
2. Product Overview
The Dell Networking N2024 is a high-performance 1U rack-mountable Ethernet switch designed for reliable network connectivity. It features 24 1GbE Base-T ports and two 10GbE SFP+ uplink ports, providing flexible connectivity options for various network environments. The switch operates on OS6 and includes an integrated 100W PSU and internal fans for efficient cooling.
Key Features:
- 24 x 10/100/1000 Base-T Ethernet Ports
- 2 x 10GbE SFP+ Uplink Ports
- 2 x Rear-Stacking Ports
- 1 x USB Type-A Port
- 1 x RJ45 Management Port (RS232 Signaling)
- Integrated 100W Power Supply Unit (PSU)
- Internal Cooling Fans
- Operating System: OS6
- 1U Rack-Mountable Design
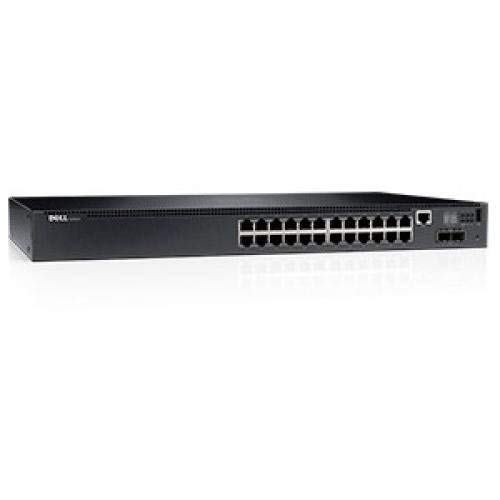
Figure 1: Front view of the Dell N2024 24-Port 1GbE Ethernet Network Switch, showing the 24 1GbE ports and two 10GbE SFP+ uplink ports.
3. Setup and Installation
3.1. Package Contents
Verify that all components are present in the package:
- Dell Networking N2024 Switch
- Rack-mounting ears
- Console cable
- Power cord
3.2. Physical Installation
The N2024 switch is designed for rack-mounting. Follow these steps for secure installation:
- Attach the provided rack-mounting ears to the sides of the switch using the screws included.
- Secure the switch into a standard 19-inch equipment rack using appropriate rack screws. Ensure adequate ventilation around the switch.
3.3. Connecting the Switch
- Power Connection: Connect the power cord to the switch's integrated power supply and then to a grounded AC power outlet.
- Network Connections: Connect your network devices (servers, workstations, other switches) to the 1GbE Base-T ports using standard Ethernet cables. For high-speed uplinks, insert SFP+ transceivers (not included) into the 10GbE SFP+ ports and connect fiber optic cables.
- Management Connection: For initial configuration or direct management, connect the console cable from your computer's serial port to the RJ45 management port on the switch.
- Stacking Connections (Optional): If deploying multiple N2024 switches in a stack, connect the rear-stacking ports using compatible stacking cables (not included).
4. Operation
4.1. Initial Power On
Once all connections are made, power on the switch. The switch will perform a self-test and boot up its operating system (OS6). Observe the LED indicators on the front panel to confirm proper power and port status.
4.2. Basic Configuration
Access the switch's command-line interface (CLI) via the console port or a network-based management interface (e.g., Telnet, SSH, Web GUI) once an IP address is assigned. Refer to the Dell Networking OS6 documentation for detailed configuration instructions, including setting up IP addresses, VLANs, and other network parameters.
5. Maintenance
5.1. General Care
- Ensure the switch is installed in a clean, dry, and well-ventilated environment.
- Regularly check for dust accumulation on ventilation openings and clean as necessary to prevent overheating.
- Verify that all cables are securely connected.
5.2. Firmware Updates
Periodically check the Dell support website for firmware updates for the N2024 switch. Keeping the firmware updated ensures optimal performance, security, and access to new features. Follow the instructions provided with the firmware update package carefully.
6. Troubleshooting
This section provides solutions to common issues you might encounter with your Dell N2024 switch.
Common Issues and Solutions:
- No Power:
- Check if the power cord is securely connected to both the switch and the power outlet.
- Verify that the power outlet is functional.
- No Link on a Port:
- Ensure the Ethernet cable is properly connected at both ends.
- Verify that the connected device is powered on and functioning correctly.
- Test with a different cable or port.
- Cannot Access Management Interface:
- If using the console port, ensure correct serial port settings (baud rate, data bits, parity, stop bits).
- If using network management, verify the switch's IP address and network connectivity.
- Check firewall settings on your management workstation.
- Overheating:
- Ensure adequate airflow around the switch.
- Clean any dust from the ventilation openings.
- Verify that internal fans are operating.
7. Technical Specifications
| Feature | Specification |
|---|---|
| Brand | Dell |
| Model | N2024 |
| Ports | 24 x 10/100/1000 Base-T, 2 x 10GbE SFP+ Uplink |
| Additional Ports | 2 x Rear-Stacking, 1 x USB Type-A, 1 x RJ45 Manage (RS232) |
| Switch Size | 1U |
| Operating System | OS6 |
| Power Source | AC (Integrated 100W PSU) |
| Item Weight | 8.14 pounds |
| Product Dimensions (LxWxH) | 22 x 20 x 6.6 inches |
8. Warranty and Support
8.1. Warranty Information
This Dell Networking N2024 switch typically comes with a No-Nonsense Next Business Day Warranty. For specific details regarding your product's warranty coverage, including duration and terms, please refer to the documentation provided at the time of purchase or contact your reseller.
8.2. Technical Support
For technical assistance, troubleshooting beyond this manual, or inquiries regarding product condition and warranty, please contact your product vendor or Dell's official support channels. You can find Dell's official support resources on their website: www.dell.com/support


