
A-Tech ATMS331398B30845X1
A-Tech 8GB DDR3L Memory Module User Manual
Model: ATMS331398B30845X1
1. Introduction
This manual provides comprehensive instructions for the installation, operation, and maintenance of your A-Tech 8GB DDR3L PC3L-14900 1866Mhz Memory Module. This module is specifically designed for compatibility with the Toshiba Satellite C55-A5310 Laptop and Notebook models, as well as other systems supporting 204-pin SO-DIMM DDR3L memory.
Upgrading your system's memory can significantly improve its multitasking capabilities and overall responsiveness. Please read this manual carefully before proceeding with installation.

A-Tech brand logo, signifying quality and reliability.
2. Setup and Installation
Installing the A-Tech memory module is a straightforward process. Always ensure your laptop is powered off and disconnected from the power source before beginning. It is recommended to discharge any static electricity by touching a grounded metal object.
2.1. Before You Begin
- Ensure your laptop model (Toshiba Satellite C55-A5310) is compatible with DDR3L SO-DIMM memory.
- Gather necessary tools: typically a small Phillips head screwdriver.
- Work on a clean, flat, and static-free surface.
2.2. Installation Steps
- Power Off and Disconnect: Shut down your laptop completely and unplug the AC adapter. Remove the battery if it is user-removable.
- Access Memory Bay: Carefully turn your laptop over. Locate the memory compartment cover, usually secured by small screws. Unscrew and remove the cover.
- Remove Existing Module (if applicable): If you are replacing an existing module, gently push the small clips on either side of the memory module outwards. The module will pop up at an angle. You can then slide it out of the slot.
- Insert New Module: Hold the A-Tech memory module by its edges, aligning the notch on the module with the key in the memory slot. Insert the module at a 45-degree angle into the slot.
- Secure Module: Gently push the module down until the clips on both sides snap into place, securing the module horizontally. Do not force it.
- Reassemble: Replace the memory compartment cover and secure it with the screws. Reinsert the battery and plug in the AC adapter.
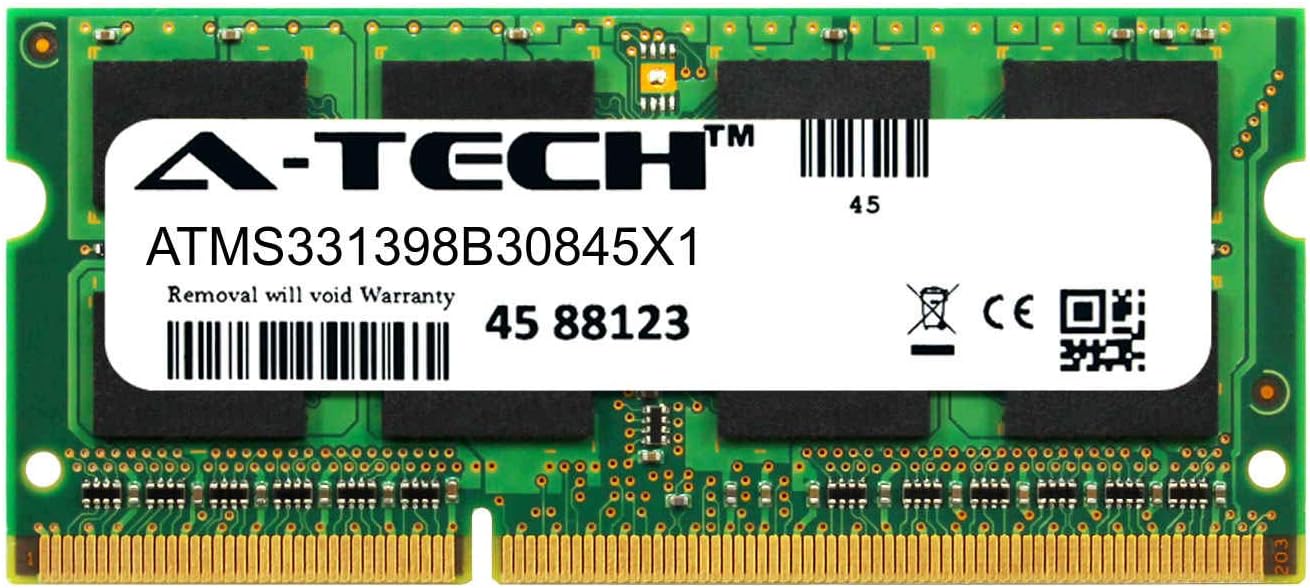
The A-Tech 8GB DDR3L PC3L-14900 1866Mhz Memory Module (ATMS331398B30845X1).

Visual representation of the easy installation process for A-Tech memory modules.

The A-Tech 8GB DDR3L Memory Module as packaged for retail.

Example of A-Tech DDR3 SODIMM modules in their protective packaging.
3. Operating Considerations
Once the memory module is successfully installed, your laptop should recognize the new memory automatically upon startup. You may notice improved system responsiveness, faster application loading times, and enhanced multitasking capabilities.
The A-Tech memory module is designed for reliable performance and is compatible with existing Samsung, Hynix, and Micron RAM modules of similar specifications. It supports both 1.35V (DDR3L) and 1.5V (DDR3) operation, adapting to your system's requirements.

An illustration depicting the performance upgrade achieved by installing A-Tech memory.

Image highlighting the broad compatibility of A-Tech memory with various laptop, Mini PC, and AIO systems.

An image emphasizing the reliability of A-Tech memory modules through extensive quality control testing.
4. Maintenance
Memory modules generally require minimal maintenance. However, following these guidelines can help ensure their longevity and optimal performance:
- Keep Components Clean: Periodically clean the interior of your laptop to prevent dust buildup, which can lead to overheating and affect component performance. Use compressed air for this purpose.
- Handle with Care: When handling memory modules, always hold them by the edges to avoid touching the gold contacts or the chips, as static electricity or oils from your skin can cause damage.
- Environmental Conditions: Operate your laptop in a well-ventilated area and avoid extreme temperatures or humidity.
5. Troubleshooting
If you encounter issues after installing your A-Tech memory module, consider the following troubleshooting steps:
5.1. Common Issues and Solutions
- Laptop Does Not Boot / Black Screen:
- Ensure the memory module is fully seated in its slot. Remove and reinsert it, making sure the clips snap into place.
- Verify that the module's notch aligns correctly with the slot's key.
- If multiple modules are installed, try booting with only the new A-Tech module, or with only the original module if you are adding to existing RAM.
- Check if your laptop's BIOS/UEFI settings need to be reset to default.
- Incorrect Memory Size Detected:
- Ensure the module is fully seated.
- Update your laptop's BIOS/UEFI to the latest version, as older versions may not fully support newer memory modules.
- Confirm that your operating system is 64-bit to utilize more than 4GB of RAM.
- System Instability / Blue Screens (BSOD):
- Run a memory diagnostic tool (e.g., Windows Memory Diagnostic) to check for errors.
- Ensure the module is compatible with your specific laptop model and existing memory (if any).
- Check for overheating issues within your laptop.
If these steps do not resolve the issue, please contact A-Tech Technical Support for further assistance.
6. Specifications
The following table details the technical specifications of the A-Tech 8GB DDR3L Memory Module:
| Feature | Specification |
|---|---|
| Module Capacity | 8GB |
| Memory Type | DDR3L (Low Voltage DDR3) |
| Form Factor | 204-pin SO-DIMM |
| Speed | 1866MHz (PC3L-14900) |
| Rank | 2Rx8 |
| Voltage | 1.35V (Dual Voltage: 1.35V or 1.5V) |
| Error Correction | Non-ECC |
| Buffering | Unbuffered |
| Model Number | ATMS331398B30845X1 |
| Manufacturer | A-Tech |
7. Warranty and Support
7.1. Lifetime Warranty
A-Tech memory modules are backed by a Genuine A-Tech Brand Lifetime Warranty. This warranty covers defects in materials and workmanship for the lifetime of the product. For detailed warranty terms and conditions, please refer to the official A-Tech website.
7.2. Technical Support
A-Tech provides toll-free technical support to assist you with any questions or issues regarding your memory module. Our support team can help with compatibility checks, installation guidance, and troubleshooting.
For technical assistance, please visit the official A-Tech website: https://atechmemory.com/
Ask a question about this manual
Ask about setup, troubleshooting, compatibility, parts, safety, or missing instructions. Manuals+ will review the question and use this page’s manual context to help answer it.