
1. Introduction
This manual provides essential instructions for the safe and efficient installation, operation, and maintenance of your Napoleon BIPRO500RBPSS-3 Built-in Prestige PRO RB Propane Gas Grill Head. This grill head is designed for outdoor use and features durable 304 stainless steel construction, multiple burners, and advanced grilling technologies.
Please read this manual thoroughly before attempting to install or operate the grill. Keep this manual for future reference.

Image 1.1: Front view of the Napoleon BIPRO500RBPSS-3 Built-in Prestige PRO RB Propane Gas Grill Head.
2. Safety Information
WARNING: For outdoor use only. Improper installation, adjustment, alteration, service, or maintenance can cause injury or property damage. Read the installation, operating, and maintenance instructions thoroughly before installing or servicing this equipment.
This product is a Propane Gas unit. Ensure your gas supply is propane. If you intend to use Natural Gas, a different model is required. Connecting a propane unit to a natural gas supply, or vice-versa, is hazardous.
Proposition 65 Warning: This product can expose you to chemicals including carbon monoxide, which is known to the State of California to cause birth defects or other reproductive harm. For more information go to www.P65Warnings.ca.gov.
- Always ensure adequate ventilation when operating the grill.
- Keep children and pets away from the grill during operation.
- Do not store or use gasoline or other flammable vapors and liquids in the vicinity of this or any other appliance.
- Never attempt to connect or disconnect the propane cylinder while the grill is operating or hot.
- It is recommended to have a licensed professional install the gas connections to ensure safety and compliance with local codes.
3. Setup and Installation
The Napoleon BIPRO500RBPSS-3 is designed for built-in installation into an outdoor kitchen island or custom enclosure. Assembly is required.
3.1 Dimensions and Clearances
Carefully measure your installation space to ensure proper fit and adequate clearances for ventilation and maintenance. The product dimensions are 25"D x 32.5"W x 24"H.

Image 3.1: Dimensional diagram of the grill head, indicating a width of 32.5 inches, height of 24 inches, and depth of 25 inches.
3.2 Gas Connection
This grill head requires a propane gas supply. The gas hose typically comes with a 3/8-inch female connection. It is crucial to ensure you have the correct regulator and coupling fitting for your 20 lb. propane tank. These parts may not be included with the grill head and must be acquired separately to ensure a safe and proper connection.
Important: Napoleon discourages the installation of the propane tank directly underneath the grill head due to safety considerations. Consult a licensed professional for proper installation of gas lines and connections, especially for built-in applications.
3.3 Electrical Connection
The grill requires a 120 Volt electrical connection for features such as the integrated LED Spectrum Night Lights and ignition system. Ensure a properly grounded electrical outlet is available near the installation site.

Image 3.2: Example of the grill head integrated into an outdoor kitchen setup.
4. Operating Instructions
4.1 Ignition System
The grill features a unique Flame Throwing ignition system for reliable startup. To ignite a burner:
- Ensure the propane tank valve is fully open.
- Push and turn the desired control knob to the HIGH position.
- The Flame Throwing ignition will generate a flame to light the burner.
- Verify the burner is lit by looking through the cooking grates.
- If the burner does not light within 5 seconds, turn the control knob to OFF, wait 5 minutes for gas to dissipate, and repeat the process.

Image 4.1: The Flame Throwing ignition system in action, showing a flame igniting the burner.
4.2 Main Grilling Burners
The grill is equipped with four main grilling burners, each rated for a 12,000 BTU maximum. These burners feature solid 304 stainless steel tube construction for durability. Stainless steel sear plates are positioned above the burners to protect them and provide even heat distribution across the 500-square-inch grilling surface, minimizing hot and cold spots.
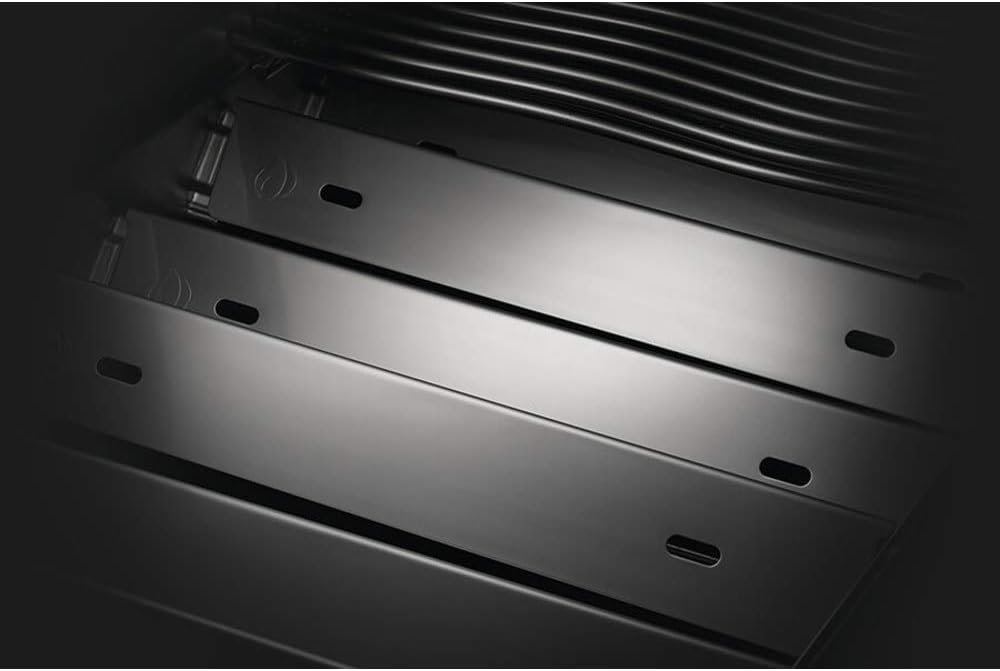
Image 4.2: View of the stainless steel sear plates designed for even heat distribution.
4.3 Infrared Rear Burner
An 18,000 BTU infrared rear burner is included for rotisserie cooking. This burner provides intense, even heat ideal for searing and slow-roasting meats on the rotisserie kit.

Image 4.3: Rotisserie cooking in progress, utilizing the infrared rear burner.
4.4 Cooking Grates
The grill features patented "S" style wave grill grates made from 9.5mm thick 304 stainless steel. These grates are designed for durability and to create distinctive grill marks.

Image 4.4: Detail of the Napoleon "S" style wave cooking grates.
4.5 Control Knobs and Lighting
The SafetyGlow control knobs illuminate blue when off and turn red when the burners are in use, providing a visual safety indicator. Integrated LED Spectrum Night Lights offer customizable color options for enhanced visibility and ambiance during evening cooking.
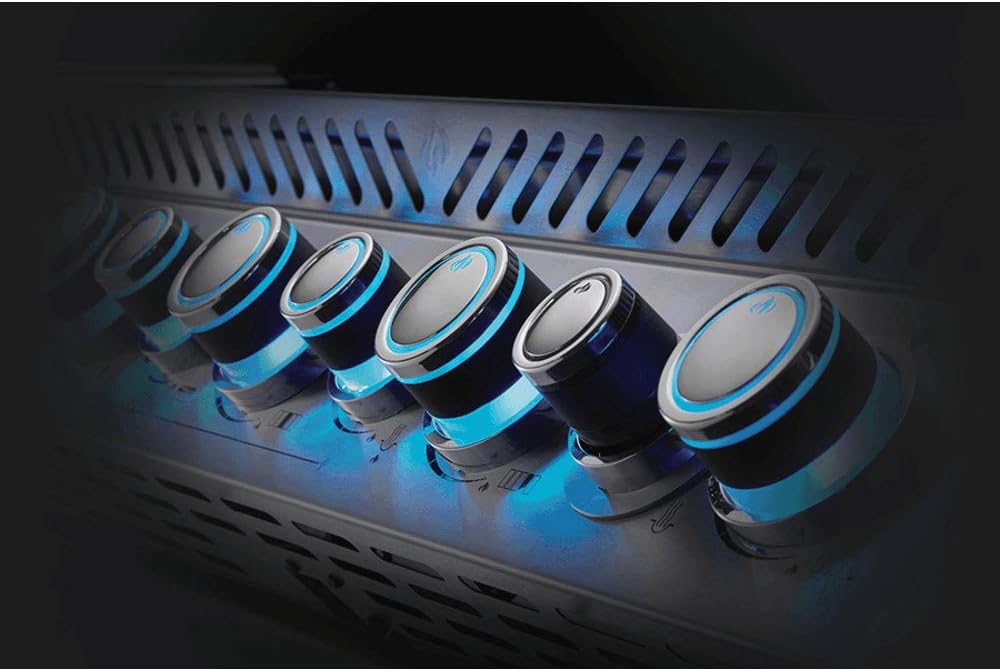
Image 4.5: The SafetyGlow control knobs illuminated in blue.
4.6 Accu-Probe Temperature Gauge
The integrated Accu-Probe temperature gauge provides accurate internal grill temperature readings, assisting in precise cooking control.

Image 4.6: The Accu-Probe temperature gauge displaying temperature readings.
4.7 Interior Lighting
The grill features interior lighting to illuminate the cooking surface, improving visibility during nighttime use.

Image 4.7: The grill's interior light providing illumination over the cooking grates.
5. Maintenance
Regular maintenance ensures the longevity and optimal performance of your grill.
5.1 Cleaning Stainless Steel Surfaces
- Clean stainless steel surfaces with a mild soap and water solution, then rinse thoroughly and dry with a soft cloth to prevent water spots.
- For stubborn stains, use a non-abrasive stainless steel cleaner, always rubbing in the direction of the grain.
- Avoid using abrasive cleaners, steel wool, or harsh chemicals, as these can scratch or damage the finish.
5.2 Cleaning Cooking Grates and Sear Plates
- After each use, while the grill is still warm, brush the cooking grates with a stiff-bristled grill brush to remove food residue.
- Periodically remove the cooking grates and sear plates for a more thorough cleaning. Wash them with warm, soapy water and rinse well.
5.3 Burner Maintenance
- Inspect burner ports regularly for blockages (e.g., from insects or food debris). Use a wire brush or paper clip to clear any obstructions.
- Ensure burner tubes are free of spider webs or other blockages that can impede gas flow.
6. Troubleshooting
This section addresses common issues you might encounter with your grill.
6.1 Burner Not Lighting
- Check Gas Supply: Ensure the propane tank valve is fully open and the tank contains sufficient fuel.
- Ignition System: Verify the Flame Throwing ignition is sparking. If not, check the 1.5V AAA battery (included components) and replace if necessary.
- Burner Ports: Inspect burner ports for blockages. Clean as described in the Maintenance section.
- Gas Hose/Regulator: Ensure the gas hose is not kinked and the regulator is properly connected and functioning.
6.2 Uneven Heating
- Sear Plates: Ensure sear plates are clean and correctly positioned over the burners.
- Burner Ports: Check for partially blocked burner ports that could cause uneven flame.
6.3 LED Controller Issues
If the LED Spectrum Night Lights or SafetyGlow knobs are not functioning correctly, check the electrical connection. If issues persist, contact customer support.
7. Specifications
| Feature | Specification |
|---|---|
| Brand | Napoleon |
| Model Name | Built-in Prestige PRO™ 500 RB |
| Item Model Number | BIPRO500RBPSS-3 |
| Product Dimensions | 25"D x 32.5"W x 24"H |
| Installation Type | Built-In |
| Material | Stainless Steel |
| Finish Type | Stainless Steel |
| Item Weight | 135.8 pounds |
| Fuel Type | Propane Gas |
| Main Burners | 4 (12,000 BTU each) |
| Infrared Rear Burner | 1 (18,000 BTU) |
| Total Heating Elements | 5 |
| Cooking Surface Area | 493.5 Square Inches |
| Voltage | 120 Volts |
| Assembly Required | Yes |
| Included Components | Grill Head, Cooking Grids (2), Side Shelf, Warming Rack, Rotisserie Kit, Manual, 1.5V AAA Battery |
8. Warranty and Support
The Napoleon BIPRO500RBPSS-3 Built-in Prestige PRO RB Propane Gas Grill Head is backed by Napoleon's President's Limited Lifetime Warranty. This includes a Bumper to Bumper Lifetime Warranty, covering parts for 15 years and lifetime coverage for major components.

Image 8.1: Napoleon's Lifetime Warranty Bumper to Bumper badge.
For warranty claims, technical assistance, or to inquire about replacement parts, please contact Napoleon customer service. Ensure you have your model number (BIPRO500RBPSS-3) and proof of purchase available when contacting support.