Introduction
The Thule Evo Clamp Foot Pack is designed to provide a secure and versatile foundation for your Thule Evo roof rack system on vehicles without pre-existing roof rack attachment points or factory-installed racks. This manual provides essential information for proper setup, operation, and care of your foot pack.
Components
The Thule Evo Clamp Foot Pack includes the following components:
- Set of 4 load carrier feet
- Ergonomic torque limiter key
- Click-in mounting brackets
- Instruction sheet with vehicle-specific measurements

Figure 1: Thule Evo Clamp Foot Pack components.
This image displays the four individual foot pack units, showcasing their robust design and the Thule branding.
Setup and Installation
The Thule Evo Clamp Foot Pack is designed for quick assembly and installation without additional tools, aside from the included torque limiter key. Vehicle-specific measurements are crucial for proper fitment.
Step 1: Prepare the Foot Pack
Ensure all four feet are ready for installation. The foot pack is designed to be easily installed onto vehicles without pre-existing roof rack attachment points.
Step 2: Access Adjustment Mechanism
Locate the protective plate on the foot pack. This plate can be turned with a coin to access the internal adjustment mechanism. Note: Thule One-Key locks (sold separately) can be installed here for added security.
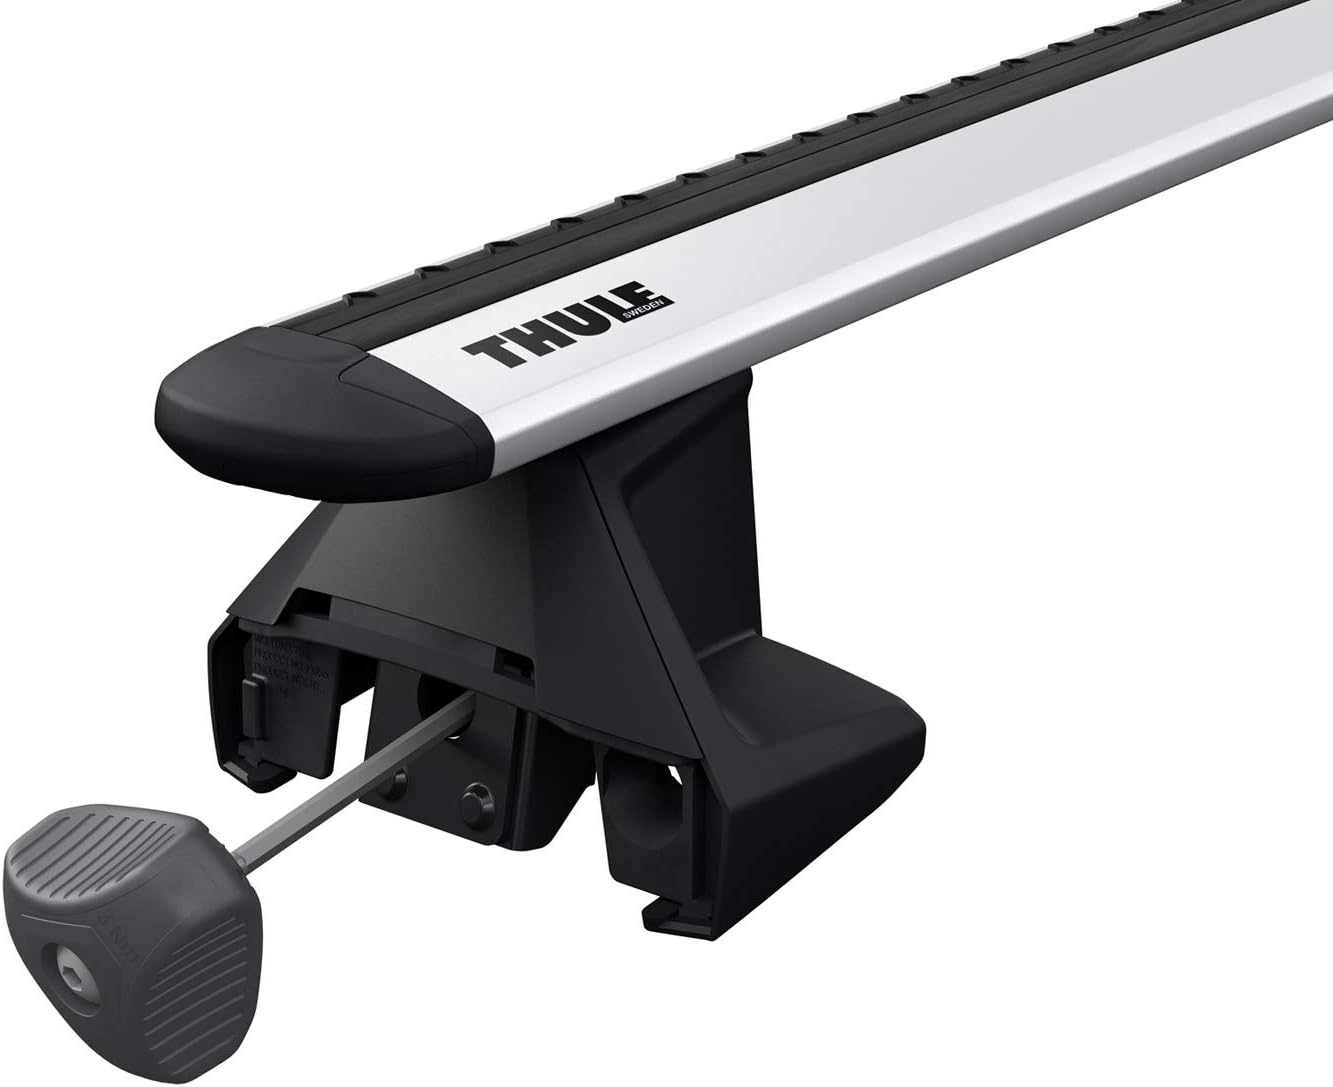
Figure 2: Accessing the adjustment mechanism with the torque limiter key.
The image shows a close-up of the Thule Evo foot, highlighting the circular access point where the torque limiter key or an optional lock cylinder is inserted.
Step 3: Adjust and Secure to Vehicle
Use the included ergonomic torque limiter key to loosen or tighten the clamping mechanism. This key indicates when the rack is safely and properly secured to your vehicle, ensuring even pressure distribution. Refer to your vehicle-specific instruction sheet for precise measurements (e.g., distance between bars and distance from windshield).

Figure 3: Thule Evo Clamp Foot securely attached to the vehicle's roofline.
This image illustrates a single Thule Evo foot clamped onto the side rail of a vehicle's roof, demonstrating its secure fit.
Step 4: Attach Load Bars (Sold Separately)
Once the feet are securely installed, attach your Thule WingBar Evo, Thule AeroBlade, Thule SquareBar, or Thule ProBar load bars (sold separately) to the foot pack. The click-in mounting brackets facilitate quick assembly.

Figure 4: Complete Thule Evo Roof Rack System installed.
The image shows a full roof rack system, including two load bars and four foot packs, installed on a vehicle's roof, ready for use.
Operating Instructions
The Thule Evo Clamp Foot Pack forms the base of your roof rack system. Once installed, it allows for the attachment of various Thule accessories such as cargo boxes, bike carriers, or kayak carriers.
Load Capacity
The maximum load capacity for the Thule Evo Clamp Foot Pack is 165 lb (75 kg). Always verify the maximum roof load capacity of your specific vehicle, as this may be lower than the rack's capacity. Distribute weight evenly across the load bars.
Accessory Attachment
Thule accessories can be attached by sliding them into the T-track of compatible load bars or by clamping them over the bar, depending on the accessory design. Refer to the instructions provided with your specific Thule accessory for detailed attachment procedures.
Maintenance
Regular maintenance ensures the longevity and safe operation of your Thule Evo Clamp Foot Pack.
- Cleaning: Clean the feet and clamping surfaces regularly with mild soap and water. Avoid abrasive cleaners that could damage the finish or rubber pads.
- Inspection: Periodically inspect all components for signs of wear, damage, or corrosion. Ensure all bolts and clamps are securely tightened, especially after initial installation and before long trips.
- Storage: If not in use for extended periods, it is recommended to remove the foot pack and load bars from your vehicle. Store them in a dry, protected area to prevent environmental damage.
Troubleshooting
Issue: Rack feels loose after installation.
Solution: Re-check the tightness of all four clamping mechanisms using the torque limiter key. Ensure the key clicks, indicating proper torque. Verify that the foot pads are correctly seated on the vehicle's roofline according to the vehicle-specific instructions.
Issue: Difficulty installing or removing the foot pack.
Solution: Ensure the clamping mechanisms are fully loosened before attempting removal or installation. Refer to the detailed instructions provided with your specific fit kit for proper alignment and technique. Sometimes, slight adjustments to the foot pads' position are needed for a perfect fit.
Issue: Excessive wind noise.
Solution: While the Thule WingBar Evo is designed to minimize noise, some wind noise can occur. Ensure the load bars are correctly positioned and that any T-track covers are properly installed. If using other load bars, ensure they are compatible and correctly installed.
Specifications
| Feature | Detail |
|---|---|
| Brand | Thule |
| Model Name | Evo |
| Part Number | 710501 |
| Color | Black |
| Mounting Type | Rack |
| Included Components | 4 pack of feet |
| Maximum Load | 165 lb (75 kg) |
| Compatible Load Bars | Thule WingBar Evo, Thule AeroBlade, Thule SquareBar, Thule ProBar |
| Item Dimensions (L x W x H) | 1 x 1 x 1 inches (approximate) |
| Package Weight | 2.65 Kilograms |
Warranty & Support
The Thule Evo Clamp Foot Pack comes with a Limited Lifetime Warranty. For warranty claims, product support, or to find a certified Thule dealer, please visit the official Thule website or contact their customer service.
For further assistance, refer to the Thule Buyer's Guide to ensure compatibility with your vehicle and to explore additional accessories.
Thule Official Website: www.thule.com


