
Introduction
This manual provides detailed instructions for assembling the Italeri 2783S 1:48 scale Panavia Tornado IDS/GR.1 Gulf War plastic model kit. Please read all instructions carefully before beginning assembly. This kit is designed for model enthusiasts and requires gluing and painting.
Safety Information
WARNING: SMALL PARTS. This model kit contains small parts which may pose a choking hazard. Not suitable for children under 3 years. Adult supervision is recommended during assembly. Always use modeling tools and adhesives in a well-ventilated area. Avoid contact with eyes and skin. Refer to the safety instructions of any glues, paints, or solvents used.
Package Contents
Your Italeri 2783S model kit package should contain the following components:
- Plastic sprues with model parts
- Decal sheet
- Illustrated instruction booklet
Note: Adhesives, paints, and tools are not included and must be purchased separately.
Assembly Instructions
Follow the numbered steps in the included instruction booklet. Use a sharp hobby knife or sprue cutters to carefully remove parts from the sprues. Clean any excess plastic (flash) with a hobby knife or fine sandpaper. Test fit parts before applying adhesive.
Sprue Layout Overview
Familiarize yourself with the parts layout on the plastic sprues:

Image 1: Sprue with main fuselage sections, various missiles, bombs, and external fuel tanks. These parts form the core structure and armament of the Tornado model.

Image 2: Sprue featuring cockpit details, landing gear components, and additional smaller fuselage parts. These are crucial for the interior and undercarriage assembly.

Image 3: Sprue with the main wing sections and tail stabilizers. These parts define the aircraft's aerodynamic profile.
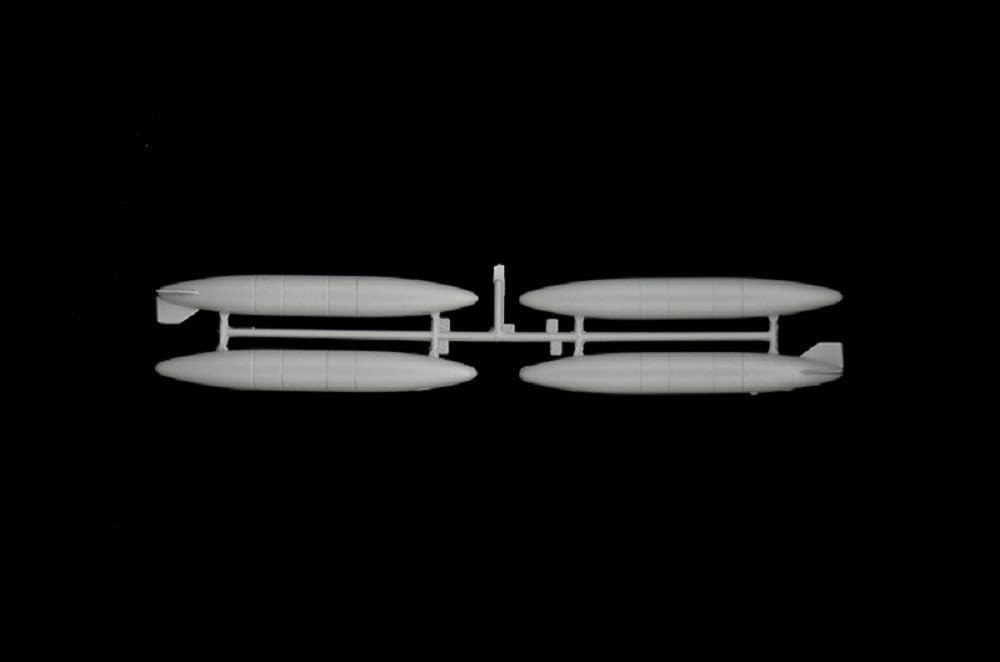
Image 4: Sprue dedicated to additional external fuel tanks, providing options for different loadouts.
General Assembly Steps:
- Cockpit Assembly: Assemble the cockpit components, including seats, control panels, and pilot figures (if included). Paint these parts before gluing them into the fuselage.
- Fuselage Assembly: Join the fuselage halves, ensuring proper alignment. Secure with model adhesive. Allow sufficient drying time.
- Wing and Tail Assembly: Attach the wings and tail sections to the main fuselage. Pay attention to the variable geometry wing mechanism if applicable to ensure smooth movement.
- Landing Gear: Assemble and attach the landing gear. Decide whether to build the model with landing gear extended or retracted.
- External Stores: Assemble and attach weapons, external fuel tanks, and other ordnance as desired.
- Final Details: Add smaller details such as antennas, pitot tubes, and clear canopy parts. Mask the canopy before painting.
Painting and Decal Application
Painting should be done after major assembly steps but before applying decals. Refer to the provided paint schemes for color guidance. Use acrylic or enamel model paints.
Decal Sheet Overview
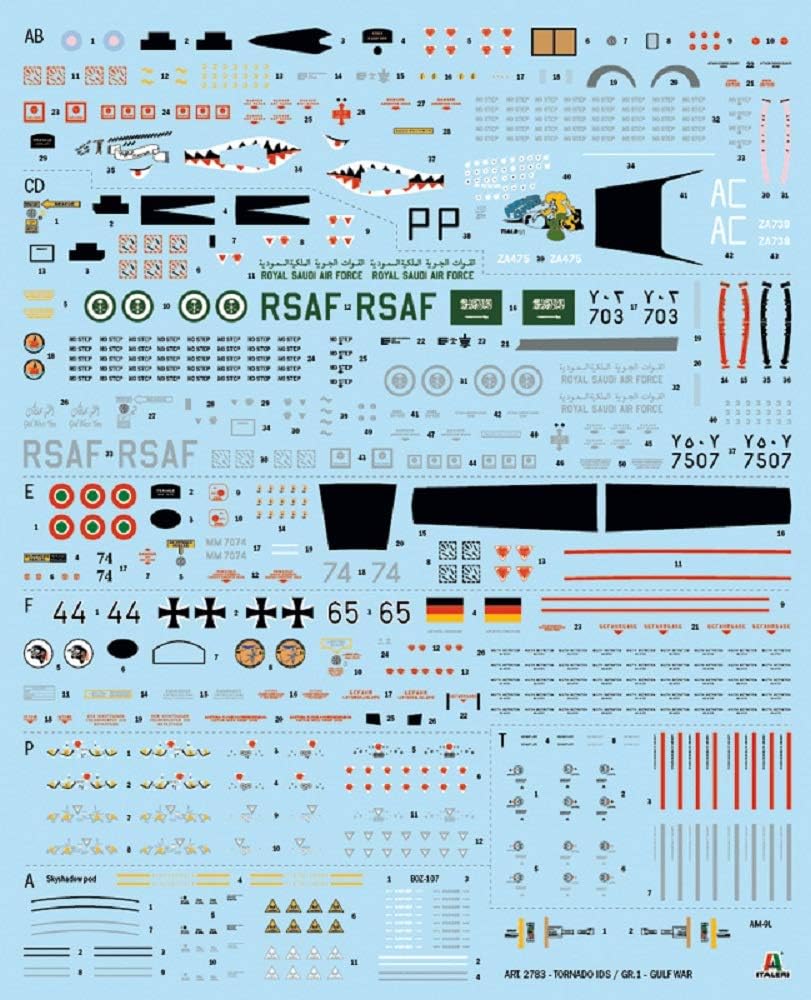
Image 5: Comprehensive decal sheet providing markings for multiple versions of the Panavia Tornado, including national insignia, squadron badges, and stencils.
Paint Schemes
The kit includes options for several historical paint schemes:

Image 6: Version A: Panavia Tornado GR.1, ZA 475(P) "Triffid Airways" Royal Air Force, Muharraq AB 1991. Colors: Desert Pink Sand (F.S. 33531) and Flat Black (F.S. 37038).

Image 7: Version C: Panavia Tornado GR.1 n°703, 7th Sq. RSAF (Royal Saudi Air Force), Lossiemouth AB, "Saudi Sword" exercise, 2007. Colors: Flat Sand (F.S. 33448), Flat Dark Earth (F.S. 30118), Flat Dark Green (F.S. 34079), and Flat Black (F.S. 37038).

Image 8: Version E: Panavia Tornado IDS, MM7074 - Italian Air Force, Al Dhafra AB, 1991. Colors: Flat Black (F.S. 37038), Flat Sand (F.S. 33448), and Flat Aluminium (F.S. 37178).
Decal Application Steps:
- Ensure the painted surface is clean, smooth, and glossy. A clear gloss coat is recommended.
- Cut out each decal individually, as close to the edge of the design as possible.
- Dip the decal in lukewarm water for 10-20 seconds until it slides freely on its backing paper.
- Carefully slide the decal onto the desired position on the model.
- Gently blot away excess water with a soft cloth or cotton swab.
- Use a decal setting solution to help the decal conform to surface details and eliminate silvering.
- Once dry, apply a clear matte or satin coat to seal the decals and unify the finish.
Display and Care
Once assembled and painted, your model is ready for display. To maintain its appearance:
- Display the model in a cool, dry place away from direct sunlight to prevent fading and warping.
- Avoid extreme temperature changes.
- Dust regularly with a soft, dry brush or a gentle air blower. Do not use harsh chemicals or abrasive materials for cleaning.
- Handle the model carefully to prevent damage to delicate parts.
Troubleshooting Common Issues
- Parts not fitting: Ensure all sprue gates and flash are removed. Gently sand or trim parts for a better fit.
- Gaps in seams: Use model putty to fill any gaps after gluing, then sand smooth before painting.
- Decal silvering: This occurs when air is trapped under the decal. Apply a gloss coat before decals and use a decal setting solution to help them conform.
- Paint issues: Ensure surfaces are clean and primed. Apply paint in thin coats to avoid brush strokes or loss of detail. Allow adequate drying time between coats.
Specifications
| Brand: | Italeri |
| Model Name: | Tornado Size 1/IDS-Gulf War |
| Model Number: | 2783S |
| Scale: | 1:48 |
| Material Type: | Plastic |
| Recommended Age Range: | Child, Adult |
| Paint Type: | Acrylic or enamel |
| Item Weight: | 0.39 kg |
| Item Dimensions (L x W x H): | 6 x 34.5 x 24 inches (packaging) |
Warranty and Support
This product is a model kit and does not typically come with an operational warranty. For missing or defective parts, please contact Italeri customer support directly. Refer to the packaging for contact information or visit the official Italeri website.