
Introduction
Thank you for choosing TORCHSTAR 6 Inch Slim Recessed Lighting. This manual provides essential information for the safe and efficient installation, operation, and maintenance of your new lighting fixtures. Please read these instructions carefully before installation and retain them for future reference.
These ETL & Energy Star & FCC & T24 certified LED recessed lights are designed for various applications, including closets, attics, hallways, bathrooms, kitchens, and basements. They offer a space-saving design, requiring only 2 inches of ceiling clearance, making them suitable for retrofit, remodel, or new construction installations.

Image: Six TORCHSTAR 6-inch slim recessed lights with their accompanying junction boxes, ready for installation.
Safety Information
- Always turn off the power at the circuit breaker before beginning installation.
- Consult a qualified electrician if you are unsure about the installation process.
- Ensure all electrical connections comply with local codes and ordinances.
- Do not install in locations where the operating temperature exceeds the fixture's rating.
- This fixture is rated for IC (insulation contact) and is safe for use in damp locations.
Setup and Installation
The slim design allows for easy installation from below the ceiling. Only 2-inch clearance is required.
Components Overview

Image: A detailed diagram illustrating the components of the recessed light, including the light fixture with its snap springs for mounting and a sponge gasket for sealing, alongside the compact junction box with its dimensions.
Installation Steps
- Prepare the Ceiling: Cut a 6.10-inch (155mm) diameter hole in the ceiling at the desired location. Ensure there is at least 2 inches of clearance above the ceiling for the fixture and junction box.
- Connect Wiring: Open the junction box cover. Connect the household electrical wires (live, neutral, and ground) to the corresponding wires inside the junction box using wire nuts. Ensure secure connections.
- Secure Junction Box: Place the junction box through the cut-out hole into the ceiling cavity.
- Connect Light Fixture: Connect the light fixture's cable to the junction box's output cable using the waterproof connectors.
- Install Light Fixture: Push the spring clips on the side of the light fixture upwards and insert the fixture into the ceiling hole. The clips will automatically secure the fixture in place, holding it flush against the ceiling.
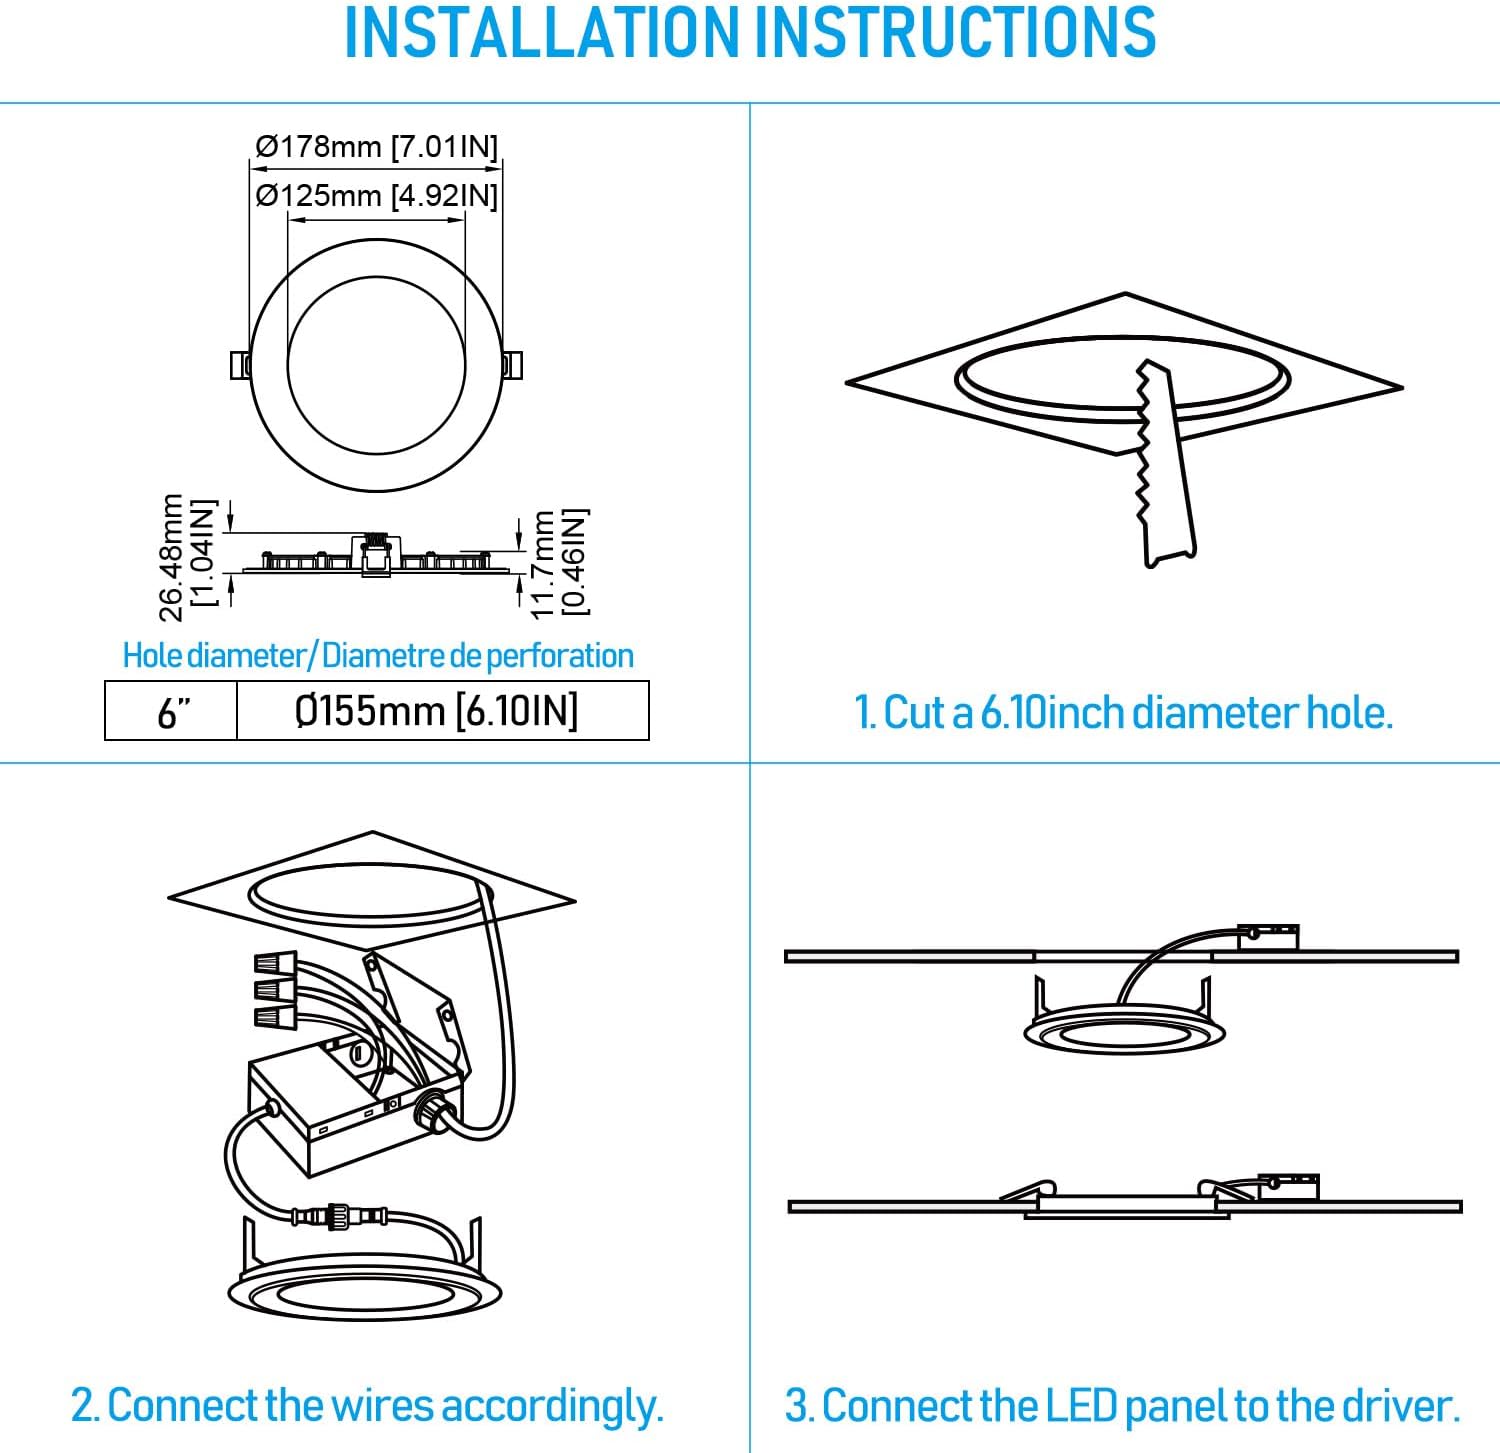
Image: A four-step diagram illustrating the installation process: 1. Cutting a 6.10-inch diameter hole. 2. Connecting the electrical wires to the junction box. 3. Connecting the LED panel to the driver (junction box). 4. Inserting the light fixture into the ceiling, where spring clips secure it.
Installation Video
Video: This video demonstrates the installation process for Ultra-Thin LED Recessed Lighting with a J-Box, showing how to connect the wires and secure the fixture in the ceiling.
Operating Instructions
Dimming Functionality
These lights offer smooth 100%-5% dimming capabilities, allowing you to adjust the brightness to suit your needs and create the desired ambiance. Ensure you use a compatible LED dimmer switch for optimal performance.
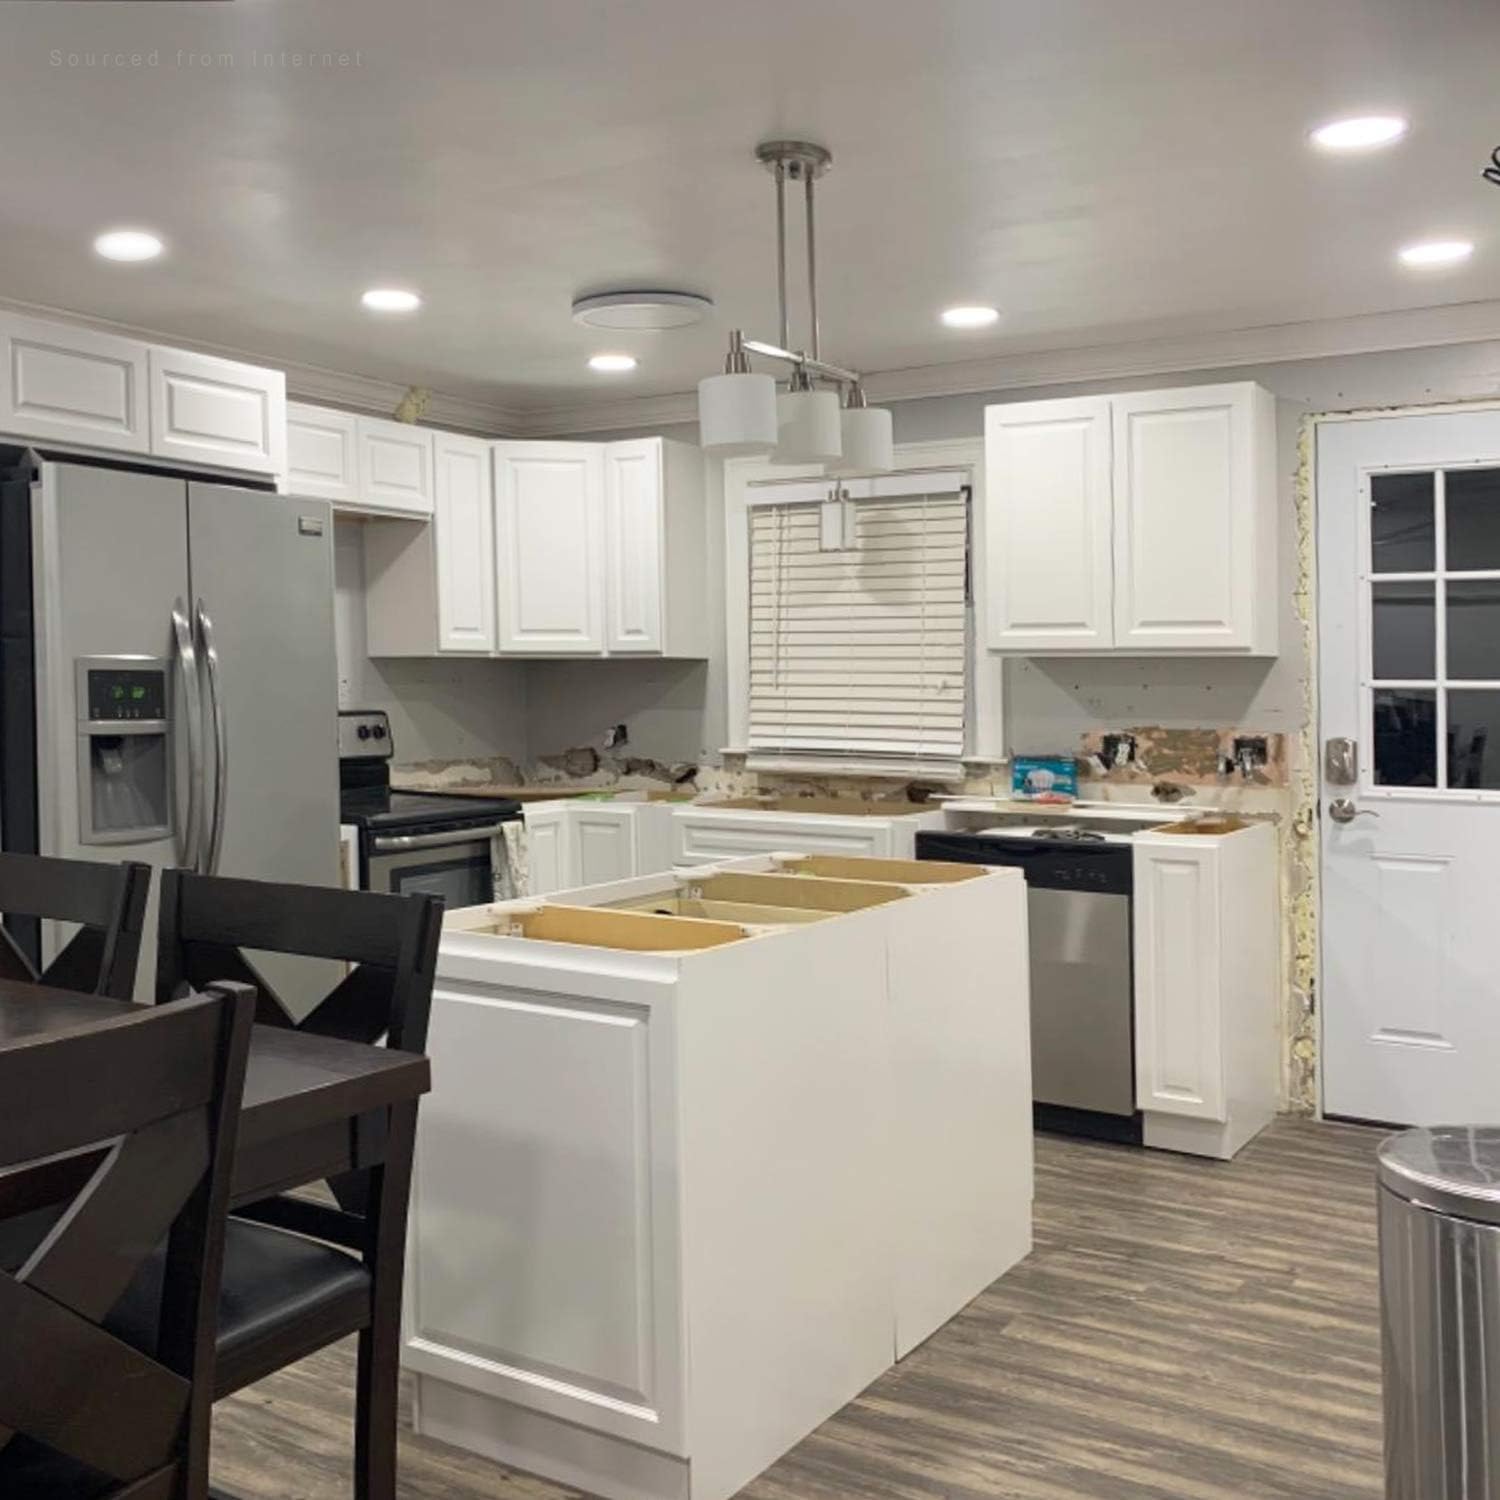
Image: A visual representation of the dimming range, showing a room illuminated by recessed lights at various brightness levels, from 5% to 100% output.
Color Temperature
This model provides 4000K Cool White light, ideal for task lighting and areas where a bright, neutral white is preferred. Other models may offer different color temperatures (2700K Soft White, 3000K Warm White, 5000K Daylight) to match various room aesthetics and functional requirements.
Operating Video
Video: This video demonstrates the dimming capabilities and adjustable color temperature settings (from 2700K to 6000K) of a similar recessed lighting product, showcasing its versatility in different environments.
Maintenance
- Cleaning: Disconnect power before cleaning. Use a soft, dry cloth to wipe the surface of the fixture. Do not use abrasive cleaners or solvents.
- Inspection: Periodically check for any loose connections or damage to the wiring. If any issues are found, consult a qualified electrician.
- No User-Serviceable Parts: The LED components are integrated and not user-replaceable. Do not attempt to disassemble the fixture.
Troubleshooting
- Light does not turn on:
- Check if the power is on at the circuit breaker.
- Verify all wire connections are secure.
- Ensure the light fixture is properly connected to the junction box.
- Light flickers or dims unexpectedly:
- Confirm that a compatible LED dimmer switch is being used.
- Check for loose wiring connections.
- Light is not bright enough:
- Ensure the dimmer switch is set to the maximum brightness level.
- Consider the room size and the number of fixtures installed; additional fixtures may be needed for larger areas.
Specifications
| Attribute | Value |
|---|---|
| Brand | TORCHSTAR |
| Model Number | R1-SJ1DL6D-12W40-6P |
| Power | 12W (100W Equivalent) |
| Luminous Flux | 850lm |
| Color Temperature (CCT) | 4000K Cool White |
| Dimmable | Yes (100%-5%) |
| Lifespan | 50,000 hours |
| CRI | >90 |
| Beam Angle | 110° |
| Material | Aluminum |
| Product Dimensions | 17.4 x 17.4 x 1.19 cm |
| Certifications | ETL, Energy Star, FCC, T24 |
| Installation Type | Flush Mount |
| Indoor/Outdoor Usage | Indoor |
Warranty and Support
This product comes with a 3-year product warranty, ensuring your rights and benefits. For any inquiries or support, please contact TORCHSTAR customer service.