Introduction
This manual provides essential information for the safe and efficient use of your IKEA Spolad Built-In Dishwasher, Model 804.223.55. Please read these instructions carefully before installation and operation to ensure proper functionality and longevity of the appliance.
Important Safety Instructions
To reduce the risk of fire, electric shock, or injury when using your dishwasher, follow these basic precautions:
- Read all instructions thoroughly before using the dishwasher.
- This appliance is designed for household use only.
- Do not allow children to play with or in the dishwasher.
- Use only detergents and rinse aids specifically recommended for automatic dishwashers.
- Keep dishwasher detergents and rinse aids out of the reach of children.
- Ensure the dishwasher is properly grounded according to local electrical codes.
- Do not operate the dishwasher if any parts are damaged or missing.
- Refer to the separate installation instructions for detailed guidance on electrical and plumbing connections.
Product Overview
Familiarize yourself with the main components and features of your IKEA Spolad Built-In Dishwasher.
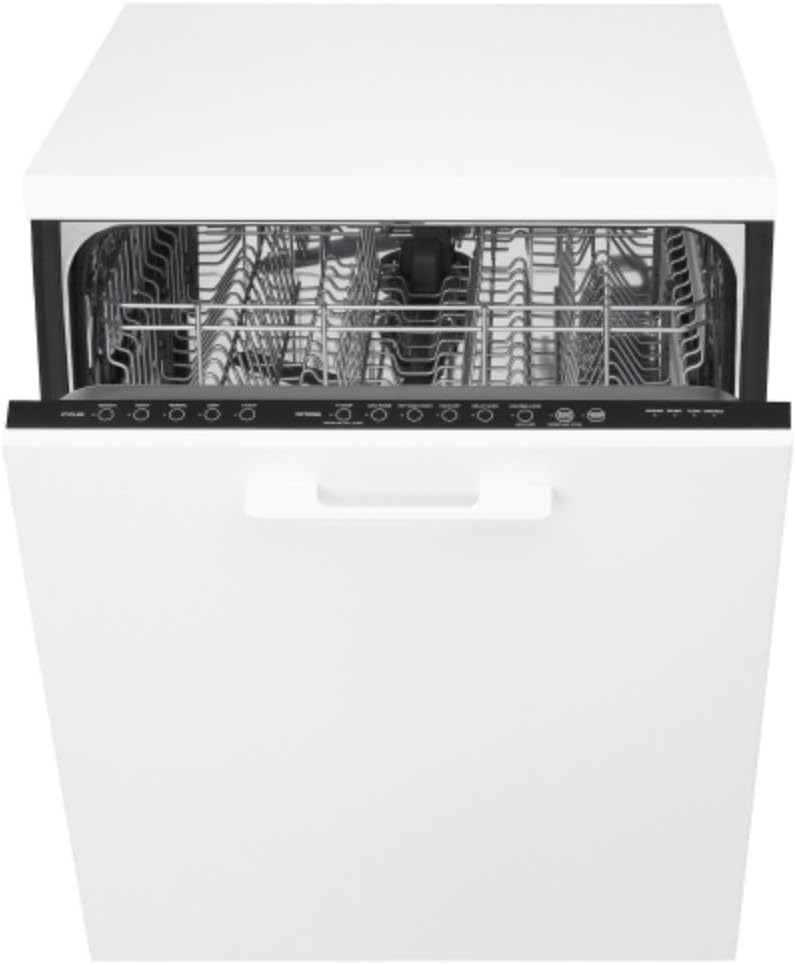
Figure 1: Front view of the IKEA Spolad Built-In Dishwasher with the door open, revealing the upper and lower dish racks. The control panel is visible along the top edge of the open door.

Figure 2: The dishwasher integrated into a white kitchen cabinet setup, with its door partially ajar, providing a view of the interior and the surrounding cabinetry.
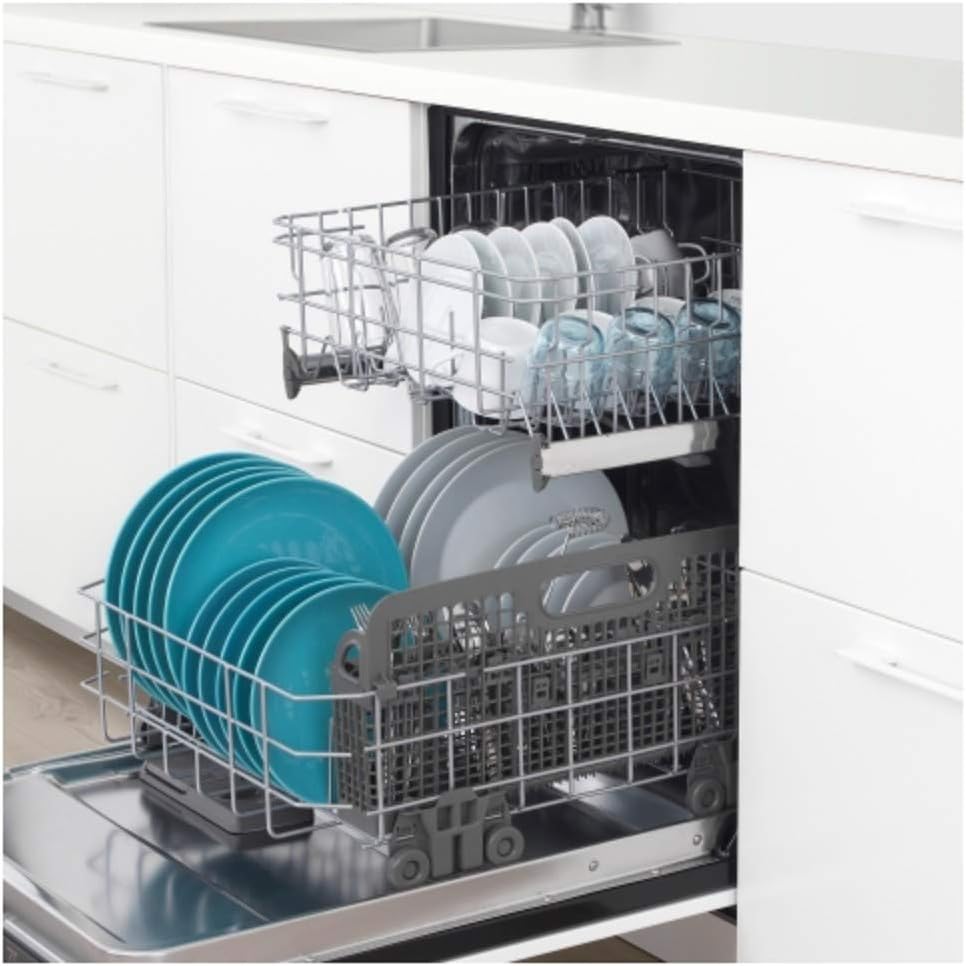
Figure 3: A clear view of the dishwasher's interior, showcasing the upper rack filled with glasses and small plates, and the lower rack holding larger plates and bowls.

Figure 4: A detailed shot of the dishwasher's control panel, located on the top edge of the door, displaying various cycle options and settings buttons.

Figure 5: This image focuses on the cutlery basket, showing how forks, knives, and spoons can be organized for washing.
Setup and Installation
The IKEA Spolad Built-In Dishwasher requires assembly and professional installation. Refer to the separate installation guide for detailed instructions on plumbing, electrical connections, and cabinet integration. Incorrect installation can lead to damage or safety hazards.
Before First Use
- Remove all packaging materials, including any protective films or internal shipping supports, from the interior of the dishwasher.
- Ensure the dishwasher is level and securely installed within its cabinet opening.
- Add dishwasher salt (if applicable to your local water hardness and dishwasher model) and rinse aid according to the dispenser instructions.
Operating Instructions
Loading the Dishwasher
Proper loading ensures optimal cleaning results and prevents damage to dishes or the appliance.
- Scrape off large food particles from dishes before loading. Pre-rinsing is generally not necessary.
- Place glasses, cups, and small bowls upside down in the upper rack.
- Arrange plates, larger bowls, and pots in the lower rack, ensuring they face the center spray arm for maximum water exposure.
- Place cutlery in the cutlery basket with handles down for forks and spoons, and handles up for knives to ensure safety and effective cleaning.
- Ensure that no items block the rotation of the spray arms.
Adding Detergent and Rinse Aid
Use only automatic dishwasher detergent. Fill the detergent dispenser according to the detergent manufacturer's instructions and the soil level of your dishes. Fill the rinse aid dispenser as needed; rinse aid helps with drying and prevents water spots on dishes.
Selecting a Wash Program
The dishwasher offers 5 distinct dish programs. Choose the program that best suits the type and amount of dishes and their soil level.
- Load the dishwasher as described above.
- Add detergent and rinse aid to their respective dispensers.
- Close the dishwasher door securely until it latches.
- Select the desired program using the control panel (refer to Figure 4 for button layout).
- Press the Start button to begin the wash cycle.
Interrupting a Cycle
To interrupt a cycle, carefully open the dishwasher door. The cycle will pause. Close the door firmly to resume the cycle from where it left off.
Maintenance and Care
Regular cleaning and maintenance will help ensure the optimal performance and longevity of your dishwasher.
Exterior Cleaning
Wipe the exterior surfaces of the dishwasher with a soft, damp cloth. Avoid using abrasive cleaners, scouring pads, or harsh chemicals, as these can damage the finish.
Interior Cleaning
Periodically clean the interior of the dishwasher, including the spray arms and filters.
- Filters: Regularly check and clean the filters located at the bottom of the dishwasher to remove accumulated food debris. Twist to remove the filter assembly, rinse it thoroughly under running water, and then reassemble it correctly.
- Spray Arms: Ensure that the small holes in the spray arms are not clogged. If necessary, remove the spray arms and clear any blockages using a small brush or toothpick.
Winterizing (if applicable)
If the dishwasher will be unused for an extended period in an unheated location where temperatures may drop below freezing, consult a qualified technician for proper winterization procedures to prevent potential damage from freezing water.
Troubleshooting
Before contacting customer service, review the following troubleshooting guide for common issues and their solutions.
| Problem | Possible Cause | Solution |
|---|---|---|
| Dishwasher does not start | Door not closed properly, power supply issue, program not selected | Ensure door is latched securely, check power connection and circuit breaker, select a wash program |
| Dishes not clean | Improper loading, clogged spray arms, insufficient detergent, wrong program selected | Reload dishes correctly, clean spray arms and filters, use correct detergent amount, select appropriate program for soil level |
| Water not draining | Clogged filter, blocked drain hose | Clean filters thoroughly, check drain hose for kinks or blockages |
| Excessive noise during operation | Improper loading (dishes hitting each other/spray arms), foreign object in pump | Ensure dishes are secure and not obstructing spray arms, check for foreign objects in the bottom of the tub |
| Spots or film on dishes | Low rinse aid level, hard water | Refill rinse aid dispenser, consider using dishwasher salt or a water softener if you have hard water |
For issues not listed here, or if problems persist after attempting these solutions, please contact IKEA customer support for further assistance.
Product Specifications
Detailed specifications for the IKEA Spolad Built-In Dishwasher Model 804.223.55.
| Feature | Detail |
|---|---|
| Model Number | 804.223.55 |
| Brand | IKEA |
| Installation Type | Built-In |
| Dimensions (W x D x H) | 23 7/8" x 24" x 33 1/2" (60.6 cm x 61.0 cm x 85.1 cm) |
| Weight | 87 lb (39.50 kg) |
| Capacity | 12 Place Settings |
| Dish Programs | 5 |
| Water Consumption | Approximately 3.5 gallons per wash (for 12 place settings) |
| Material | Plastic, Steel |
| UPC | 696305164044 |
Note: This product requires assembly.
Warranty Information and Customer Support
Limited Warranty
Your IKEA Spolad Built-In Dishwasher is covered by a 5-year Limited Warranty. Please retain your proof of purchase for all warranty claims. The warranty covers defects in material and workmanship under normal household use. For full terms and conditions, please refer to the warranty documentation provided with your purchase.
Customer Support
For technical assistance, spare parts, or warranty service, please contact IKEA customer support. Visit the official IKEA website or refer to your purchase documentation for the most current contact details.
You can find more information and support at the IKEA Brand Page on Amazon.


