
L Continue 0713072779032
L Continue Glider Bracket Hardware (4 Pack) Instruction Manual
Model: 0713072779032
Brand: L Continue
1. Introduction
This instruction manual provides essential information for the proper installation, operation, and maintenance of your L Continue Glider Bracket Hardware. Please read this manual thoroughly before use to ensure safe and effective application. This product is designed for use in various gliding mechanisms, such as those found in porch gliders, benches, and other furniture requiring a smooth gliding motion.
2. Product Overview
The L Continue Glider Bracket Hardware consists of durable components designed to facilitate smooth gliding action. Each bracket features a galvanized finish for corrosion resistance and includes integrated bearings for reduced friction.
2.1 Components
- Glider Brackets: Four (4) units of galvanized alloy steel brackets.
- Bearings: Stamped steel and ball bearings integrated into each end of the brackets.

Figure 1: Four L Continue Glider Brackets, showing their overall design and galvanized finish.
3. Specifications
| Feature | Detail |
|---|---|
| Item Package Quantity | 4 |
| Total Length | 9 inches |
| Hardware Hole Center Distance | 7-1/2 inches |
| Bolt Hole Diameter | 1/4 inch |
| Offset (Both Ends) | 1-1/32 inches (approx. 1.03 inches) |
| Material | Alloy Steel (1045 Steel Plate) |
| Finish | Bright Galvanizing |
| Item Weight (per pack) | 1.19 pounds (0.54 kg) |
| Model Number | 0713072779032 |
| UPC | 713072779032 |
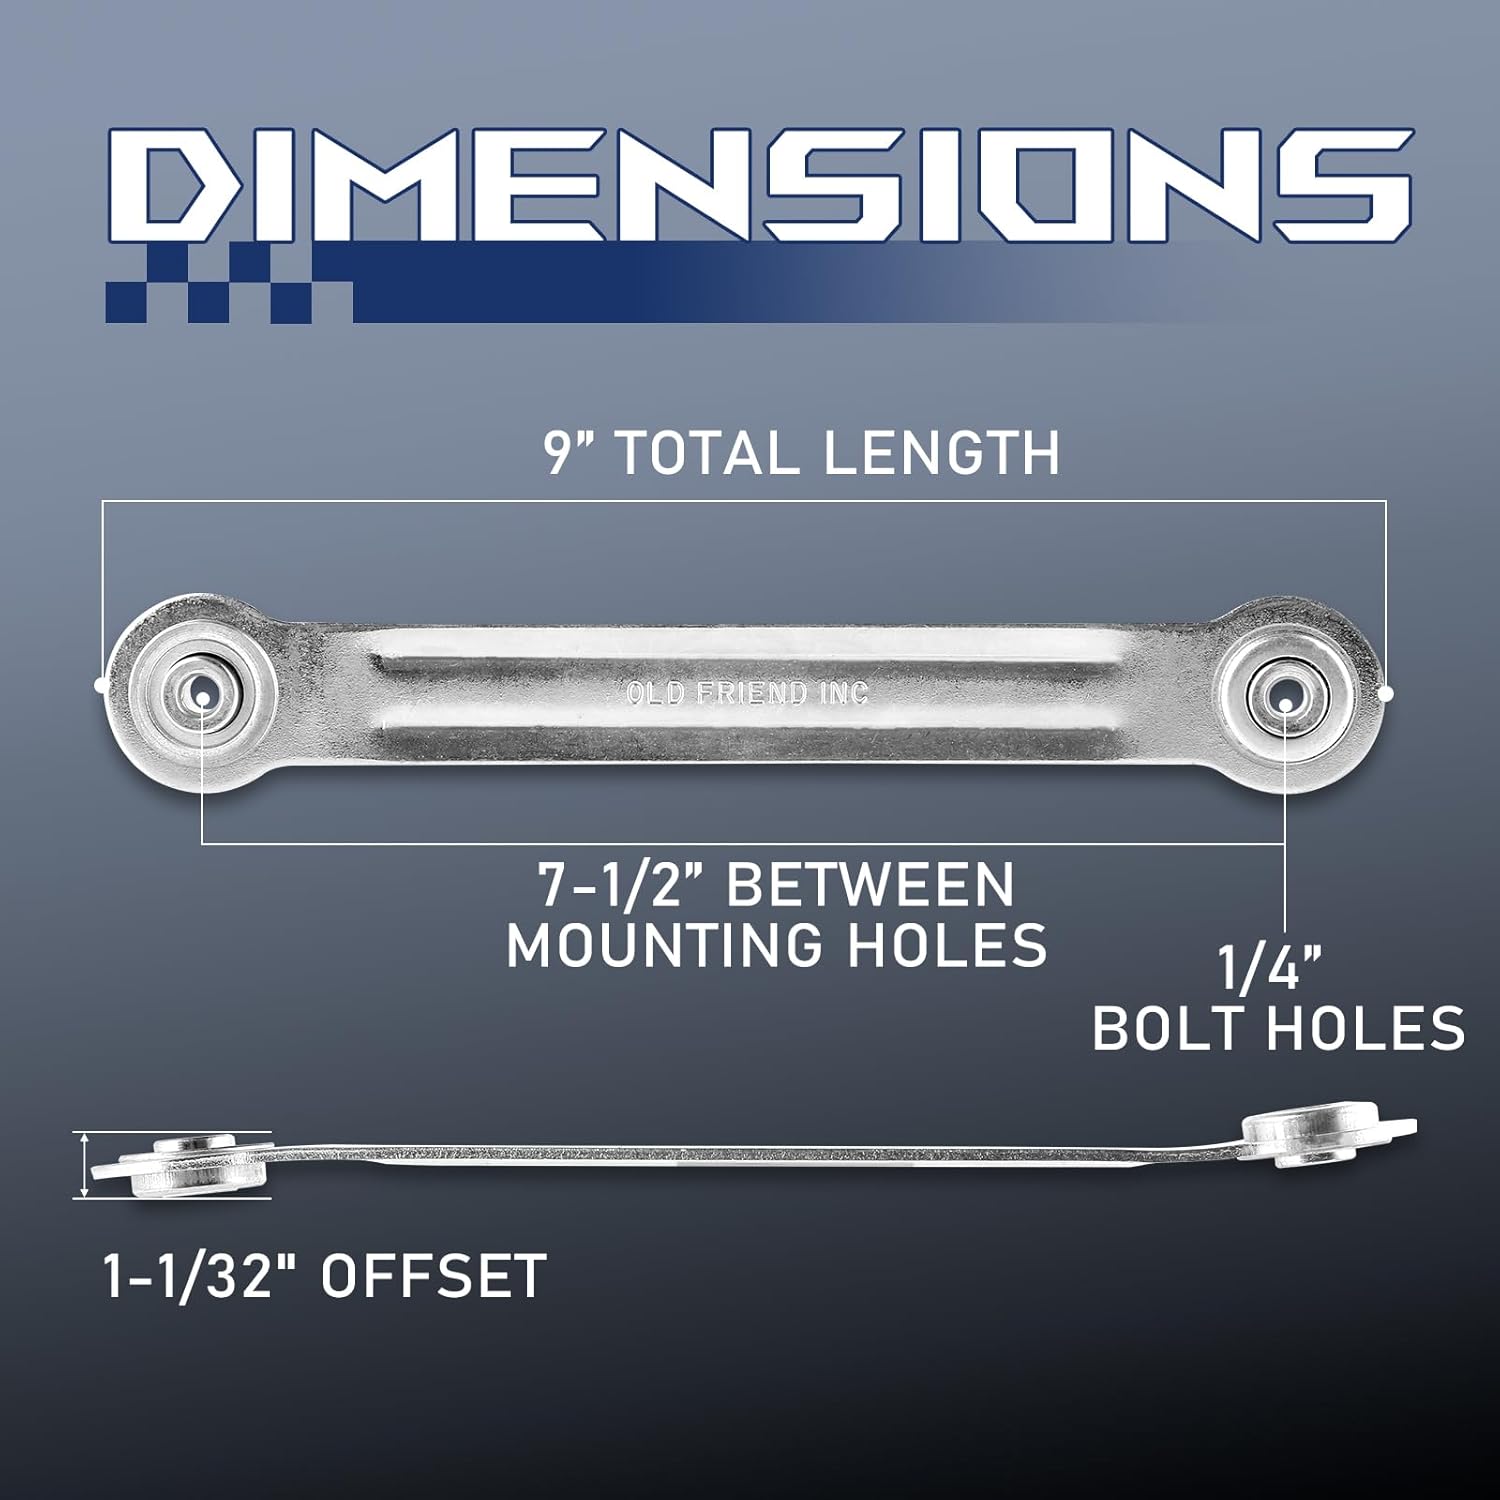
Figure 2: Detailed dimensions of the glider bracket hardware.
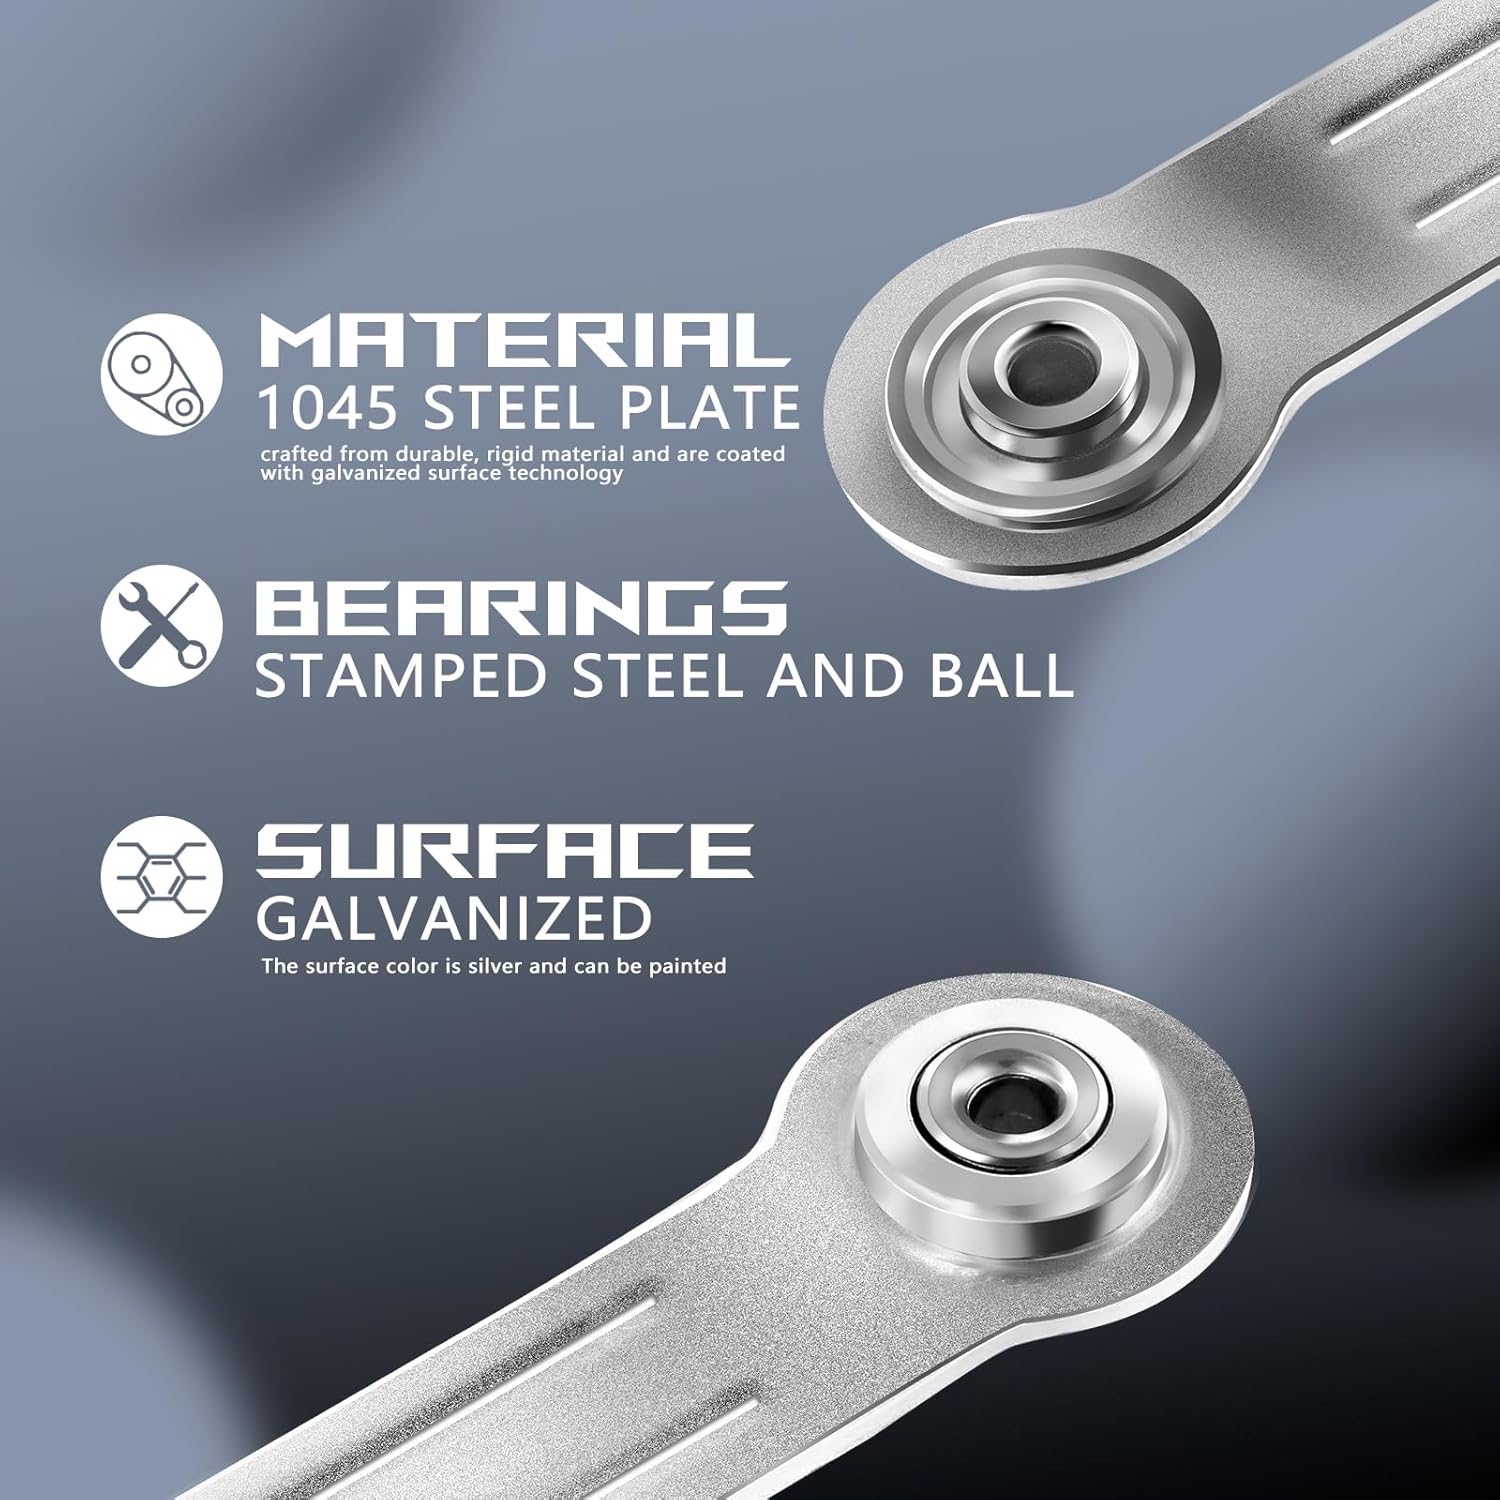
Figure 3: Material and construction details of the glider bracket.
4. Setup and Installation
Proper installation is crucial for the longevity and smooth operation of your glider. The following steps outline the general installation process. Specific furniture designs may require slight variations.
4.1 Required Tools (Not Included)
- Wrenches or socket set (for 1/4 inch bolts)
- High-quality automotive grease
- Optional: Isopropyl alcohol, primer, paint (for additional rust protection)
4.2 Installation Steps
- Prepare the Glider: Ensure the furniture frame where the brackets will be attached is clean and free of debris. If replacing old hardware, remove all existing brackets and clean the mounting areas.
- Lubricate Bearings: Before attaching, force a high-quality automotive grease into the bearings at both ends of each bracket. This lubricates the bearings and helps protect them from weather exposure.
- Align Brackets: Gently bend each end of the bracket to match the required angle on your glider. The goal is for each end to be as closely aligned with the bearings as possible, ensuring they are perpendicular to the bolt when installed. This alignment prevents side-loading and extends bearing life.
- Mount the Brackets: Position the glider brackets onto the designated mounting points on your furniture. Use 1/4 inch bolts, nuts, and lock washers (not included) to secure the brackets. Stainless steel hardware is recommended for enhanced durability and rust resistance.
- Secure Fasteners: Tighten all bolts securely, but do not overtighten, as this can damage the bearings or the furniture frame.
- Optional Rust Protection: For extended outdoor use, consider wiping the brackets (avoiding the bearings) with 91% isopropyl alcohol, priming with a self-etching primer, and painting with a high-quality outdoor spray paint.

Figure 4: Example of glider bracket installation on a bench.
5. Operation
Once installed, the L Continue Glider Bracket Hardware enables a smooth, back-and-forth gliding motion for your furniture. No specific operational steps are required beyond the natural use of the glider.
- Ensure all mounting hardware remains tight and secure during use.
- Avoid excessive force or sudden movements that could strain the brackets or bearings.
6. Maintenance
Regular maintenance helps prolong the life and performance of your glider brackets.
- Periodic Inspection: Periodically check all bolts and fasteners to ensure they are tight. Retighten as necessary.
- Bearing Lubrication: Re-lubricate the bearings annually, or more frequently if the glider is exposed to harsh weather conditions or heavy use. This prevents rust and maintains smooth operation.
- Cleaning: Clean the brackets with a damp cloth to remove dirt and grime. Avoid abrasive cleaners that could damage the galvanized finish.
- Rust Prevention: If the galvanized coating shows signs of wear or if rust appears, clean the affected area, prime, and repaint as described in the installation section to prevent further corrosion.
7. Troubleshooting
If you encounter issues with your glider brackets, refer to the following common problems and solutions:
| Problem | Possible Cause | Solution |
|---|---|---|
| Squeaking or stiff gliding motion | Lack of lubrication in bearings; misaligned brackets; loose bolts. | Apply fresh grease to bearings. Check bracket alignment and adjust if necessary. Tighten all mounting bolts. |
| Rust formation on brackets | Exposure to moisture; wear of galvanized coating. | Clean rust, prime, and repaint the affected areas. Consider additional protective coatings for outdoor use. |
| Bracket feels loose or unstable | Loose mounting bolts; damaged furniture frame. | Inspect and tighten all mounting bolts. If the furniture frame is damaged, repair or reinforce it before reattaching brackets. |
8. Warranty and Support
No specific warranty information is provided with this product. For product support or inquiries, please contact the manufacturer, L Continue, through their official channels or the retailer from whom the product was purchased.
Manufacturer: L Continue
Model: 0713072779032
UPC: 713072779032
Ask a question about this manual
Ask about setup, troubleshooting, compatibility, parts, safety, or missing instructions. Manuals+ will review the question and use this page’s manual context to help answer it.