Important Safety Information
WARNING: Before using this inversion table, consult with a licensed physician, especially if you have any pre-existing medical conditions, including but not limited to: heart disease, high blood pressure, glaucoma, retinal detachment, pregnancy, recent surgery, or bone/joint conditions. Failure to do so may result in serious injury.
- Read and understand all instructions and warnings in this manual before assembly and use.
- Ensure all parts are correctly assembled and secured before each use.
- This inversion table is designed for individuals between 4'9" (145 cm) and 6'6" (198 cm) in height.
- Maximum user weight capacity is 300 lbs (136 kg). Do not exceed this limit.
- Always use the safety belt and ensure ankle holders are securely fastened.
- Do not attempt full inversion until you are comfortable with partial inversion and can return to the upright position easily.
- Keep children and pets away from the inversion table during use.
- Use on a flat, stable surface.
Product Overview
The Dripex Heavy Duty Gravity Inversion Table is designed to provide a comfortable and effective inversion experience for back pain relief, improved circulation, and enhanced flexibility. It features a robust aluminum frame, adjustable settings for height and balance, and multiple safety mechanisms.

Figure 1: Dripex Inversion Table highlighting key benefits.
Key Features:
- Heavy-Duty Construction: Integrated steel frame for stability and durability.
- Adjustable Balance System: Allows users to fine-tune lumbar support, height, and footrest for optimal center of gravity.
- Triple Safety Protection: Includes an adjustable back pad, safety belt, rear crossbar to prevent dropping, and secure ankle holders.
- Six Angle Position Adjustment: Rear crossbar for easy inversion angle selection.
- Foldable Design: Quick folding mechanism for convenient storage.
- Comfortable Ankle Holding System: Ergonomic foam ankle holders for secure and comfortable use.
Assembly Instructions
The Dripex Inversion Table is designed for straightforward assembly. While specific step-by-step diagrams are typically provided in a separate assembly guide, the general process involves connecting the main frame components, attaching the backrest, and securing the ankle support system. All necessary tools are usually included.
It is recommended to have a second person assist during certain stages of assembly for ease and safety.
Components Included:
- Gravity Inversion Table (main frame, backrest, ankle holders)
- Assembly hardware (bolts, nuts, washers)
- Basic assembly tools (e.g., wrench, Allen key)
Ensure all components are present and undamaged before beginning assembly. Refer to the included hardware sheet for part identification.
Setup and Adjustment
1. Height Adjustment
Proper height adjustment is crucial for safe and effective inversion. The inversion table features multiple height settings to accommodate users from 4'9" to 6'6".
- Locate the height adjustment pin on the main frame.
- Pull out the pin and slide the backrest assembly up or down to match your height.
- For optimal balance, it is recommended to set the height 2-5 cm (1-2 inches) less than your actual height. This helps ensure a good control of your balance during inversion.
- Ensure the pin fully re-engages into the desired height hole before use.

Figure 2: Height adjustment system with recommended settings.
2. Ankle Holders
The ergonomic ankle holders secure your feet during inversion. Ensure they are snug but comfortable.
- Step onto the foot platform and place your ankles between the foam rollers.
- Pull the locking lever to secure the ankle holders tightly around your ankles.
- To release, pull the lever again and step off.
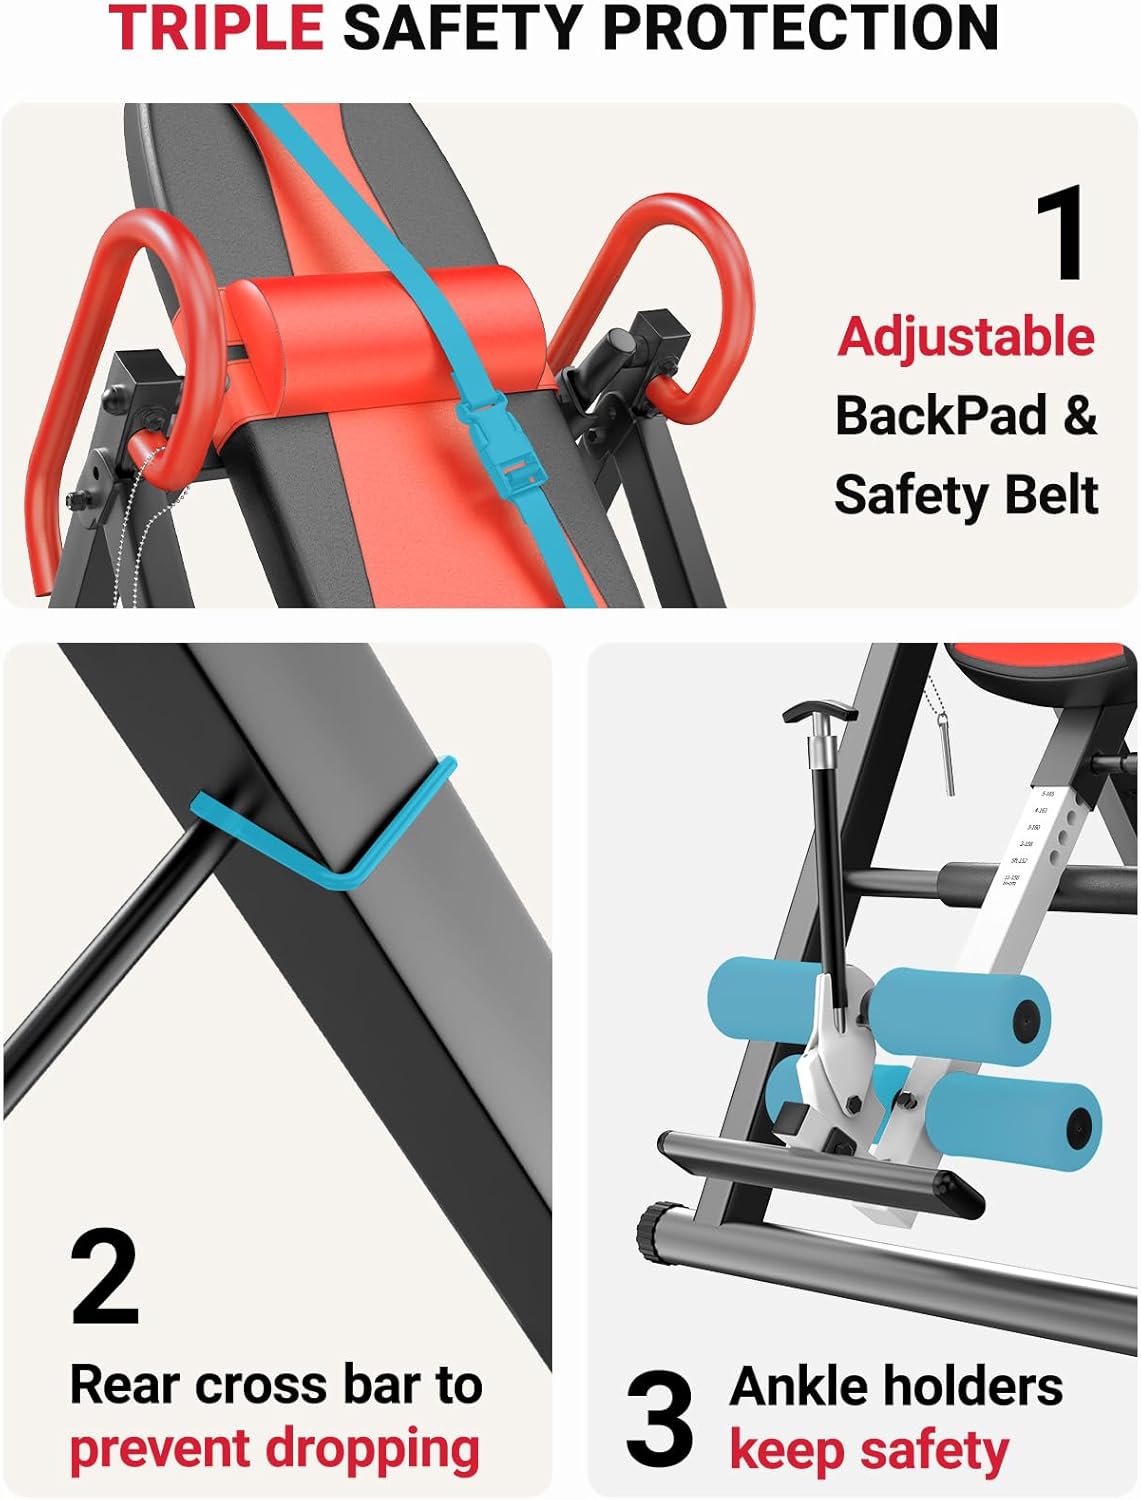
Figure 3: Ankle holders and safety belt for secure inversion.
3. Safety Belt
Always use the adjustable safety belt to prevent over-rotation and ensure additional security.
- Once seated and ankle holders are secured, fasten the safety belt across your waist.
- Adjust the belt for a snug fit, allowing for comfortable movement but preventing excessive forward lean.
4. Angle Position Adjustment
The inversion table offers six adjustable angle positions, allowing you to control the degree of inversion.
- Locate the angle adjustment bar at the rear of the table.
- Adjust the bar to the desired position to limit the maximum inversion angle. Start with a shallow angle and gradually increase as you become more comfortable.
Operating Instructions
Follow these steps for a safe and effective inversion session.
1. Getting Started
- Ensure the table is on a stable, level surface.
- Verify that the height setting is appropriate for your body.
- Check that the ankle holders and safety belt are functioning correctly.
2. Mounting the Table
- Stand facing the table with your back to the backrest.
- Step onto the foot platform and place your ankles securely into the ankle holders. Lock them in place.
- Lean back slowly onto the backrest, ensuring your body is centered.
- Fasten the safety belt across your waist.
3. Inverting
To invert, slowly raise your arms over your head. The table will begin to rotate. Control the speed of inversion by adjusting your arm movements. To return to the upright position, slowly bring your arms back down to your sides.
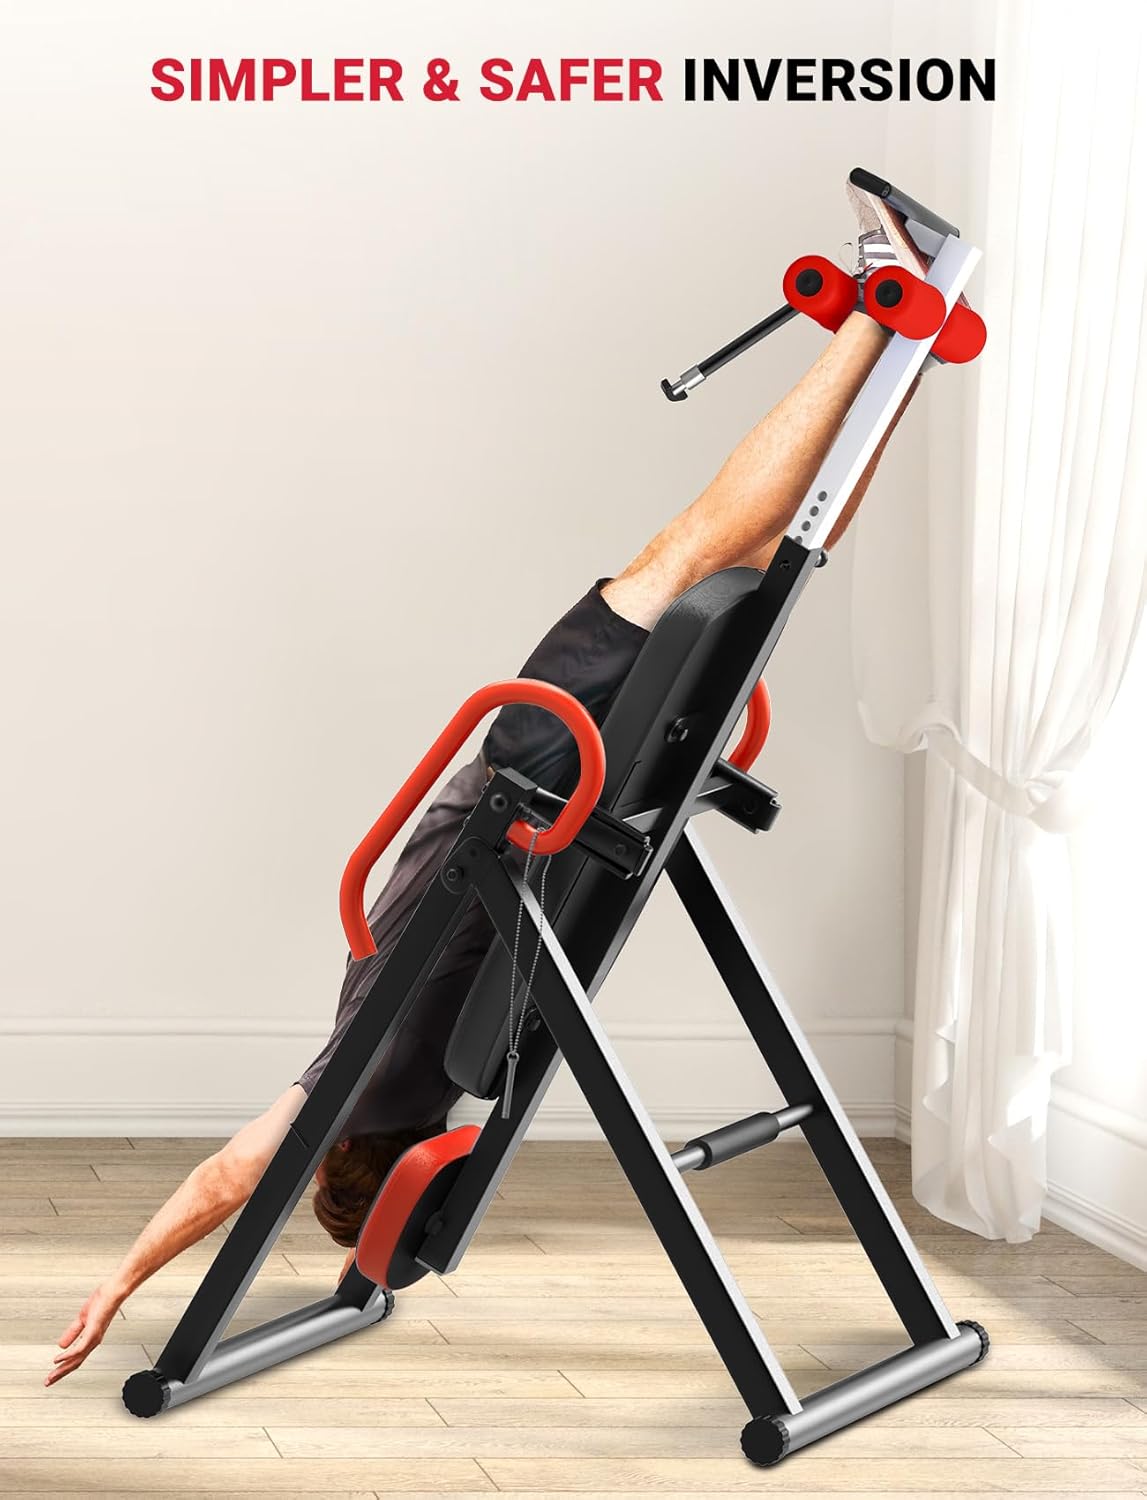
Figure 4: User demonstrating inversion on the table.
- Start with short inversion sessions (1-2 minutes) at a shallow angle.
- Gradually increase duration and angle as your body adapts.
- Listen to your body and stop immediately if you experience any discomfort or pain.
4. Dismounting
- Ensure the table is fully upright and stable.
- Unfasten the safety belt.
- Release the ankle holders by pulling the lever.
- Carefully step off the foot platform.
Maintenance
Regular maintenance ensures the longevity and safe operation of your inversion table.
- Cleaning: Wipe down the frame and padded surfaces with a damp cloth after each use. Avoid abrasive cleaners.
- Inspection: Periodically check all bolts, nuts, and moving parts for tightness and wear. Tighten any loose fasteners.
- Storage: Store the inversion table in a clean, dry place away from direct sunlight and extreme temperatures.
Troubleshooting
- Table does not invert smoothly or return to upright position easily:
Check your height setting. It might be set too high. Adjust the height setting 1-2 inches (2-5 cm) shorter than your actual height to shift your center of gravity. Ensure the ankle holders are securely fastened.
- Ankle holders feel uncomfortable or insecure:
Ensure the ankle holders are adjusted snugly around your ankles. Wear appropriate footwear (e.g., athletic shoes) for better comfort and grip. If the belt is too short, as noted by some users, consider using an extension or contacting customer support.
- Squeaking or unusual noises during operation:
Inspect all pivot points and bolted connections. Apply a small amount of silicone-based lubricant to moving parts if necessary. Ensure all bolts are tightened.
Specifications
| Model Name | Inversion table modelA |
| Model Number | A3 |
| Brand | Dripex |
| Material | Aluminum |
| Color | Red02 |
| Item Dimensions (LxWxH) | 45.28 x 31.1 x 59.84 inches |
| Package Weight | 25.2 Kilograms |
| Max User Weight Capacity | 300 lbs |
| Suggested User Height | 4'9" to 6'6" (approx. 145cm to 198cm) |
| Model Year | 2020 |
Folding and Storage
The Dripex Inversion Table is designed to fold quickly for convenient storage, making it suitable for home use even in limited spaces.
- Ensure the table is in the fully upright position.
- Locate the folding pin or mechanism (often near the base or main pivot point).
- Pull out the pin and carefully fold the frame inwards. The table should collapse into a more compact form.
- Secure any locking mechanisms to keep it in the folded position.
- Store in a dry, safe place. While foldable, it remains a substantial piece of equipment and may not fit under all beds.

Figure 5: Folding mechanism for compact storage.
Warranty and Support
The Dripex Heavy Duty Gravity Inversion Table comes with a 2-year warranty. For warranty claims, technical support, or any questions regarding your product, please contact Dripex customer service.
Refer to your purchase documentation or the official Dripex website for specific contact details and warranty terms.


