
SOCOTRAN SC-R40
SOCOTRAN SC-R40 FRS Two-Way Radio User Manual
Model: SC-R40
1. Introduction
Thank you for choosing the SOCOTRAN SC-R40 FRS Two-Way Radio. This manual provides essential information for the safe and efficient operation of your device. The SC-R40 is a compact, rechargeable, and license-free radio designed for reliable communication over short to medium distances, ideal for outdoor activities, family trips, and professional use.

Figure 1: SOCOTRAN SC-R40 Two-Way Radios with included accessories.
2. What's in the Box
Your SOCOTRAN SC-R40 package includes:
- 2 × SOCOTRAN SC-R40 Two-Way Radios
- 2 × 1500mAh Li-ion Batteries
- 1 × USB Charging Cable
- 2 × Belt Clips
- 1 × User's Manual (this document)
- 2 × Lanyards
3. Parts of the Radio
Familiarize yourself with the different components of your SC-R40 radio:
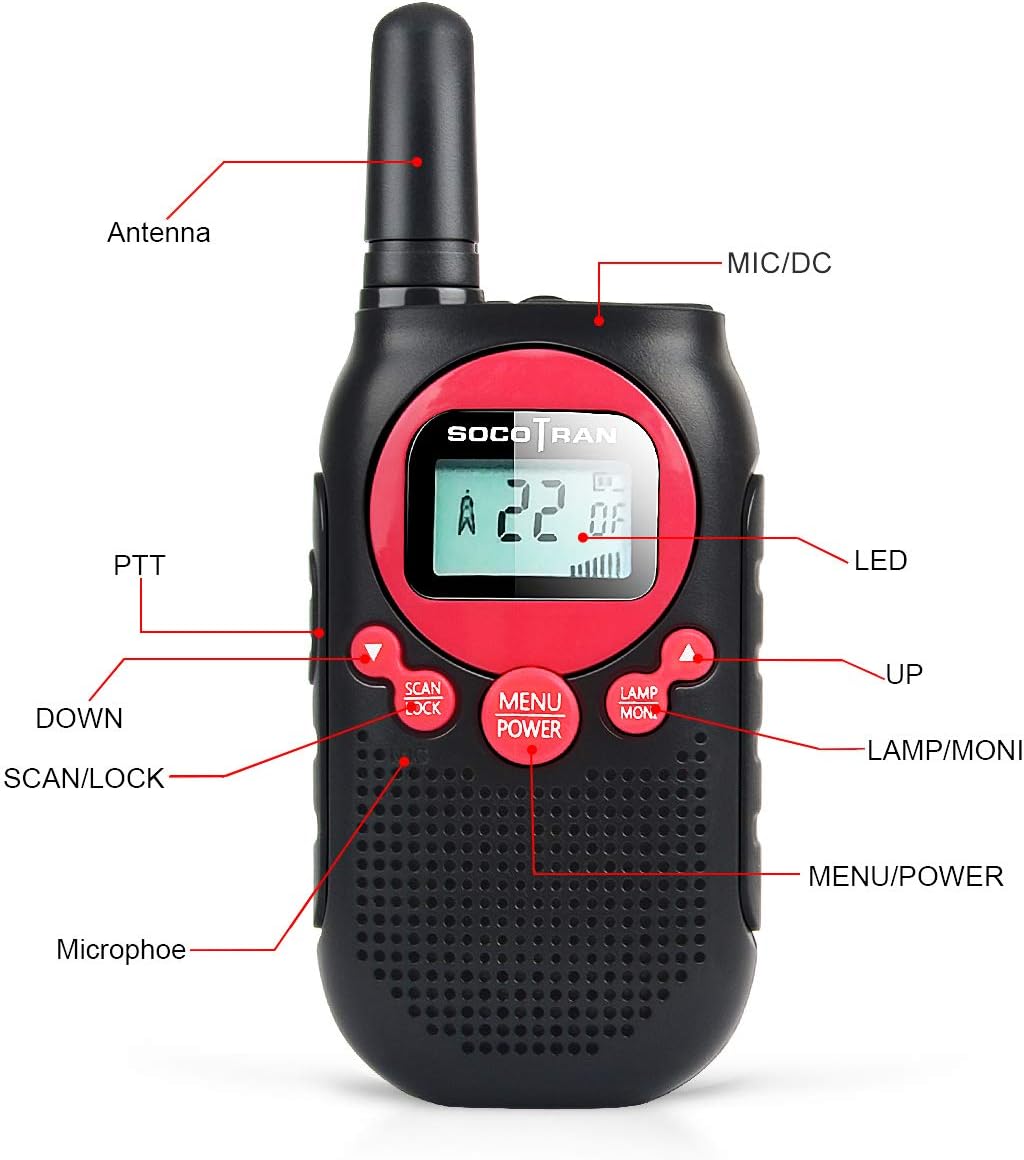
Figure 2: Front and side view of the SC-R40 with key components labeled.
- Antenna: For transmitting and receiving signals.
- MIC/DC: Microphone and charging port.
- LED: Indicator light.
- PTT (Push-to-Talk) Button: Press and hold to transmit, release to listen.
- DOWN Button: Navigates menu options downwards or decreases values.
- SCAN/LOCK Button: Initiates channel scan or locks/unlocks the keypad.
- Microphone: For voice input during transmission.
- MENU/POWER Button: Accesses menu settings or turns the radio on/off.
- UP Button: Navigates menu options upwards or increases values.
- LAMP/MONI Button: Activates the flashlight or monitors the current channel.
- LCD Display: Shows channel, volume, battery status, and other indicators.
4. Setup
4.1 Battery Installation
The SC-R40 uses a rechargeable 1500mAh Li-ion battery. To install:
- Locate the battery compartment cover on the back of the radio.
- Slide the cover downwards to open.
- Insert the Li-ion battery into the compartment, ensuring the contacts align correctly.
- Replace the battery compartment cover and slide it upwards until it clicks into place.
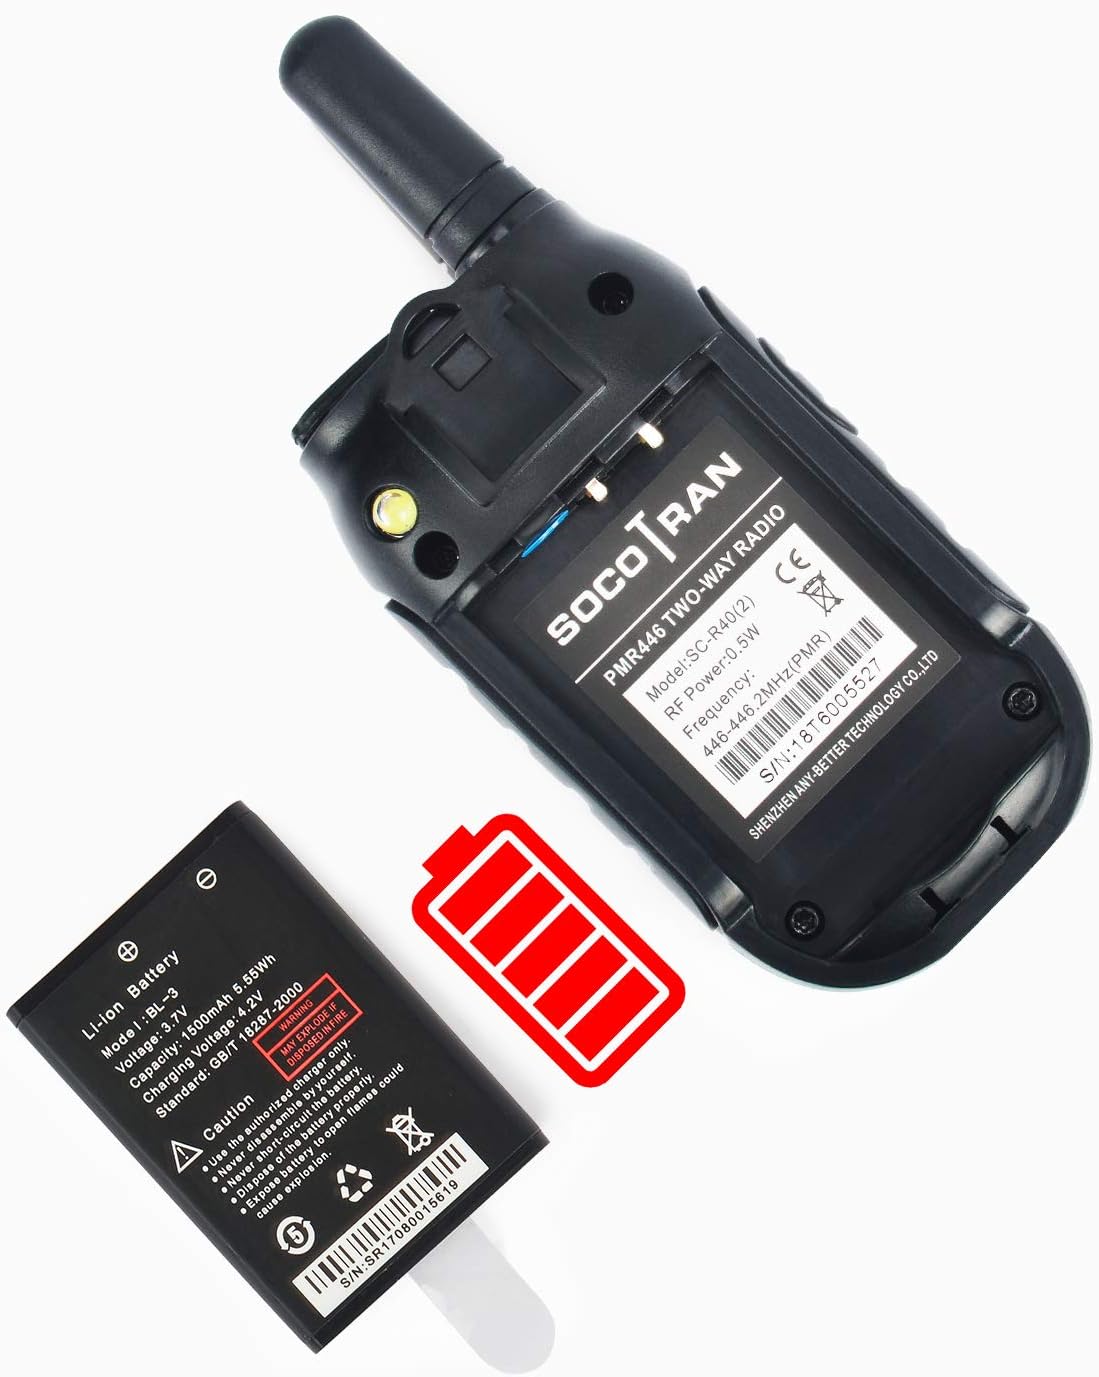
Figure 3: Battery installation process.
4.2 Charging the Battery
Before first use, fully charge the battery. The SC-R40 can be charged via USB, offering versatile charging options:
- Connect the USB charging cable to the MIC/DC port on top of the radio.
- Connect the other end of the USB cable to a compatible power source (e.g., PC, power bank, car charger adapter).
- The LED indicator will show charging status (refer to specifications for color indications).
- A full charge typically takes approximately 12 hours for the first charge, and less for subsequent charges.
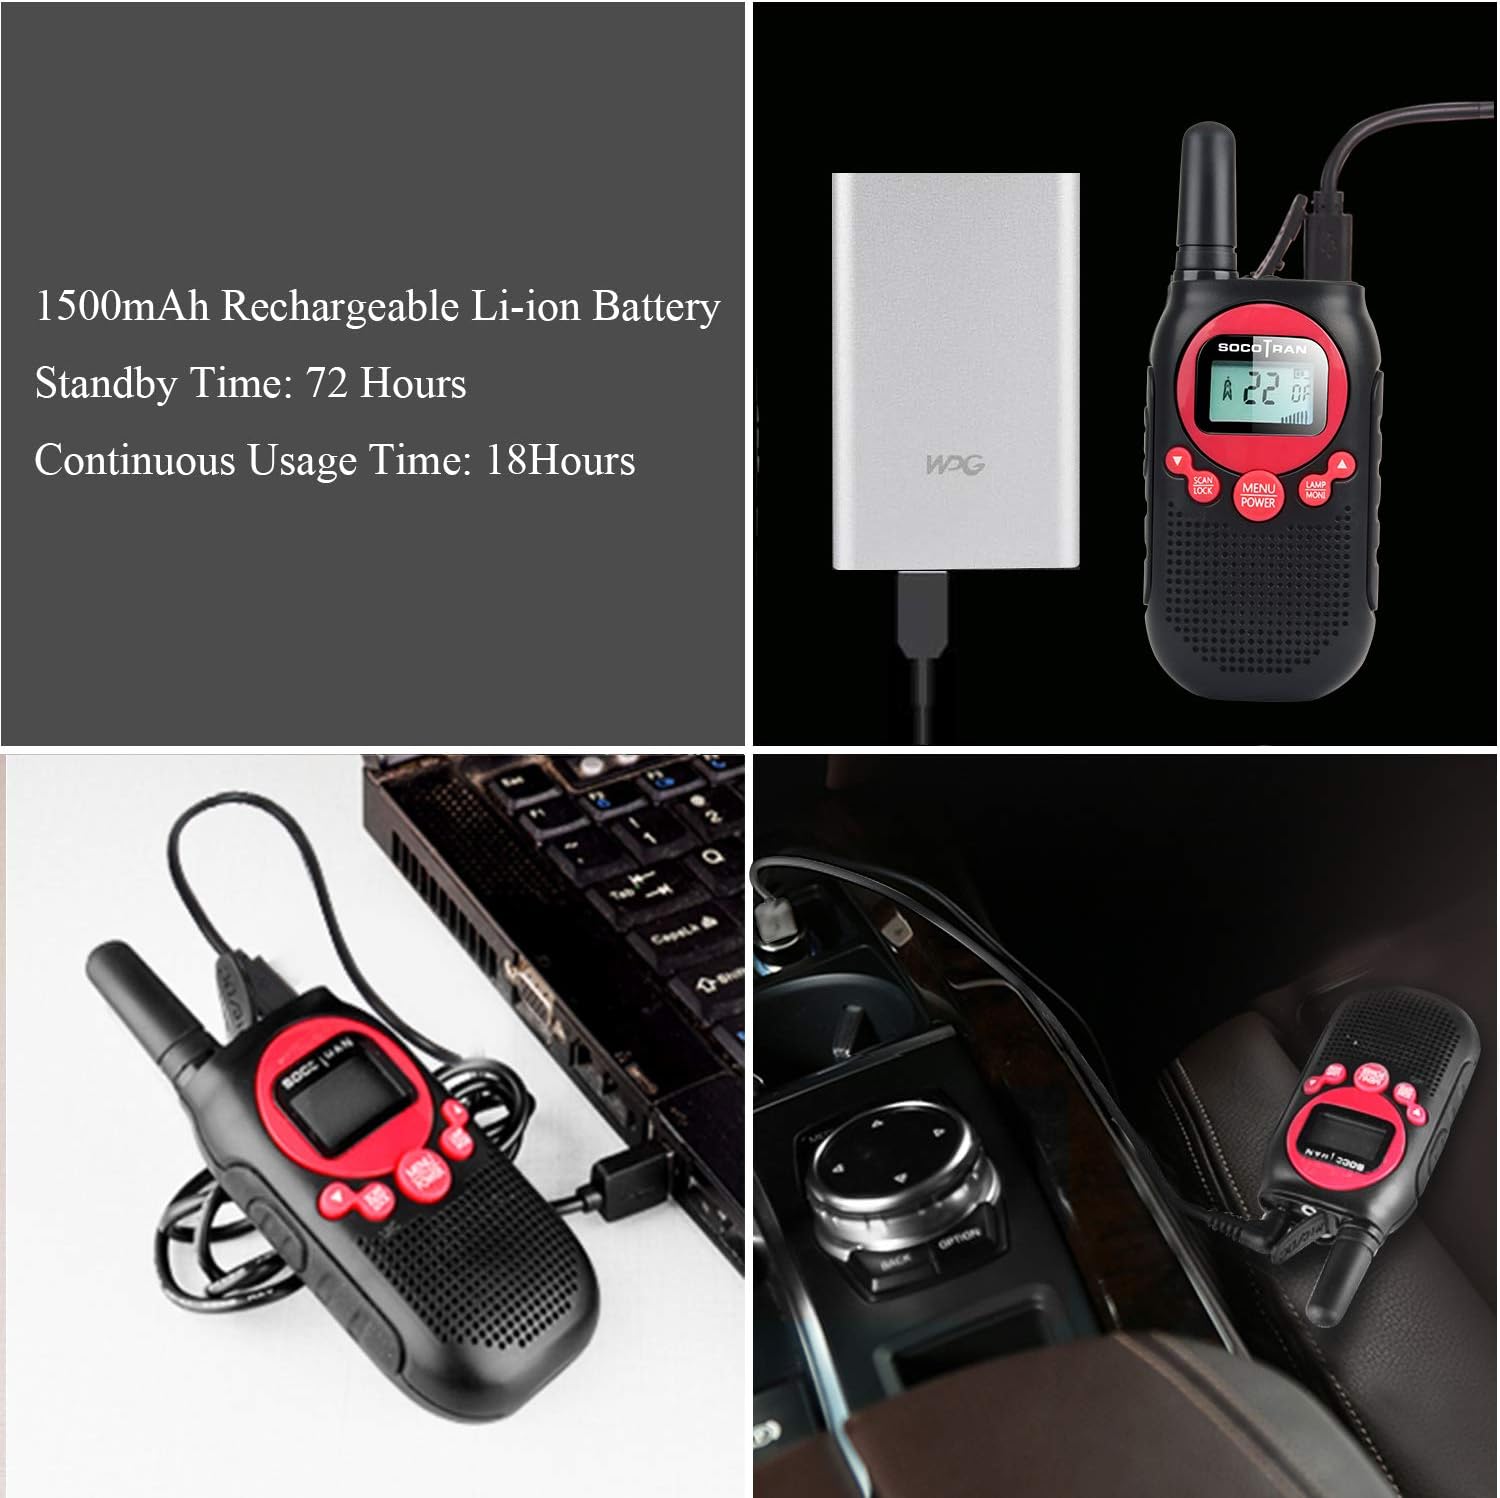
Figure 4: Various charging methods for the SC-R40.
4.3 Attaching Belt Clip and Lanyard
For convenient carrying, attach the included belt clip and lanyard:
- Belt Clip: Align the belt clip with the grooves on the back of the radio and slide it upwards until it locks into place.
- Lanyard: Thread the lanyard through the small loop located near the top of the radio.
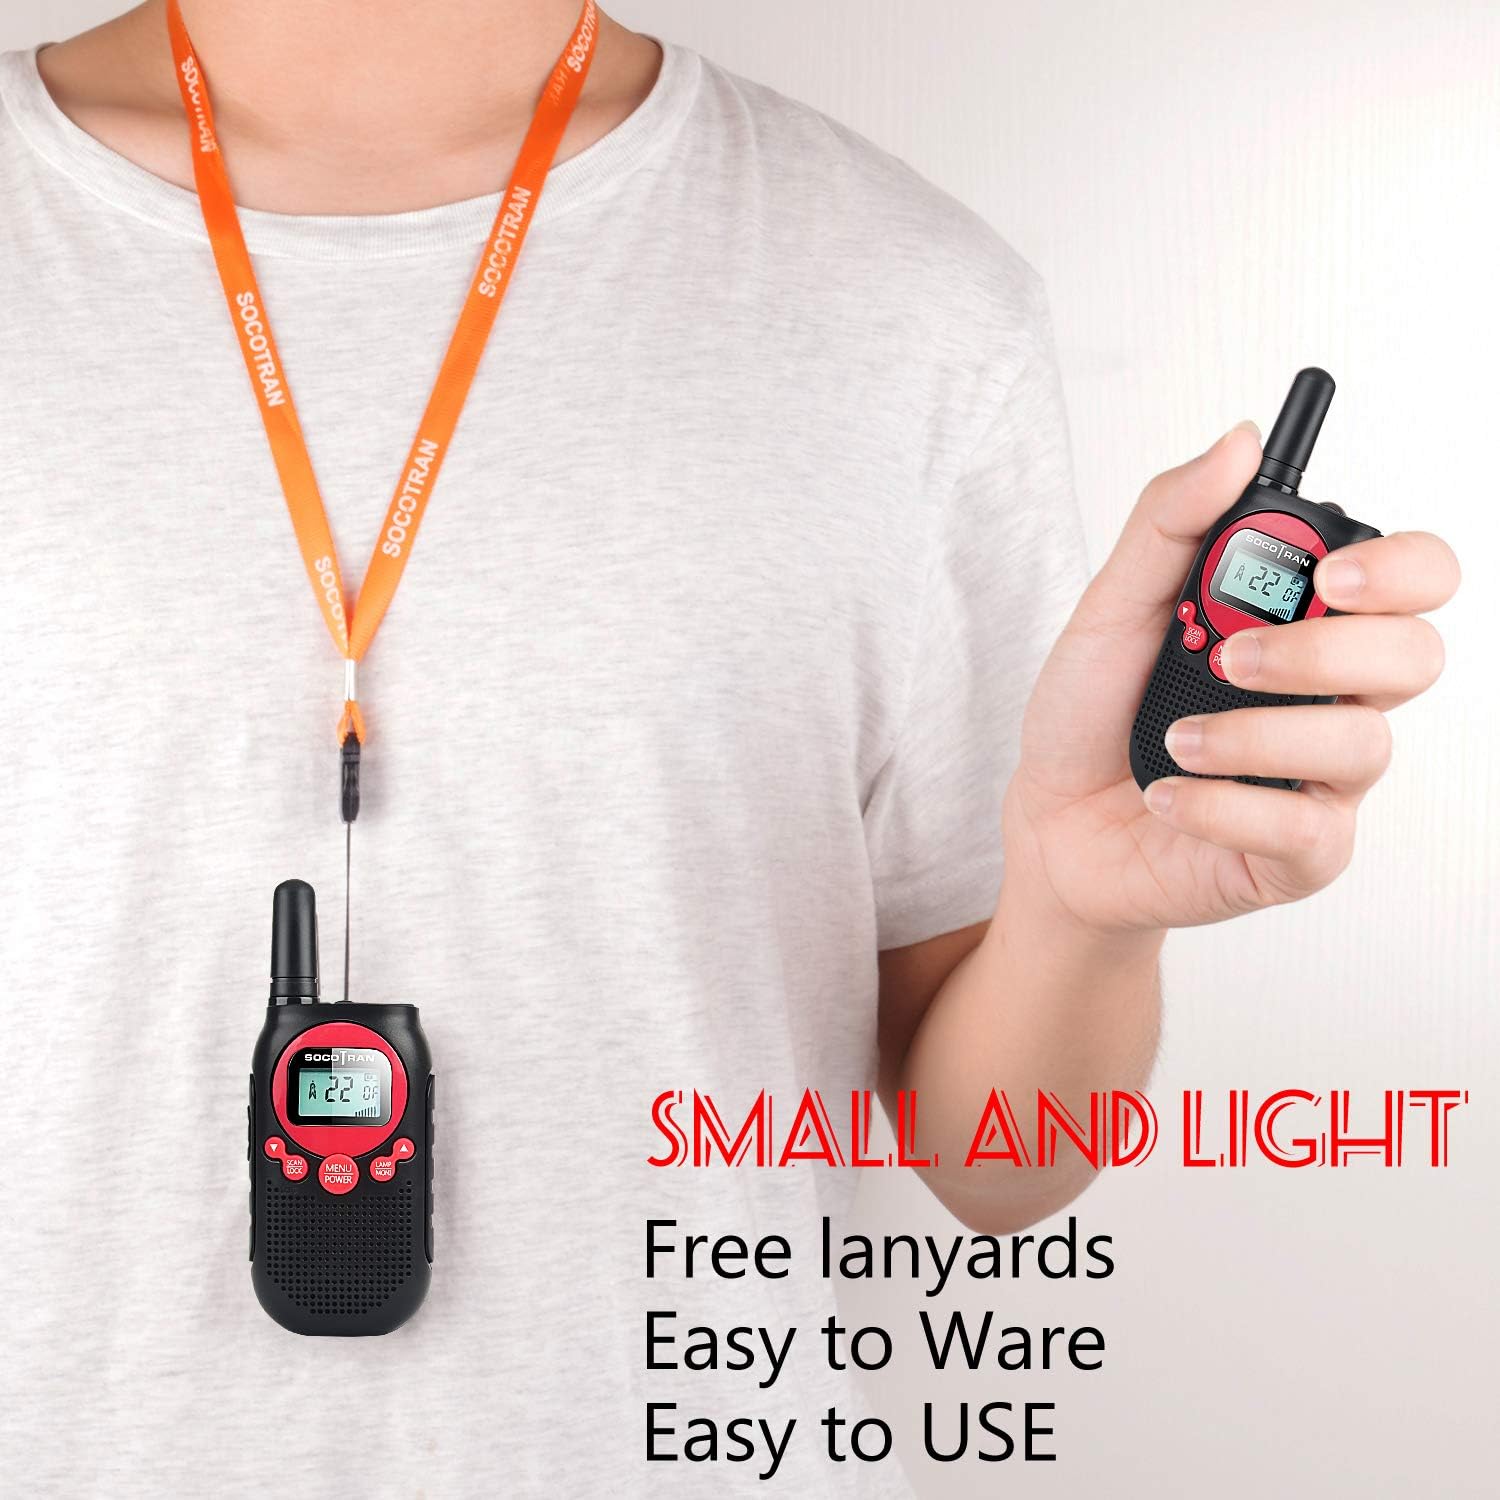
Figure 5: SC-R40 with attached lanyard for easy carrying.
5. Operation
5.1 Power On/Off
- To Power On: Press and hold the MENU/POWER button until the LCD screen illuminates and you hear a confirmation tone.
- To Power Off: Press and hold the MENU/POWER button until the LCD screen turns off.
5.2 Channel Selection
The SC-R40 features 22 FRS channels. To change channels:
- Press the MENU/POWER button once to enter channel selection mode. The channel number on the LCD will flash.
- Use the UP or DOWN buttons to select your desired channel (1-22).
- Press the MENU/POWER button again to confirm your selection, or wait a few seconds for it to automatically confirm.
5.3 Volume Adjustment
Adjust the listening volume using the UP and DOWN buttons when not in menu mode. The volume level (1-8) will be displayed on the LCD.
5.4 VOX Function (Hands-Free Operation)
VOX (Voice Operated Exchange) allows you to transmit without pressing the PTT button. The radio will automatically transmit when it detects your voice.
- Press the MENU/POWER button multiple times until "VOX" appears on the LCD.
- Use the UP or DOWN buttons to select the VOX sensitivity level (1-3, with 3 being most sensitive) or "OFF" to disable.
- Press MENU/POWER to confirm.
5.5 Keypad Lock
To prevent accidental changes to settings:
- To Lock: Press and hold the SCAN/LOCK button until a key icon appears on the LCD.
- To Unlock: Press and hold the SCAN/LOCK button again until the key icon disappears.
5.6 Flashlight
The SC-R40 includes a built-in flashlight for convenience in low-light conditions.
- To Turn On: Press the LAMP/MONI button once.
- To Turn Off: Press the LAMP/MONI button again.
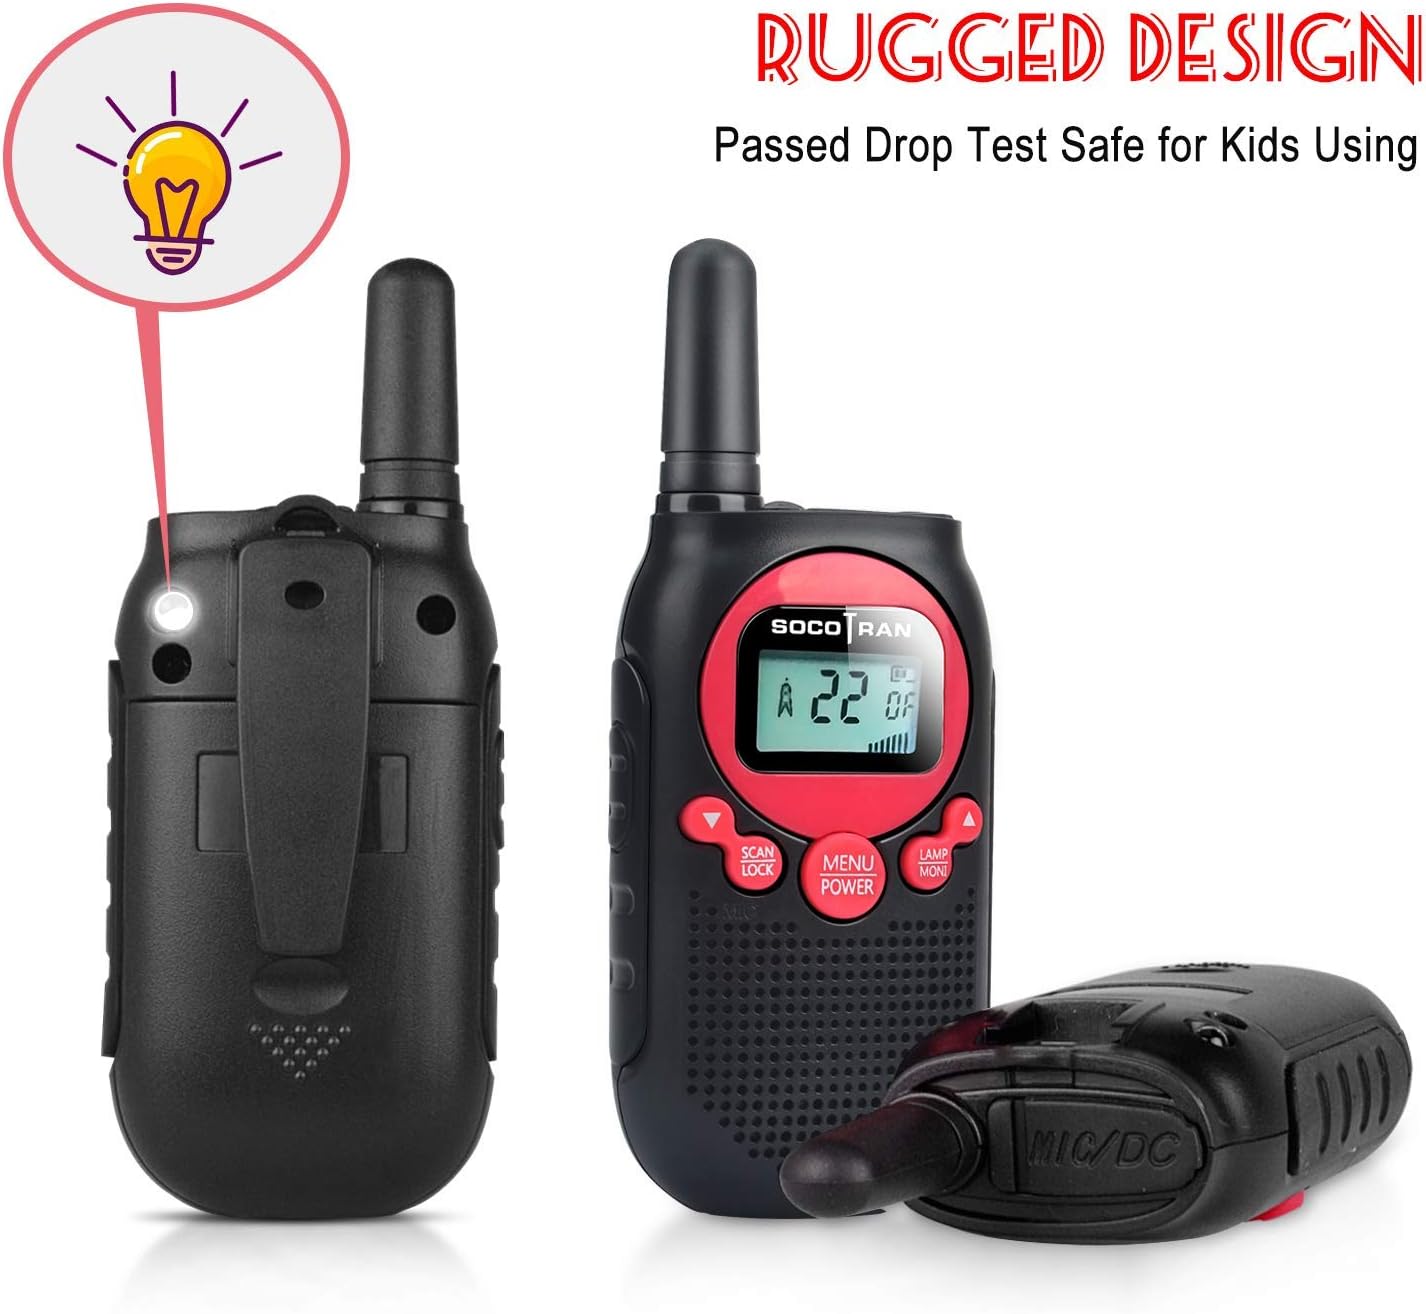
Figure 6: SC-R40 with activated flashlight.
5.7 Push-to-Talk (PTT)
To communicate, press and hold the PTT button while speaking clearly into the microphone. Release the button to listen for a response.
5.8 Scanning for Active Channels
The scan feature allows you to find active channels automatically.
- Press the SCAN/LOCK button once to start scanning. The radio will cycle through channels until an active one is found.
- To stop scanning, press the SCAN/LOCK button again.
5.9 Privacy Codes (CTCSS/DCS)
The SC-R40 supports 38 CTCSS (Continuous Tone-Coded Squelch System) codes and 99 DCS (Digitally Coded Squelch) codes. These codes help filter out unwanted conversations on the same channel.
- After selecting a channel, press the MENU/POWER button twice to enter CTCSS/DCS selection mode.
- Use the UP or DOWN buttons to select a code. "Hi" indicates CTCSS, "Lo" indicates DCS.
- Press MENU/POWER to confirm. Both radios must be on the same channel and privacy code to communicate.
6. Specifications
| Feature | Detail |
|---|---|
| Model Number | SC-R40 |
| Brand | SOCOTRAN |
| Channels | 22 FRS Channels |
| Output Power | 0.5W |
| Frequency Range | UHF (around 300 MHz to 3 GHz) |
| Talking Range (Max) | 5 Miles (Line of Sight) |
| Battery Type | 1500mAh Li-ion (included) |
| Standby Time | Up to 36 hours |
| Continuous Usage Time | Up to 18 hours |
| Charging | USB Charger (PC, power bank, car) |
| Dimensions | 4.9 x 1.9 x 0.9 inches |
| Item Weight | 1.6 ounces |
| Water Resistance | Waterproof |
| Special Features | VOX, Flashlight, Keypad Lock, Low Power Warning, Key-Tone, Screen Backlight |
7. Maintenance
- Battery Care: To maximize battery life, avoid overcharging and fully discharge the battery periodically before recharging. Store the radio in a cool, dry place when not in use for extended periods.
- Cleaning: Use a soft, damp cloth to clean the radio's exterior. Do not use harsh chemicals or abrasive cleaners. Ensure the charging port cover is securely closed to prevent dust and moisture ingress.
- Storage: If storing the radio for a long time, remove the battery.
8. Troubleshooting
| Problem | Possible Solution |
|---|---|
| No Power | Ensure battery is correctly installed and charged. Press and hold the MENU/POWER button. |
| Cannot Transmit/Receive | Verify both radios are on the same channel and privacy code. Check battery level. Ensure PTT button is fully pressed when transmitting. Check for obstructions or distance limitations. |
| Poor Audio Quality | Adjust volume. Check for interference. Ensure microphone and speaker are not obstructed. |
| Keypad Locked | Press and hold the SCAN/LOCK button to unlock the keypad. |
| Low Battery Warning | Recharge the battery immediately. |
9. Warranty and Support
SOCOTRAN offers a 2-Year Warranty on this product. If you encounter any issues or require support, please contact SOCOTRAN customer service. They will replace any faulty radios within 2 years of purchase.
For further assistance, please refer to the contact information provided with your purchase or visit the official SOCOTRAN website.
10. Product Demonstration Video
Watch this official video from the seller for a visual demonstration of the walkie talkies in use:
Video: Walkie Talkies for Kids Boys Girls Long Range Walkie Talkie Outdoor Toys gift for 3-12 Year Old kids. This video demonstrates the walkie talkies in an outdoor play setting, showcasing their ease of use and communication capabilities.
Ask a question about this manual
Ask about setup, troubleshooting, compatibility, parts, safety, or missing instructions. Manuals+ will review the question and use this page’s manual context to help answer it.