
1. Introduction
This manual provides essential information and step-by-step guidance for replacing the LCD screen on compatible iPad models. This product is designed to repair issues such as cracked LCDs, dead pixels, unresponsive touch (if the digitizer is separate and functional), display problems, color errors, or non-functional screens. Please note that this product includes the LCD panel only; the touch screen digitizer is not included. Retain your original touch panel and other components.
Professional installation is highly recommended. Replacing an iPad screen requires specialized skills and tools. Improper installation can lead to screen malfunction or damage to your device. If you lack technical expertise, consider seeking assistance from a professional maintenance center or referring to online video tutorials before attempting the replacement.
2. Compatibility
This SRJTEK LCD replacement panel is compatible with the following Apple iPad models:
- iPad 5 (2017): Models A1822, A1823
- iPad Air 1st Generation: Models A1474, A1475
Important: Before purchasing or beginning installation, please verify your iPad's model number. The model number is typically printed on the back cover of your iPad. Installing an incorrect model can cause damage to your device.

Image: This chart illustrates various iPad models and their corresponding model numbers, helping you confirm compatibility.
3. Safety Precautions and Important Notes
- Fragility: The screen replacement part is extremely fragile. Handle it with extreme care and gentleness when unpacking and installing. Avoid pressing on the edges or corners of the screen, as this can easily cause breakage.
- LCD Cable: Do not bend the LCD cable excessively. Bending it beyond 90 degrees can result in a black screen display.
- Power Off: Always power off your iPad and disconnect the battery cable before beginning any installation or repair work.
- Connector Cleaning: Clean the LCD connector using a cleaning paper (often included in the package) to ensure a proper connection.
- Screw Management: When replacing the LCD assembly, be aware that there are screws of different dimensions and lengths. Keep track of each screw's original position and ensure they are reinstalled in the correct locations to prevent internal damage.
- Pre-Installation Test: It is highly recommended to test the new screen before fully installing it. Connect the flex cables to the logic board and power on the device to check for display issues, touch functionality, and dead pixels.

Image: A detailed view of the LCD panel's connectors, emphasizing the delicate nature of these components.
4. Installation Guide
4.1. Preparation (Setup)
- Gather all necessary tools. A repair tool kit is typically included with the screen replacement.
- Power off your iPad completely.
- Disconnect the battery cable from the logic board to prevent short circuits during the repair.
- Carefully remove the old, damaged screen. This usually involves heating the edges to soften the adhesive and using prying tools.
4.2. Screen Replacement Steps (Operating)
- Clean Connectors: Use the provided cleaning paper to gently clean the LCD connector on the new screen and the corresponding connector on the iPad's logic board.
- Connect IC Line: Carefully connect the IC line (flexible cable) from the new LCD panel to the logic board. Ensure it is seated correctly and securely.
- Connect Battery Flexible Cable: Reconnect the battery flexible cable to the logic board.
- Initial Test: Before fully securing the screen, connect the battery and restart your iPad to perform a functional test. Check for display quality, touch responsiveness, and any abnormalities. If issues arise, power off, disconnect the battery, and re-check all connections.
- Secure Screen: Once the screen passes the test, power off the iPad again, disconnect the battery, and then proceed to carefully secure the new LCD assembly into the iPad frame. Apply new adhesive if necessary.
- Final Assembly: Reconnect the battery, reassemble any other components, and power on your iPad.
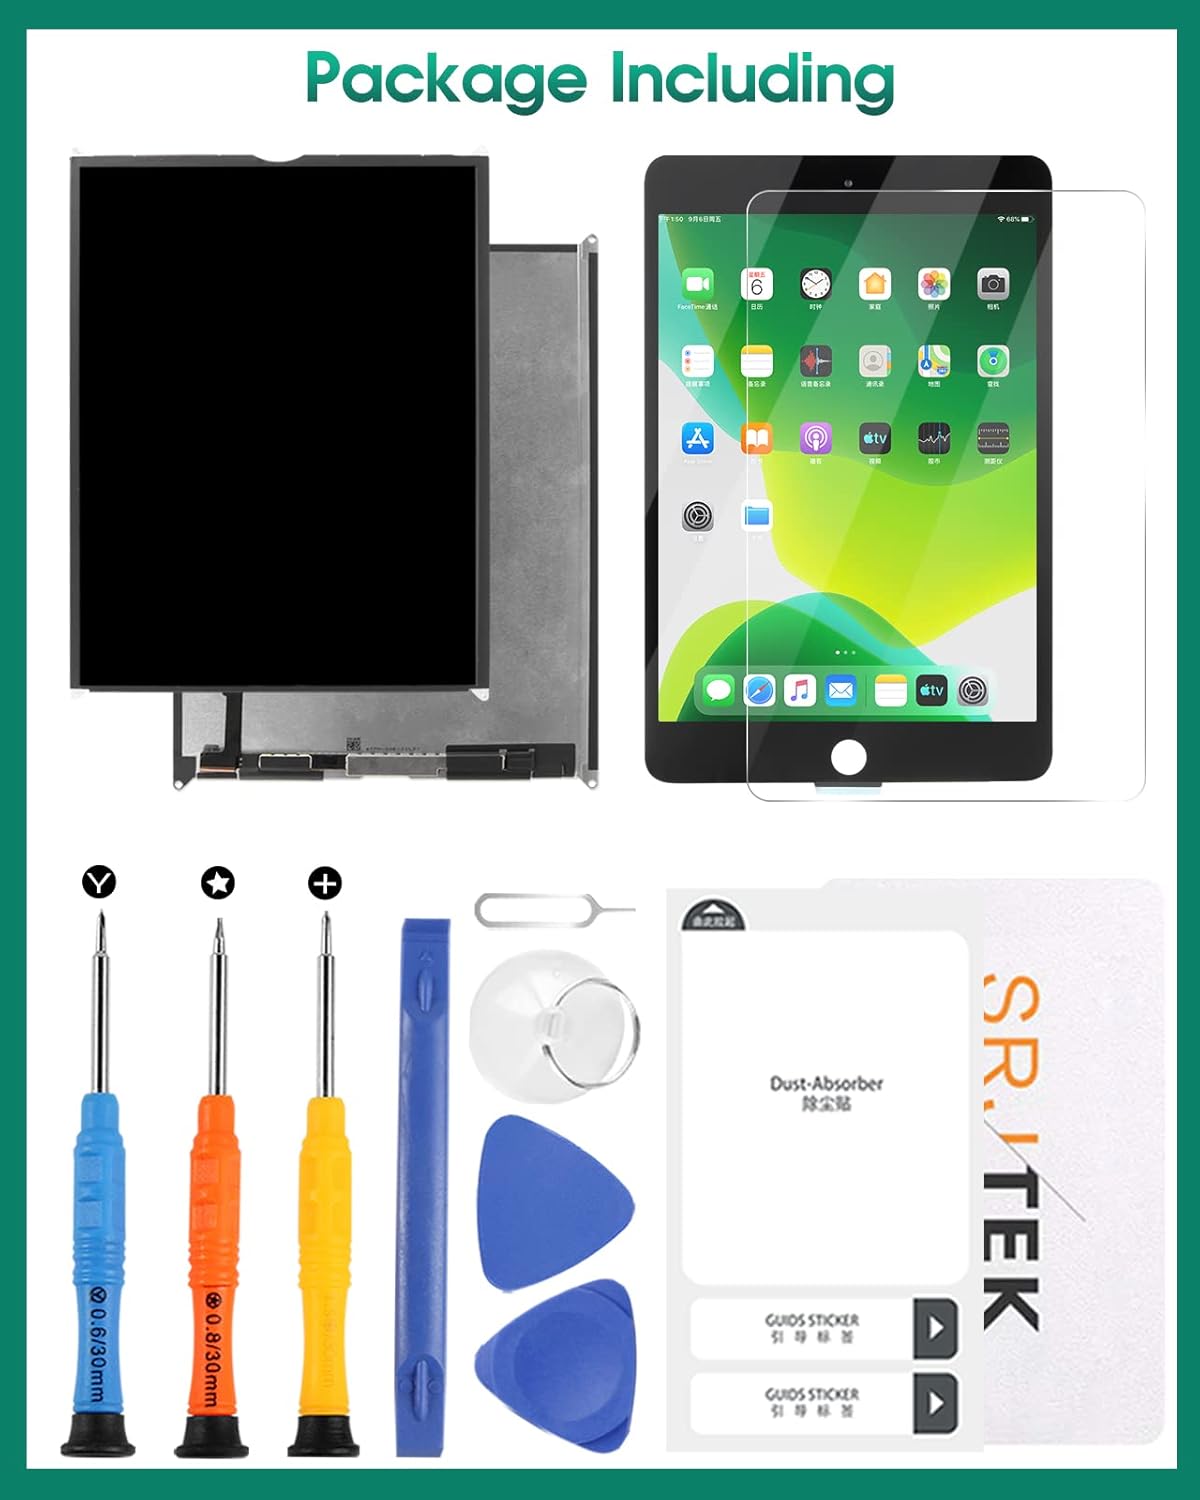
Image: The package includes the LCD panel and essential repair tools such as screwdrivers, prying tools, and a suction cup.
5. Maintenance
After successful installation, maintain your new LCD screen by:
- Avoiding excessive pressure on the screen surface.
- Keeping the screen clean with a soft, lint-free cloth.
- Using a screen protector to prevent scratches and minor impacts.
6. Troubleshooting
If you encounter issues after installation, such as lines appearing on the screen or unresponsive touch (assuming the touch digitizer is separate and functional), follow these steps:
- Power off your iPad and disconnect the battery.
- Carefully remove the LCD display.
- Clean the connectors on both the LCD panel and the logic board thoroughly.
- Reinstall the LCD display, ensuring all flexible cables are properly seated and secured.
- Reconnect the battery and restart your iPad to test.
If the problem persists, ensure that the issue is indeed with the LCD panel and not another component of your iPad. If your iPad was non-functional for reasons other than the LCD panel, replacing the LCD will not resolve those underlying issues.
7. Specifications
| Brand | SRJTEK |
| Product Model Number | For iPad 5 Air 1st A1474 A1475 9.7 |
| Compatible Models | iPad 5 (A1822, A1823), iPad Air 1st Gen (A1474, A1475) |
| Color | LCD Screen |
| Package Dimensions | 25.4 x 22.86 x 2.54 cm |
| Item Weight | 91 g |

Image: Front (left) and back (right) views of the SRJTEK LCD replacement panel, showing its design and connectors.
8. Warranty and Support
8.1. Warranty Information
SRJTEK offers a 1-month free exchange for product damage not caused by human error. Please note that damage or issues resulting from incorrect installation are not covered under this warranty. The provided repair tools are standard components and may not be comprehensive for all repair scenarios.
8.2. Customer Support
If you require further assistance with your order, installation, or any other issues, please contact our service team directly through Amazon. We are committed to providing high-quality customer service and will do our best to assist you.