
1. Introduction
This manual provides instructions for the assembly, operation, and maintenance of the EQKIT ECL-1227 Electronic Calendar Clock DIY Kit. This kit allows users to build a functional digital clock with calendar and temperature display capabilities. Please read all instructions carefully before beginning assembly or operation.
2. Safety Information
- This product is a DIY kit and requires soldering. Exercise caution when handling soldering irons and hot components.
- Ensure proper ventilation during soldering to avoid inhaling fumes.
- Always disconnect power before making any adjustments or repairs.
- Keep components and the assembled device away from water and excessive moisture.
- Use only the specified DC9-12V power supply.
3. Package Contents
The EQKIT ECL-1227 Electronic Calendar Clock DIY Kit includes the following components:
- Printed Circuit Boards (PCBs)
- Seven-segment LED displays
- Integrated Circuits (ICs)
- Resistors, Capacitors, Diodes
- Push buttons
- Buzzer
- Crystal oscillator
- DC power jack
- Battery holder (for CR2025 battery, battery typically not included)
- Plastic casing parts and stand
- Acrylic front cover
- Fasteners and wires

Image: Various electronic components included in the kit.

Image: Seven-segment LED displays for the clock.
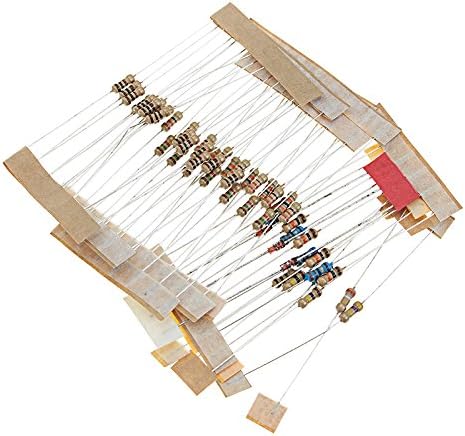
Image: Assorted resistors for the circuit board.
4. Assembly Instructions
The EQKIT ECL-1227 is an unassembled kit requiring soldering. Detailed soldering instructions are typically provided by the manufacturer or seller via an external link or separate document. It is crucial to follow these specific instructions for successful assembly.
General Assembly Steps (Refer to detailed guide for specifics):
- Component Identification: Identify all components and match them to their designated positions on the Printed Circuit Board (PCB).
- Soldering: Solder components onto the PCB. Start with smaller components like resistors and diodes, then move to larger ones like IC sockets (if applicable), capacitors, and LED displays. Pay close attention to component polarity where indicated.
- Module Assembly: Assemble any sub-modules if present.
- Case Assembly: Once the circuit board is fully assembled and tested (if possible), mount it into the plastic casing. Secure the front panel and acrylic cover.
Note: Some users have reported that detailed assembly instructions or circuit diagrams may not be included directly with the kit. It is recommended to search for official assembly guides or community resources if you encounter difficulties.

Image: Front side of the PCB with component outlines.

Image: Back side of the PCB.

Image: Plastic casing components.

Image: Acrylic front cover.

Image: Front panel with display labels.
5. Operating Instructions
Once assembled and powered, the EQKIT ECL-1227 offers various functions:
- Time Display: Features a 1-inch large digital display for real-time hours, minutes, and seconds. Supports 12-hour and 24-hour formats.
- Calendar Display: Displays date (month, day, year) and day of the week on a 0.5-inch digital display. Includes a 50-year calendar function.
- Temperature Display: Shows real-time temperature on the 0.5-inch display. Switchable between Celsius (°C) and Fahrenheit (°F).
- Alarm Functions: Includes 8 different alarm methods and 12 birthday reminder settings.
- Hourly Chime: Features a whole-point time chime function that simulates church bells, and can also simulate running water and cuckoo calls.
- Power Saving Mode: One-key switch for power-saving functionality.
- Power-Off Memory: Retains settings even after power loss, eliminating the need to reset time and date.
- Placement: Designed with a bracket and hanging holes on the back for desktop placement or wall mounting.
Specific button functions for setting time, date, alarms, and switching display modes will be detailed in the manufacturer's full operating guide. Typically, there are dedicated buttons for 'Set', 'Up', 'Down', and 'Mode' to navigate and adjust settings.
6. Maintenance
- Cleaning: Use a soft, dry cloth to clean the display and casing. Avoid abrasive cleaners or solvents.
- Environment: Keep the clock in a dry environment, away from direct sunlight, extreme temperatures, and strong magnetic fields.
- Battery Replacement: If the power-off memory function fails, the CR2025 backup battery may need replacement. Ensure correct polarity when inserting a new battery.
- Component Check: Periodically inspect soldered joints for any signs of corrosion or damage, especially if the device malfunctions.
7. Troubleshooting
- No Display/Power:
- Check if the DC9-12V power adapter is correctly connected and supplying power.
- Verify all power connections on the PCB are securely soldered.
- Incorrect Time/Date:
- Refer to the operating instructions (if available) for setting the time and date.
- If settings are lost after power-off, replace the CR2025 backup battery.
- Inaccurate Temperature:
- Ensure the temperature sensor component is correctly installed and soldered.
- Avoid placing the clock near heat sources or in direct sunlight, which can affect readings.
- Buttons Not Responding:
- Check the soldering of the push buttons.
- Ensure buttons are not physically stuck.
- General Malfunction:
- Carefully inspect all soldered joints for cold joints, bridges, or unsoldered pins.
- Ensure all components are inserted in the correct orientation (e.g., diodes, electrolytic capacitors, ICs).
8. Specifications
| Parameter | Value |
|---|---|
| Kit Model | ECL-1227 |
| Operating Voltage | DC9-12V |
| Operating Current | <90mA |
| Dynamic Current | <160mA |
| Display Color Options | Red / Green / Blue |
| Panel Language | English |
| Finished Product Size | 228 x 160 x 38 mm |
| Net Weight | Approx. 375g |
| Timing Error | ±0.5 seconds/day |
| Temperature Error | ±1°C |
9. Warranty and Support
As this is a DIY kit, warranty coverage typically applies to defective components upon receipt, not to issues arising from assembly errors. For specific warranty details, returns, or technical support, please contact the seller or manufacturer directly through your purchase platform.