
Homend Automatic Water Pump Pressure Controller
Homend Automatic Water Pump Pressure Controller User Manual
Model: Automatic Water Pump Pressure Controller
Brand: Homend
Introduction
This manual provides essential information for the safe and effective use of your Homend Automatic Water Pump Pressure Controller. Please read this manual thoroughly before installation and operation, and keep it for future reference.
The Homend Automatic Water Pump Pressure Controller is designed to automate the operation of water pumps. It automatically stops the pump if no water is detected, eliminating the need for a pressure tank. It controls the pump's on and off cycles based on water pressure changes, contributing to water conservation. This controller is suitable for various pump types including self-priming pumps, jet pumps, garden pumps, clarified water pumps, and centrifugal pumps.

Figure 1: Homend Automatic Water Pump Pressure Controller
This image shows the main view of the Homend Automatic Water Pump Pressure Controller, featuring its distinctive yellow and blue casing with a pressure gauge visible on the side.
Safety Information
Always observe basic safety precautions to reduce the risk of fire, electric shock, and personal injury.
- Ensure the power supply matches the controller's voltage (110V).
- Disconnect power before performing any installation, maintenance, or troubleshooting.
- Installation should be performed by a qualified professional if you are unsure.
- Do not operate the controller if it is damaged.
- Keep the controller away from excessive moisture or direct water spray unless properly sealed for such conditions.
Product Overview
Familiarize yourself with the components of the pressure controller.
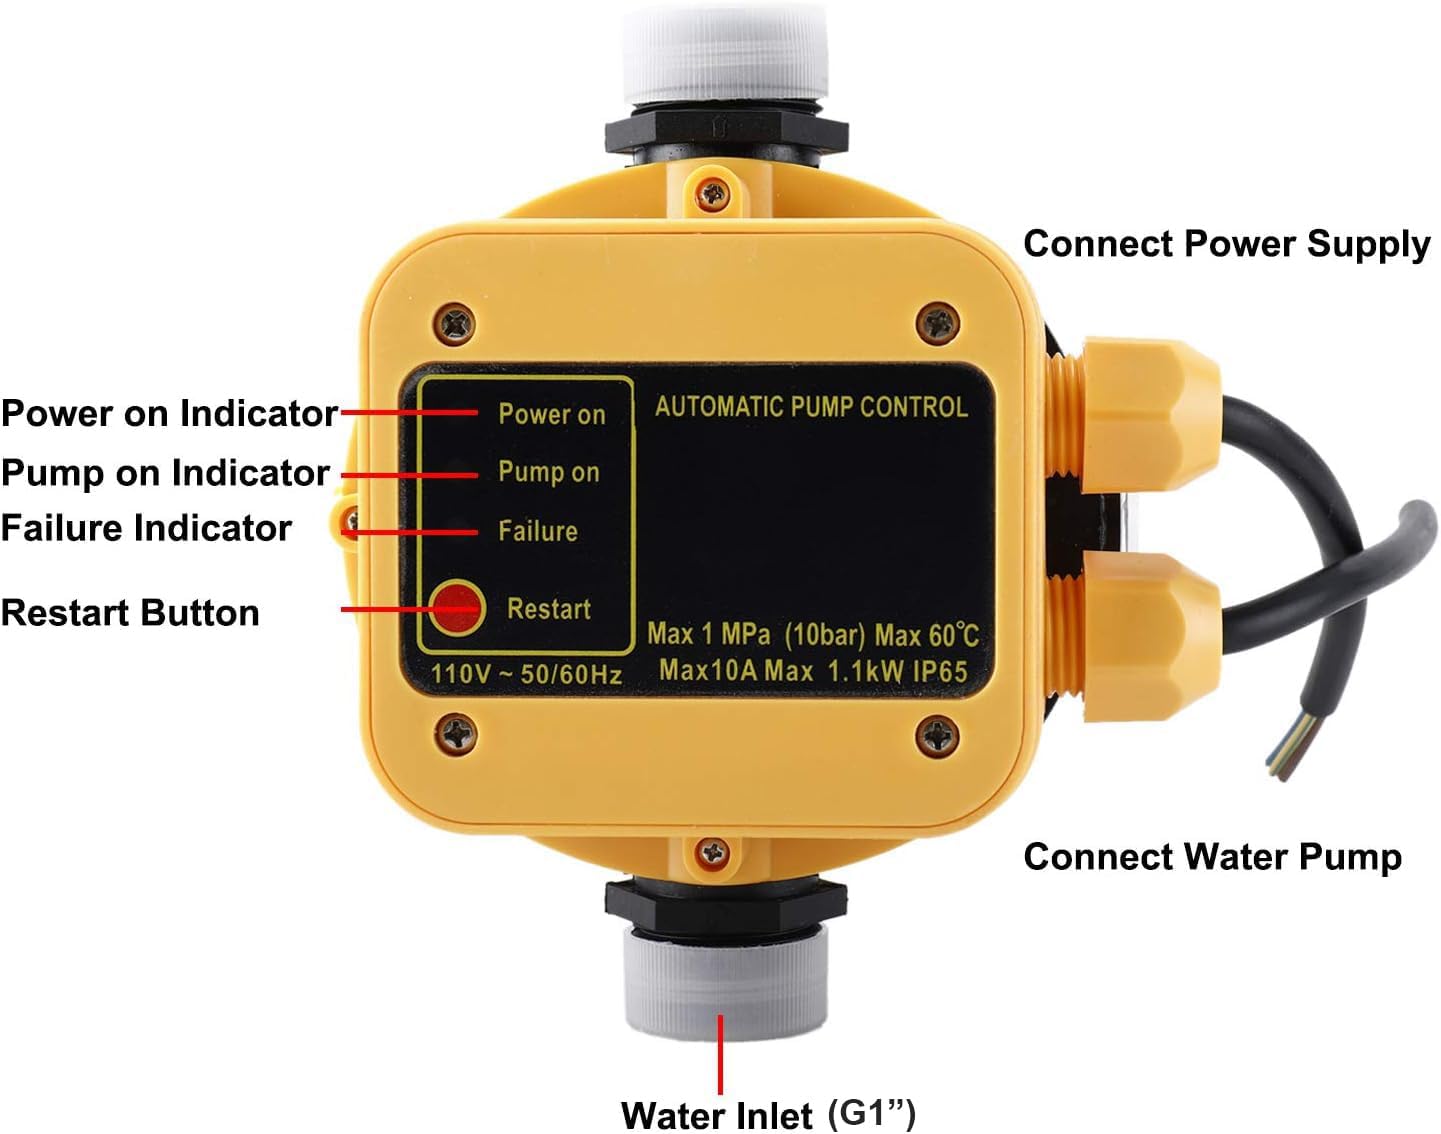
Figure 2: Controller Components and Indicators
This image displays the top view of the controller with key components labeled: Power on Indicator, Pump on Indicator, Failure Indicator, Restart Button, Connect Power Supply, Connect Water Pump, and Water Inlet (G1").
- Power on Indicator: Illuminates when the unit is receiving power.
- Pump on Indicator: Illuminates when the water pump is actively running.
- Failure Indicator: Illuminates to indicate an error or fault condition, such as dry running.
- Restart Button: Used to manually restart the pump after a failure or power interruption.
- Connect Power Supply: Terminal for connecting the main power input.
- Connect Water Pump: Terminal for connecting the water pump's power cable.
- Water Inlet (G1"): The primary water connection point for the controller.
Setup and Installation
Follow these steps for proper installation of the water pump pressure controller.
- Mounting: Securely mount the controller in a suitable location, ensuring it is protected from direct weather exposure if not rated for outdoor use.
- Water Connection: Connect the water inlet (G1") of the controller to your water supply line. Ensure all connections are watertight.
- Pump Connection: Connect the water pump's outlet to the controller's water outlet.
- Electrical Connection (Power Supply): Connect the main 110V power supply to the 'Connect Power Supply' terminals on the controller. Ensure correct wiring for live, neutral, and ground (if applicable).
- Electrical Connection (Water Pump): Connect the water pump's power cable to the 'Connect Water Pump' terminals on the controller.
- Initial Fill: Before powering on, ensure the pump and suction line are primed with water to prevent dry running.

Figure 3: Typical Installation Scenarios
This image illustrates various application examples, showing the controller integrated into different water pump systems, demonstrating its versatility in home and garden setups.
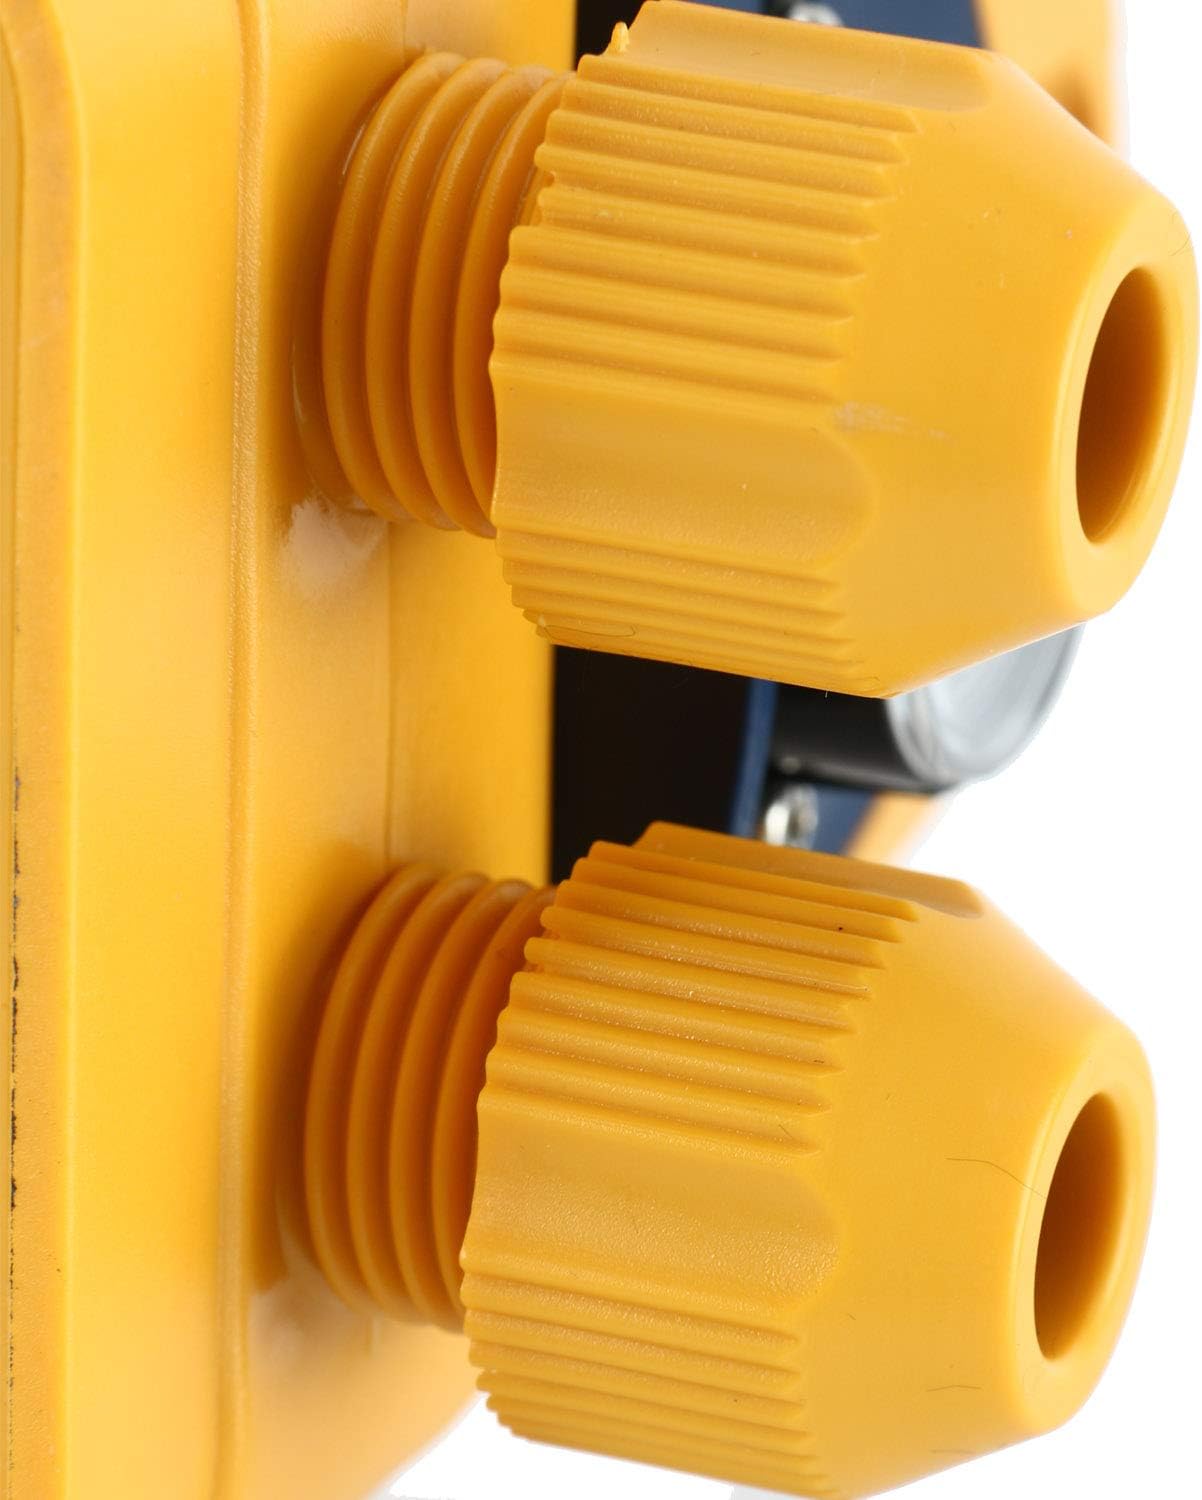
Figure 4: Electrical Connection Points
A detailed view of the electrical connection points on the controller, showing the secure cable glands for power input and pump output.
Operating Instructions
The controller is designed for fully automatic operation.
- Power On: Once installed and connected, apply power to the controller. The 'Power on Indicator' LED will illuminate.
- Automatic Operation: The controller will automatically detect water pressure changes. When water is demanded (e.g., a tap is opened), the pressure drops, and the controller will activate the pump. The 'Pump on Indicator' LED will illuminate.
- Pump Off: When water demand ceases and pressure is restored, the controller will automatically turn off the pump. The 'Pump on Indicator' LED will turn off.
- Dry Running Protection: If the water supply to the pump runs out, the controller will automatically stop the pump to prevent damage. The 'Failure Indicator' LED will illuminate.
- Restarting After Failure: If the 'Failure Indicator' is lit due to dry running, ensure the water supply is restored. Then, press the 'Restart Button' to reset the controller and resume pump operation.
Maintenance
Regular maintenance ensures optimal performance and longevity of your controller.
- Regular Inspection: Periodically check all electrical and water connections for leaks, corrosion, or loose wiring.
- Cleaning: Keep the exterior of the controller clean and free from dust and debris. Use a soft, dry cloth. Do not use abrasive cleaners or solvents.
- Winterization: In cold climates, ensure the controller and associated plumbing are protected from freezing temperatures to prevent damage.
- Pressure Gauge Check: Monitor the pressure gauge for consistent readings during operation.
Troubleshooting
Refer to this section for common issues and their solutions.
| Problem | Possible Cause | Solution |
|---|---|---|
| Pump does not start. | No power supply. 'Failure Indicator' is on (dry running). Loose electrical connections. | Check power source and circuit breaker. Restore water supply and press 'Restart Button'. Check and tighten all wiring connections (ensure power is off first). |
| Pump runs continuously. | Water leak in the system. Controller malfunction. | Inspect plumbing for leaks and repair. Contact customer support if no leaks are found. |
| Pump cycles on/off frequently. | Small leak in the system. Insufficient water supply. | Check for minor leaks. Ensure adequate water flow to the pump. |
| 'Failure Indicator' is on. | No water in the pump/supply line (dry running). | Ensure water supply is available and pump is primed. Press 'Restart Button'. |
Specifications
Key technical specifications for the Homend Automatic Water Pump Pressure Controller.
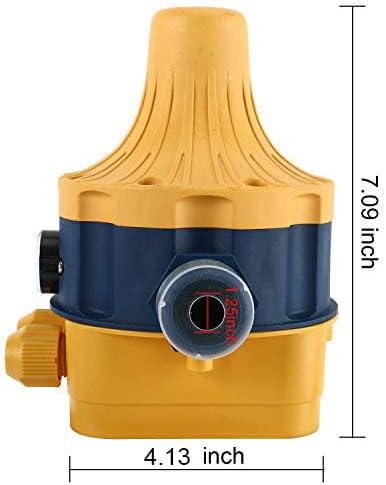
Figure 5: Product Dimensions
This image provides the key dimensions of the controller, showing a height of 7.09 inches and a width of 4.13 inches.
| Feature | Specification |
|---|---|
| Brand | Homend |
| Model | Automatic Water Pump Pressure Controller |
| Voltage | 110V |
| Frequency | 50-60Hz |
| Maximum Current | 10A |
| Maximum Power | 1.1KW |
| Max Working Pressure | 10 Bar (1 MPa) |
| Connection | 1" Male |
| Material | Plastic |
| Color | Yellow |
| Product Dimensions (L x W x H) | 0.79" x 0.79" x 0.79" (Note: This appears to be a generic placeholder, actual dimensions from image are approx. 4.13" W x 7.09" H) |
| Item Weight | 2.46 pounds |
| UPC | 711221778127 |
Warranty and Support
For warranty information, please refer to the documentation included with your purchase or contact the seller directly. This product includes a manual instruction in the package.
For technical support or inquiries, please contact Homend customer service through the retailer where the product was purchased.
Ask a question about this manual
Ask about setup, troubleshooting, compatibility, parts, safety, or missing instructions. Manuals+ will review the question and use this page’s manual context to help answer it.