
DROK 180080AFA
DROK DC Buck Converter User Manual
Model: 180080AFA | Brand: DROK
1. Introduction
This user manual provides detailed instructions for the DROK DC Buck Converter Adjustable Voltage Regulator. This versatile module is designed to step down DC voltage, offering adjustable output voltage and current, an LCD display for real-time monitoring, and a protective case. It is suitable for various applications including power supply regulation, LED driving, and solar power control.
2. Safety Instructions
- Ensure proper input voltage polarity to prevent damage. The module features input reverse connection protection, but caution is always advised.
- Do not exceed the maximum input voltage (32V) or output current (5A) and power (75W) ratings.
- Always disconnect power before making any connections or adjustments.
- Handle the module with care to avoid electrostatic discharge.
- Keep the device away from moisture, dust, and extreme temperatures.
- If using for high power applications, ensure adequate ventilation or additional cooling.
3. Product Overview
3.1 Key Features
- Input voltage range: DC 6V-32V
- Output voltage range: DC 1.5V-32V (adjustable)
- Max output current: 5A (recommended use within 4.5A)
- Max output power: 75W (recommended use within 50W)
- Large clear digital LCD display for simultaneous voltage and current monitoring.
- Constant current/voltage mode.
- Voltage calibration and current calibration functions.
- Integrated USB interface for convenient power output.
- Comes with a protective case (requires assembly).
- Built-in short-circuit protection.
- Over-temperature protection.
- Input reverse connection protection.
3.2 Component Identification
Familiarize yourself with the main components of the DROK DC Buck Converter:

Figure 3.2.1: Front view of the DROK DC Buck Converter with key components labeled, including input/output terminals, LCD display, USB port, and adjustment potentiometers.

Figure 3.2.2: Rear view of the DROK DC Buck Converter, highlighting the power supply chip and the designated area for attaching a cooling fan (not included).
3.3 Dimensions
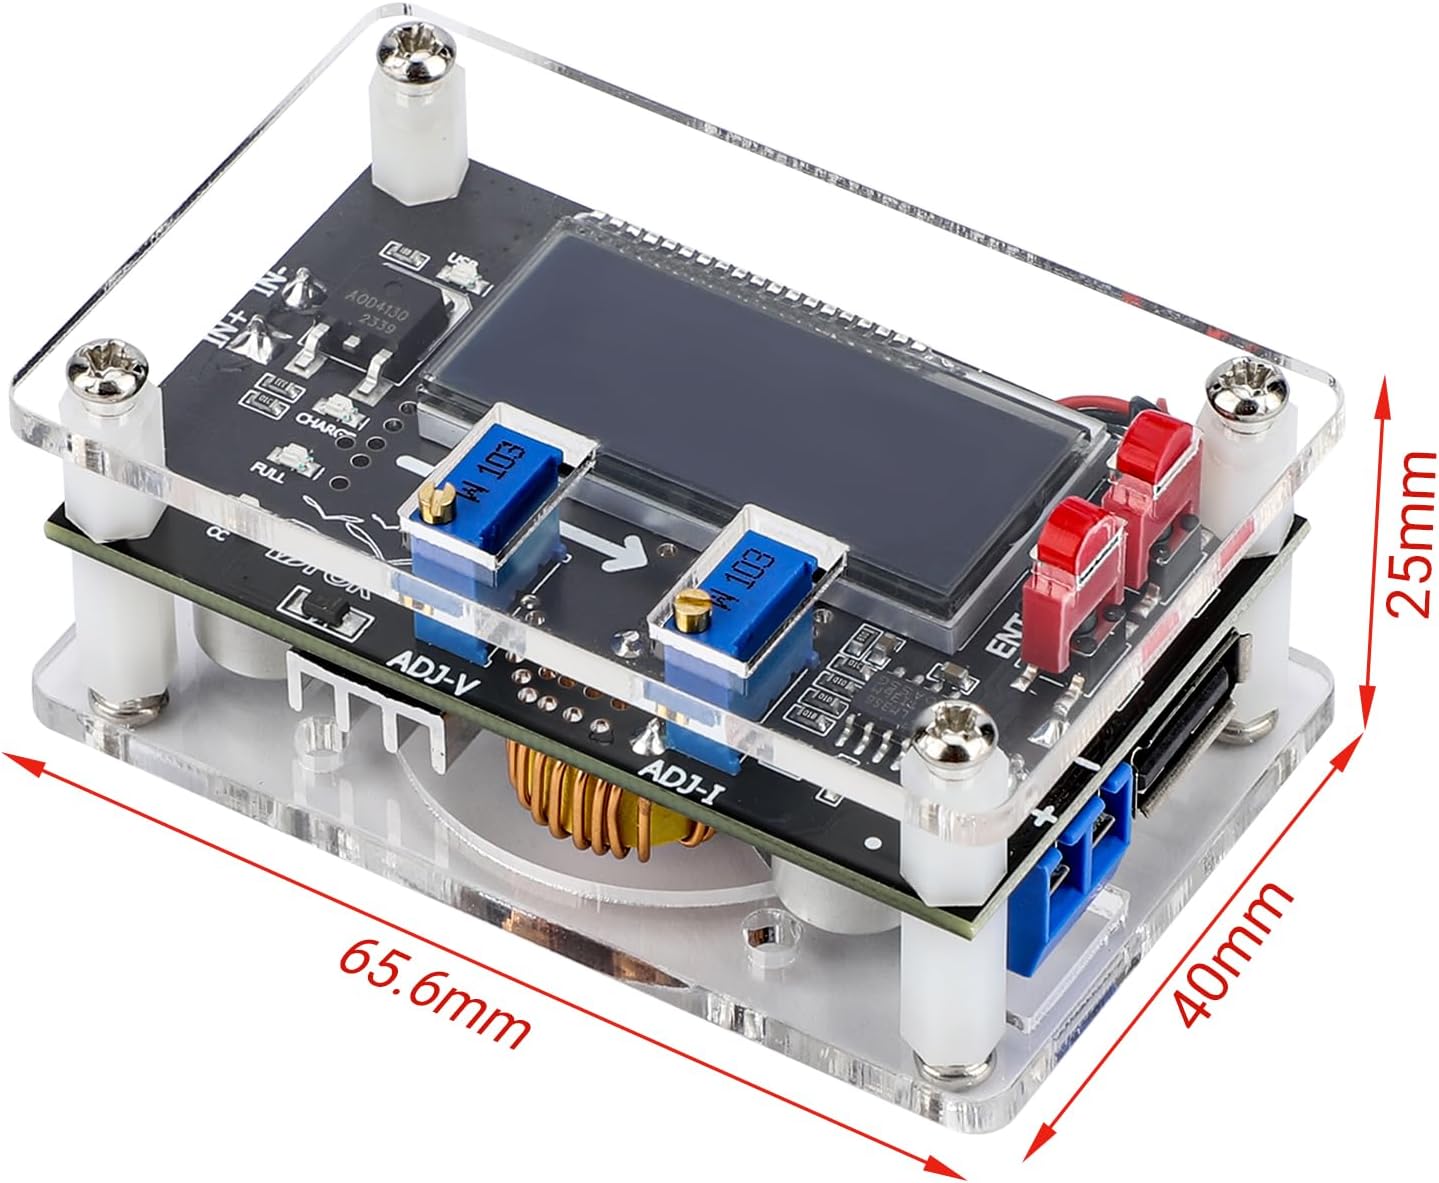
Figure 3.3.1: Physical dimensions of the DROK DC Buck Converter module, approximately 65.6mm (length) x 40mm (width) x 25mm (height).
4. Setup
4.1 Protective Case Assembly
The protective case is shipped unassembled to prevent damage during transit. Follow these steps to assemble it:
- Carefully remove all protective films from the acrylic panels.
- Place the main circuit board onto the bottom acrylic panel, aligning the screw holes.
- Insert the white plastic standoffs into the corner holes, securing the board to the bottom panel.
- Place the top acrylic panel over the circuit board, aligning it with the standoffs.
- Secure the top panel using the provided screws. Do not overtighten to avoid damaging the board.
- Attach the red terminal covers to the output terminals for added safety.
Video 4.1.1: This video demonstrates the assembly of the protective case and initial operation of the DROK DC Buck Converter. (Duration: 0:53)
4.2 Wiring Connections
Connect your power source and load to the module using the screw terminals. Observe polarity carefully.
- Input + (IN+): Connect the positive terminal of your DC power source (6V-32V).
- Input - (IN-): Connect the negative terminal of your DC power source.
- Output + (OUT+): Connect the positive terminal of your load.
- Output - (OUT-): Connect the negative terminal of your load.
Ensure all connections are secure to prevent loose wires and potential short circuits.
5. Operating Instructions
5.1 Initial Voltage Adjustment
The output voltage is typically set to around 20V by default from the factory. If your desired output voltage is lower than this, or if the display shows an unexpected value, you may need to adjust it. Use a small flat-head screwdriver to turn the ADJ-V potentiometer (voltage adjustment) counter-clockwise for 10 laps or more until the voltage display begins to change and reaches your desired value.
5.2 Adjusting Output Voltage and Current
- Voltage Adjustment (ADJ-V): Use a small flat-head screwdriver to turn the ADJ-V potentiometer. Turning clockwise increases the output voltage, and counter-clockwise decreases it.
- Current Adjustment (ADJ-I): Use a small flat-head screwdriver to turn the ADJ-I potentiometer. Turning clockwise increases the output current limit, and counter-clockwise decreases it. This is used for constant current applications, such as charging batteries or driving LEDs.
Always monitor the LCD display while adjusting to ensure the desired output is achieved.
5.3 Display Modes and USB Output Control
The module features multiple display modes and USB output control via the buttons on the right side of the LCD screen:
- F0 (Display Output Voltage): Press the "SET" button to cycle to this mode. The display will show the current output voltage.
- F1 (Display Input Voltage): Press the "SET" button again to cycle to this mode. The display will show the current input voltage.
- F2 (Alternatively Display Output/Input Voltage): Press the "SET" button to cycle to this mode. The display will automatically switch between showing the output and input voltages.
- USB (Display USB Output Voltage & Turn ON/OFF USB Output): Press the "USB" button to view the USB output voltage. Press and hold the "USB" button to toggle the USB output ON or OFF.
Video 5.3.1: This video demonstrates the various display modes and USB output control features of the DROK DC Buck Converter. (Duration: 0:53)
6. Maintenance
- Cleaning: Use a soft, dry cloth to clean the module. Avoid using liquids or abrasive cleaners.
- Ventilation: Ensure proper airflow around the module, especially during prolonged operation or when drawing higher currents, to prevent overheating. The module includes a heatsink, and the case design allows for a small cooling fan to be attached if needed.
- Storage: Store the module in a dry, cool environment, away from direct sunlight and corrosive substances.
- Inspection: Periodically check wiring connections for tightness and inspect the module for any signs of damage or wear.
7. Troubleshooting
| Problem | Possible Cause | Solution |
|---|---|---|
| No display or module not powering on. | Incorrect input voltage or polarity; loose connections; power source issue. | Verify input voltage is within 6V-32V. Check input wiring for correct polarity (+/-). Ensure all connections are secure. Test power source. |
| Output voltage does not change or is stuck at a high value. | Potentiometer (ADJ-V) not adjusted sufficiently. | Turn the ADJ-V potentiometer counter-clockwise for at least 10 full rotations until the voltage starts to decrease. Continue adjusting to the desired level. |
| Output current is lower than expected or module enters constant current mode unexpectedly. | Current limit (ADJ-I) set too low; load resistance too high. | Turn the ADJ-I potentiometer clockwise to increase the current limit. Check the load's current requirements. |
| Module overheats during operation. | Excessive load; insufficient ventilation. | Reduce the load or ensure it is within recommended limits (under 50W). Improve ventilation around the module. Consider adding a small cooling fan to the designated area. |
| USB output not working. | USB output disabled; incorrect output voltage setting. | Press and hold the "USB" button to enable the USB output. Ensure the main output voltage is set to 5V if you intend to power standard USB devices. |
8. Specifications
| Parameter | Value |
|---|---|
| Input Voltage Range | DC 6V-32V |
| Output Voltage Range | DC 1.5V-32V |
| Max Output Current | 5A (recommended < 4.5A) |
| Max Output Power | 75W (recommended < 50W) |
| Product Dimensions (L x W x H) | 1.57 x 2.58 x 0.98 inches (approx. 65.6 x 40 x 25 mm) |
| Item Weight | 2.08 ounces |
| Model Number | 180080AFA |
9. Warranty and Support
DROK products are designed for reliability and performance. We stand by the quality of our products.
- Warranty: Each product purchased from DROK includes a one-year service period.
- Replacements: In the event of any quality issue with your item, you may be eligible for a brand new replacement.
- Contact Support: For technical assistance, troubleshooting, or warranty claims, please visit the official DROK store on Amazon or contact their customer service directly.
For more information and to explore other DROK products, please visit the DROK Store.
Related documents180080AFA


Ask a question about this manual
Ask about setup, troubleshooting, compatibility, parts, safety, or missing instructions. Manuals+ will review the question and use this page’s manual context to help answer it.