
Smartxchoices 10x20 Gazebo Canopy Tent
Smartxchoices 10x20 Outdoor Gazebo Canopy Tent Instruction Manual
Brand: Smartxchoices
Model: 10x20 Gazebo Canopy Tent
Important Safety Information
This product is designed for garden and leisure events in good weather conditions. It is not guaranteed to withstand windy or rainy days. For enhanced stability, it is strongly recommended to use white duct tape to secure the poles to the plastic connectors after initial setup. Ensure all connections are tight before use.
In case of tent or part breakage, please contact Smartxchoices for replacement parts.
Package Contents
Verify that all components are present before beginning assembly:
- Numbered Steel Poles (various lengths)
- Plastic Connectors
- Polyethylene Canopy Cover
- Removable Sidewalls with Windows (6 pieces)
- Ropes for securing
- Ground Stakes for stability
- Instruction Manual
Setup Instructions
Follow these steps for proper assembly of your gazebo canopy tent. It is recommended to have at least two people for assembly, especially in windy conditions.
Step 1: Unpack and Organize Components
Carefully remove all parts from the packaging. Lay out the poles and connectors on a flat, clear surface. Identify each pole by its number (1 through 8) as indicated in the instruction manual.

Image: All components of the tent, including poles, connectors, and fabric, are laid out on a grassy area before assembly.
Step 2: Assemble the Base Frame
Connect the numbered poles according to the instruction manual to form the rectangular base of the tent. Ensure all connections are secure.

Image: A person is shown connecting the metal poles to form the rectangular base of the tent frame on a grassy lawn.
Step 3: Attach Vertical Poles and Roof Frame
Insert the vertical support poles into the base frame connectors. Then, assemble the roof frame structure by connecting the remaining poles and connectors at the top. This will create the skeletal structure of the tent.

Image: The complete metal frame of the tent stands assembled on a lawn, ready for the canopy to be draped over it.
Step 4: Drape the Canopy Cover
Carefully unfold the polyethylene canopy cover and drape it over the assembled frame. Ensure it is centered and evenly distributed over the roof structure. Secure the canopy to the frame using the integrated fasteners.

Image: A fully assembled white canopy tent with its roof and sidewalls in place. One end of the tent has its sidewalls pulled back to create an open entrance.
Step 5: Attach Sidewalls
Attach the removable sidewalls to the tent frame using the Velcro fasteners. The sidewalls with windows can be placed as desired. The end panels feature zippered entrances for easy access.

Image: A white canopy tent with all six sidewalls attached, featuring clear window panels on the sides. The tent is set up on a grassy area.
Step 6: Secure the Tent
Use the provided ropes and ground stakes to secure the tent firmly to the ground. This is crucial for stability, especially in outdoor environments. For additional reinforcement, consider taping the poles to the plastic connectors with white duct tape.
Setup Demonstration Video
Video: A detailed demonstration of setting up a 10x20 party tent, including unboxing, assembling the frame, and attaching the canopy and sidewalls. This video provides visual guidance for the assembly process.
Operating Instructions
Removable Sidewalls
The tent features six removable sidewalls that can be easily attached or detached using Velcro fasteners. This allows for flexible configurations, from a fully enclosed space to an open-air canopy, depending on weather conditions and event requirements. The sidewalls include transparent window panels to allow natural light and visibility.
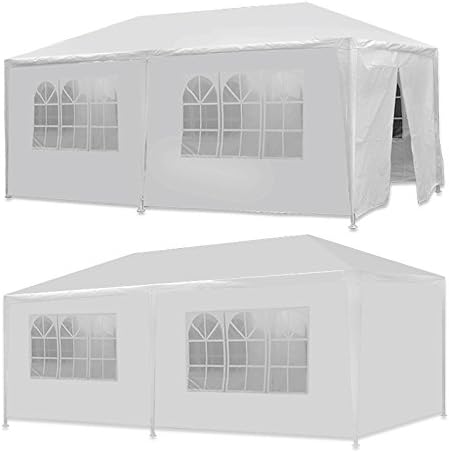
Image: A diagram illustrating the tent frame with and without its removable sidewalls, highlighting the versatility of the design.
Zippered Entrance
The end panels of the tent are equipped with zippers, creating convenient entrances. These can be fully closed for privacy and weather protection or rolled up and secured to allow for open access.
UV Protection and Water Resistance
The tent's polyethylene cover provides UV protection, blocking approximately 90% of the sun's UV rays. The material is also waterproof, offering protection from light rain. However, it is not designed for heavy rain or strong winds.
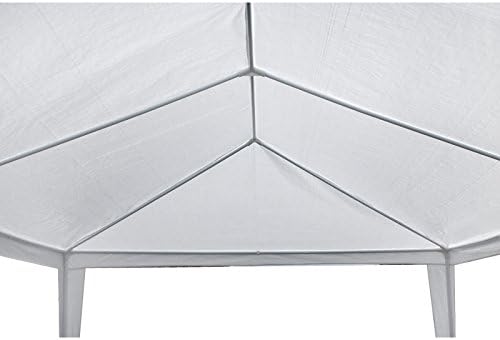
Image: A graphic illustrating the tent's waterproof and UV protection features, showing sunlight being blocked and water beading on the fabric.
Maintenance
Cleaning
Clean the canopy and sidewalls with mild soap and water. Avoid harsh chemicals or abrasive cleaners, as these can damage the material. Allow all parts to dry completely before storage to prevent mold and mildew.
Storage
When not in use, disassemble the tent and store all components in a dry, cool place, away from direct sunlight and extreme temperatures. Proper storage extends the lifespan of the product.
Inspection
Regularly inspect the frame, connectors, canopy, and sidewalls for any signs of wear, tear, or damage. Address any issues promptly to ensure continued safe and effective use.
Troubleshooting
Tent Instability
If the tent feels unstable, ensure all pole connections are fully engaged and tight. Utilize all provided ropes and ground stakes to anchor the tent securely. Consider reinforcing pole-to-connector joints with white duct tape for added rigidity.
Water Accumulation on Canopy
Ensure the canopy is stretched tautly over the frame to prevent water from pooling. Adjust the frame or re-secure the canopy if sagging occurs.
Damaged or Missing Parts
In the event of damaged or missing components, refer to the "Important Safety Information" section and contact Smartxchoices customer support for assistance with replacement parts.
Specifications
| Brand | Smartxchoices |
| Model | 10' x 20' with 6 Sidewalls |
| Material | Alloy Steel, Plastic, Polyethylene (PE) |
| Color | White |
| Item Weight | 33.1 Pounds |
| Product Dimensions | 98.4 x 120 x 98.4 inches |
| Floor Area | 200 Square Feet |
| Water Resistance Level | Waterproof |
| Ultraviolet Light Protection | True |
| Assembly Required | Yes |
Warranty and Support
For warranty information, technical support, or to order replacement parts, please contact Smartxchoices customer service through their official website or the retailer where the product was purchased. Please have your model number and purchase date available when contacting support.
Ask a question about this manual
Ask about setup, troubleshooting, compatibility, parts, safety, or missing instructions. Manuals+ will review the question and use this page’s manual context to help answer it.