
1. Introduction
Thank you for choosing the T-SUN Solar Spotlights. This manual provides detailed instructions for the proper installation, operation, and maintenance of your solar-powered outdoor lighting. Please read this manual thoroughly before use to ensure optimal performance and longevity of your product.

Image 1.1: The T-SUN Solar Spotlight system, featuring a separate solar panel and LED light unit, designed for outdoor illumination.
2. Product Features
- Separate Solar Panel: Equipped with a poly-crystalline solar panel for efficient energy conversion (up to 17%). The separate design allows for optimal placement of the solar panel to maximize sun exposure.
- Adjustable Lighting Modes: Offers two lighting modes: High Light and Low Light, selectable via a button on the solar panel.
- Extended Operation: Provides 8-12 hours of illumination after a full charge of approximately 8 hours.
- Adjustable Angles: The solar panel can be adjusted 90 degrees, and the light head can be adjusted 180 degrees, allowing for precise light direction and solar charging.
- Easy Installation: Can be installed by sticking into the ground with a stake or mounting on a wall with screws and anchors.
- Durable and Waterproof: Features an IP65 waterproof rating, ensuring reliable operation in various weather conditions including rain, snow, and dust.

Image 2.1: The IP65 waterproof rating ensures the spotlight's resilience against outdoor elements.

Image 2.2: Both the solar panel and light head offer adjustable angles for optimal positioning.

Image 2.3: The spotlight offers distinct high and low brightness settings to suit different lighting needs.
3. Package Contents
The T-SUN Solar Spotlight package includes the following components:
- 1 x Solar Spotlight Unit (LED light with bracket)
- 1 x Solar Panel Unit (with ground stake attachment)
- 1 x Ground Stake for Spotlight
- Mounting Screws and Anchors (for wall installation)
- Connecting Cable (pre-attached to solar panel and light)
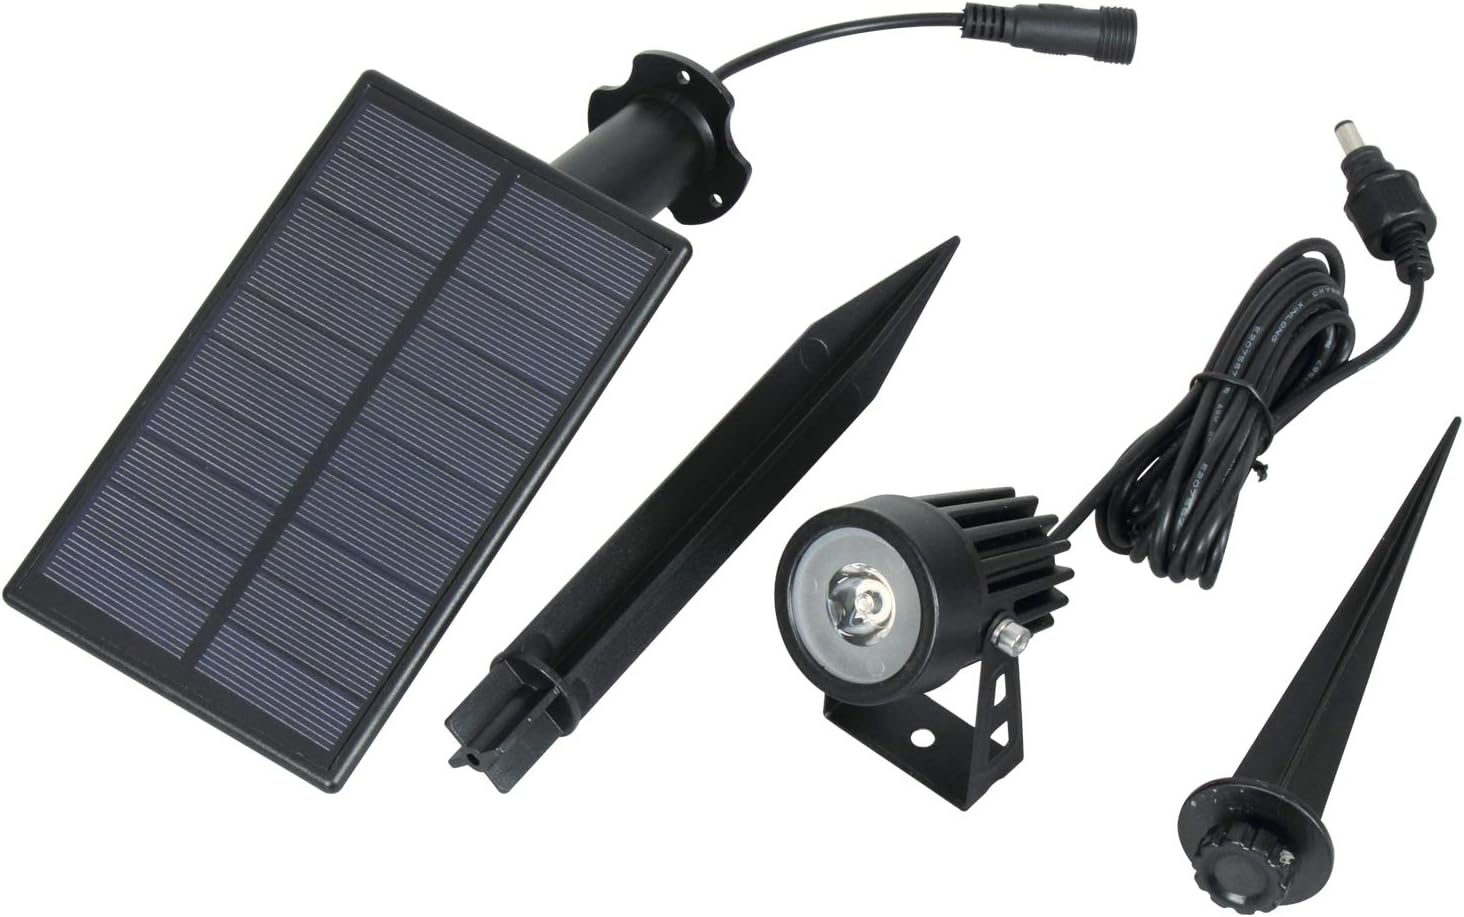
Image 3.1: Overview of all included parts for the T-SUN Solar Spotlight, ready for assembly and installation.
4. Setup & Installation
The T-SUN Solar Spotlight offers two primary installation methods: ground stake or wall mount.
4.1. Ground Installation
- Attach the ground stake to the bottom of the solar panel unit by twisting it securely.
- Attach the smaller ground stake to the bottom of the spotlight unit.
- Select a location for the solar panel that receives direct sunlight for at least 6-8 hours daily.
- Insert the solar panel's ground stake firmly into the soil.
- Position the spotlight unit in your desired location and insert its ground stake into the soil.
- Connect the cable from the solar panel to the spotlight unit. Ensure the connection is secure.
4.2. Wall Mount Installation
- Choose a wall location for both the solar panel and the spotlight unit. Ensure the solar panel location receives ample direct sunlight.
- Use the provided screws and anchors to securely mount the solar panel bracket to the wall.
- Mount the spotlight unit's bracket to the wall using the provided screws and anchors.
- Connect the cable from the solar panel to the spotlight unit. Ensure the connection is secure.
4.3. Adjusting Angles
After installation, adjust the angle of the solar panel to face the sun directly for maximum charging efficiency. Adjust the light head to illuminate your desired area. The solar panel pivots 90 degrees, and the light head pivots 180 degrees.

Image 4.1: Visual guide for both ground stake and wall-mounted installation methods.

Image 4.2: Illustrates the adjustability of both the solar panel (90°) and the light head (180°) for optimal positioning.
5. Operating Instructions
The T-SUN Solar Spotlight is designed for automatic operation. It charges during the day and illuminates automatically at night.
5.1. Initial Use
Before first use, ensure the solar panel is exposed to direct sunlight for at least 8 hours to fully charge the internal battery. The unit will automatically turn on at dusk once charged.
5.2. Power ON/OFF and Mode Selection
A button located on the back of the solar panel controls the power and lighting modes:
- Press once for High Light mode.
- Press again for Low Light mode.
- Press a third time to turn the unit OFF.
The light will automatically turn on at dusk in the selected mode and turn off at dawn.

Image 5.1: The power button on the solar panel allows selection between High Light, Low Light, and Off modes.
5.3. Optimal Placement Considerations
For best performance, avoid placing the solar panel near other light sources at night (e.g., streetlights, porch lights) as this may prevent the light from turning on automatically. Ensure the ground is soft enough for stake installation; do not use excessive force or tools like hammers on the stake.

Image 5.2: Guidelines for proper placement, including avoiding other light sources at night and ensuring suitable ground conditions for installation.
6. Maintenance
Regular maintenance helps ensure the longevity and efficiency of your T-SUN Solar Spotlights.
6.1. Cleaning the Solar Panel
Periodically wipe the solar panel with a soft, damp cloth to remove dust, dirt, or debris. A clean panel ensures maximum sunlight absorption and charging efficiency.
6.2. Battery Replacement
The T-SUN Solar Spotlight features an easily replaceable battery. If the light duration significantly decreases over time, the battery may need replacement. Access the battery compartment on the back of the solar panel unit to replace the Lithium Ion battery (1 required).

Image 6.1: The back of the solar panel showing the ON/OFF switch and the accessible battery compartment for easy replacement.
7. Troubleshooting
If your T-SUN Solar Spotlight is not functioning as expected, please refer to the following common issues and solutions:
- Light does not turn on at night:
- Ensure the ON/OFF switch on the solar panel is set to either High Light or Low Light mode, not OFF.
- Verify the solar panel is receiving at least 6-8 hours of direct sunlight daily. Relocate if necessary.
- Check for external light sources (e.g., streetlights) that might be activating the light sensor, preventing the spotlight from turning on.
- Ensure the cable connection between the solar panel and the light unit is secure.
- Light is dim or only stays on for a short period:
- The battery may not be fully charged. Ensure the solar panel is clean and receives adequate direct sunlight.
- Consider replacing the battery if the issue persists after several days of full charging.
- Environmental factors like prolonged cloudy weather can affect charging efficiency.
- Physical damage to stake during installation:
- Avoid using excessive force or tools like hammers when inserting the ground stake into hard soil. If the ground is too hard, pre-dig a small hole or soften the soil with water.
8. Specifications

Image 8.1: Detailed dimensions of the solar panel and spotlight unit for planning installation.
| Feature | Specification |
|---|---|
| Brand | T-SUN |
| Model Number | 724190991619 |
| Color | White (Light Color: White) |
| Material | Acrylonitrile Butadiene Styrene, Aluminum |
| Power Source | Solar Powered |
| Light Source Type | LED |
| Brightness | 100 Lumens (Maximum) |
| Solar Panel Efficiency | 17% |
| Water Resistance Level | IP65 Waterproof |
| Battery | 1 Lithium Ion battery required (included) |
| Charging Time | Approx. 8 hours (full sun) |
| Lighting Duration | 8-12 hours (after full charge) |
| Installation Type | Ground Stake, Wall Mount |
| Item Weight | 1.1 Pounds |
| Package Dimensions | 6.81 x 5.98 x 3.62 inches |
9. Warranty & Support
For any product inquiries, technical support, or warranty claims, please contact the seller directly through your purchase platform. The seller, T-SUN Team, is available to assist with any issues you may encounter.
You can typically find seller contact information on your order details page or by visiting the T-SUN Store on Amazon.