
Introduction
This manual provides essential information for the safe operation, maintenance, and troubleshooting of your RYOBI ONE+ 18V Cordless Brad Nailer P320. Please read this manual thoroughly before using the tool to ensure proper function and to prevent injury.

Figure 1: The RYOBI ONE+ 18V Cordless Brad Nailer P320, including the 18V Lithium battery and charger.
Note: This product is typically supplied in bulk packaging and may not include retail packaging.

Figure 2: Information regarding the bulk packaging of the product.
Safety Information
Always follow basic safety precautions to reduce the risk of fire, electric shock, and personal injury when using power tools. Keep this manual for future reference.
- Read all instructions: Familiarize yourself with the tool's operation and safety guidelines.
- Wear eye protection: Always wear safety glasses with side shields.
- Wear hearing protection: Prolonged exposure to noise from power tools can cause hearing damage.
- Keep work area clean: Cluttered areas invite accidents.
- Do not operate in explosive atmospheres: Power tools create sparks which may ignite dust or fumes.
- Secure workpiece: Use clamps or a vise to hold the workpiece. This frees both hands to operate the tool.
- Disconnect power: Always remove the battery pack before making adjustments, changing accessories, or storing the tool.
Product Features
The RYOBI ONE+ 18V Cordless Brad Nailer P320 is designed for various nailing applications, offering cordless convenience and consistent performance.
- Cordless Operation: Powered by the RYOBI ONE+ 18V battery system.
- AirStrike Technology: Provides cordless convenience, eliminating the need for compressors and hoses.
- Depth-of-Drive Adjustment: Tool-free dial for precise nail depth control.
- LED Work Light: Illuminates the work surface for improved visibility.
- Belt Clip: For convenient portability.
- Nail Capacity: Capable of firing up to 700 nails (up to 50mm long) on a single 4 Ah battery charge.

Figure 3: Side view of the nailer highlighting the depth adjustment dial and belt clip.
Setup
1. Battery Installation and Charging
- Charge the Battery: Connect the charger to a standard power outlet. Insert the 18V Lithium battery into the charger. The indicator lights on the charger will show the charging status. Ensure the battery is fully charged before first use.
- Install the Battery: Align the battery pack with the receptacle on the base of the nailer. Slide the battery into place until it clicks securely.
- Remove the Battery: Press the release latches on the sides of the battery pack and slide it out of the tool.
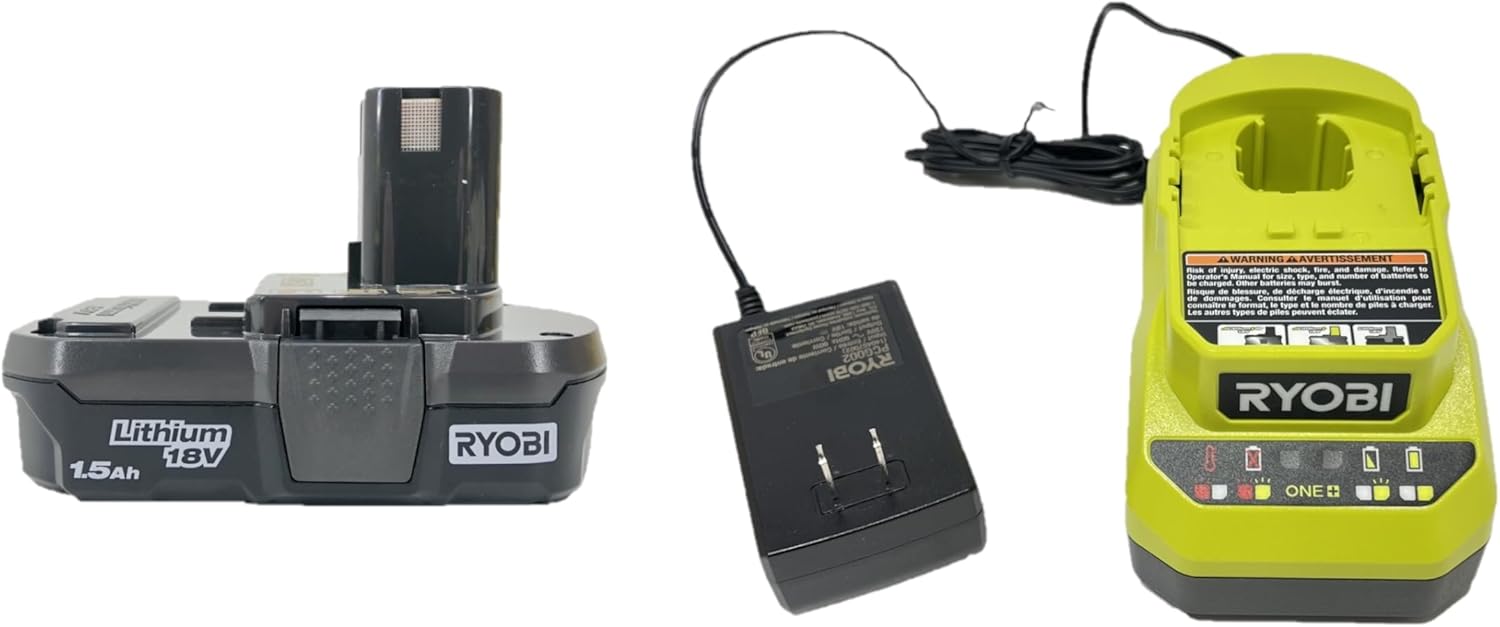
Figure 4: The RYOBI ONE+ 18V Lithium battery and its corresponding charger.
2. Loading Brad Nails
- Ensure Safety: Remove the battery pack from the nailer before loading nails.
- Open Magazine: Pull back the magazine follower until it locks in the open position.
- Insert Nails: Place a strip of brad nails into the magazine with the points facing down. Ensure the nails are the correct gauge and length for the tool (e.g., 18 gauge brad nails).
- Close Magazine: Release the magazine follower, allowing it to push the nails forward.

Figure 5: The nailer's magazine, where brad nails are loaded.
Operating Instructions
1. Adjusting Depth of Drive
The depth of drive can be adjusted without tools to control how far the nail is driven into the workpiece.
- Locate the depth adjustment dial on the side of the nailer.
- Rotate the dial clockwise to increase the depth of drive (nails driven deeper).
- Rotate the dial counter-clockwise to decrease the depth of drive (nails driven less deep).
- Test on a scrap piece of material to achieve the desired depth before working on your project.
2. Firing the Nailer
The P320 features a sequential actuation mode for controlled firing.
- Connect Battery: Ensure a charged battery is securely installed.
- Position Tool: Place the nose of the nailer firmly against the workpiece where the nail is to be driven.
- Engage Safety: The contact trip must be depressed against the workpiece before the trigger can be pulled.
- Fire Nail: Squeeze the trigger to drive a single nail. Release the trigger and lift the tool from the workpiece to prepare for the next nail.
The built-in LED light will activate when the trigger is pulled, illuminating the work area.
Maintenance
Regular maintenance ensures the longevity and optimal performance of your brad nailer.
- Clean the Tool: Periodically clean the tool with a soft, damp cloth. Do not use harsh chemicals or abrasive cleaners.
- Inspect for Damage: Before each use, inspect the tool for any signs of damage, loose parts, or wear. Do not use a damaged tool.
- Clear Jams: If a nail jam occurs, immediately remove the battery pack. Follow the instructions in the troubleshooting section to safely clear the jam.
- Storage: Store the tool in a dry, secure location out of reach of children. Remove the battery pack before storing for extended periods.
Troubleshooting
This section addresses common issues you might encounter with your RYOBI P320 Brad Nailer.
| Problem | Possible Cause | Solution |
|---|---|---|
| Nailer does not fire. |
|
|
| Nails not driven to full depth. |
|
|
| Nailer jams frequently. |
|
|
Specifications
| Feature | Detail |
|---|---|
| Model Number | P320 |
| Brand | RYOBI |
| Power Source | 18V DC (Battery Powered) |
| Battery Type | RYOBI ONE+ 18V Lithium-Ion |
| Nail Type | 18 Gauge Brad Nails |
| Item Weight | 8.76 pounds |
| Package Dimensions | 14.02 x 10.51 x 8.58 inches |
| Date First Available | October 11, 2018 |
Warranty and Support
For detailed warranty information, product registration, or technical support, please refer to the official documentation included with your product or visit the official RYOBI website. Warranty terms and conditions may vary by region and purchase date.
Manufacturer: RYOBI
Website: www.ryobitools.com (This is a general link, specific support pages may vary)


