1. Introduction
This manual provides essential information for the safe and efficient installation, operation, and maintenance of your Dayton 3/4 HP Capacitor-Start General Purpose Motor. Please read this manual thoroughly before attempting to install or operate the motor. Retain this manual for future reference.
Safety Warning:
Always disconnect power before performing any installation, maintenance, or troubleshooting procedures. Failure to do so can result in serious injury or death. This motor must be installed by a qualified electrician in accordance with all local and national electrical codes.
2. Product Overview
The Dayton 3/4 HP Capacitor-Start General Purpose Motor is designed for a wide range of industrial and commercial applications requiring reliable power. It features a robust construction and is engineered for continuous duty.
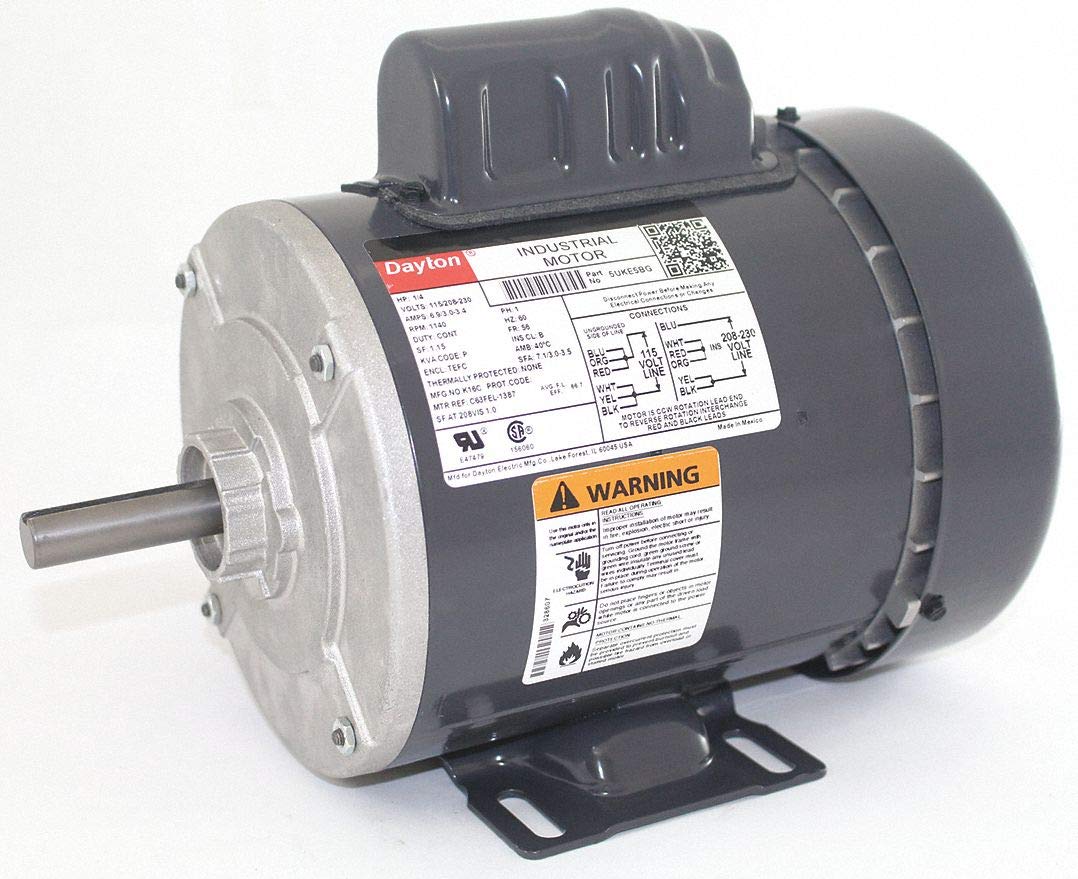
Image 1: Dayton 3/4 HP Capacitor-Start General Purpose Motor. This image displays the motor's main body, cooling fins, and electrical connection box.
Key Features:
- 3/4 Horsepower output
- Capacitor-Start design for high starting torque
- 3450 Nameplate RPM
- Dual voltage compatibility: 115V / 208-230V
- Frame 48 construction
- Durable Alloy Steel material
3. Specifications
| Specification | Value |
|---|---|
| Brand | Dayton |
| Horsepower | 0.75 HP |
| Speed | 3450 RPM |
| Voltage | 115V / 208-230V |
| Frame | 48 |
| Material | Alloy Steel |
| ASIN | B07J293QSC |
| UPC | 696334102413 |
4. Setup
4.1 Pre-Installation Checks
- Inspect the motor for any shipping damage. Do not install if damaged.
- Ensure the mounting surface is flat, rigid, and capable of supporting the motor's weight and operational forces.
- Verify that the power supply voltage and frequency match the motor's nameplate ratings (115V or 208-230V).
- Ensure adequate ventilation around the motor to prevent overheating.
4.2 Mounting Instructions
- Position the motor on the desired mounting surface.
- Secure the motor using appropriate bolts and washers through the mounting holes on the motor frame. Ensure all bolts are tightened evenly to prevent distortion of the motor frame.
- Verify that the motor shaft is properly aligned with the driven equipment to minimize vibration and wear.
4.3 Electrical Connection
WARNING: Electrical connections must be made by a qualified electrician. Ensure the power supply is disconnected before wiring.
- Open the motor's terminal box.
- Refer to the wiring diagram located inside the terminal box cover for specific connections for 115V or 208-230V operation.
- Connect the power supply wires to the appropriate terminals.
- Ensure the motor is properly grounded according to local and national electrical codes.
- Close and secure the terminal box cover.
5. Operating Instructions
5.1 Initial Start-Up
- After completing all installation and wiring steps, ensure all safety guards are in place.
- Restore power to the motor circuit.
- Start the motor. Observe for any unusual noises, vibrations, or overheating.
- If any abnormalities are detected, immediately shut down the motor and investigate the cause.
5.2 Normal Operation
- The motor is designed for continuous duty within its specified ratings.
- Avoid operating the motor beyond its rated horsepower or voltage.
- Monitor the motor periodically for excessive heat, noise, or vibration.
5.3 Shut Down
To stop the motor, simply disconnect the power supply to the motor circuit. For extended periods of non-use, it is recommended to disconnect the main power source.
6. Maintenance
Regular maintenance ensures the longevity and optimal performance of your motor. Always disconnect power before performing any maintenance.
6.1 Routine Inspection (Monthly)
- Check for loose mounting bolts and tighten as necessary.
- Inspect the motor for dirt, dust, or debris accumulation on the housing and cooling fins.
- Listen for unusual noises or vibrations during operation.
- Check electrical connections for tightness and signs of corrosion or damage.
6.2 Cleaning
Keep the motor clean and free from obstructions. Use compressed air to remove dust and debris from the cooling fins and ventilation openings. Do not use water or solvents that could damage electrical components.
6.3 Lubrication
This motor is equipped with permanently lubricated bearings and typically does not require additional lubrication under normal operating conditions. Refer to the motor's nameplate or specific documentation for any lubrication requirements if present.
6.4 Storage
If storing the motor for an extended period, keep it in a dry, clean environment. Protect it from moisture, dust, and extreme temperatures.
7. Troubleshooting
Before troubleshooting, ensure the power supply is disconnected.
| Problem | Possible Cause | Solution |
|---|---|---|
| Motor does not start | No power; incorrect wiring; faulty capacitor; seized bearings | Check power supply and circuit breaker; verify wiring against diagram; test/replace capacitor; inspect/replace bearings |
| Motor overheats | Overload; insufficient ventilation; incorrect voltage; faulty bearings | Reduce load; clear ventilation openings; verify correct voltage; inspect/replace bearings |
| Excessive noise or vibration | Loose mounting; misalignment; worn bearings; unbalanced load | Tighten mounting bolts; check and correct alignment; replace bearings; balance load |
| Motor runs slowly | Low voltage; excessive load; faulty capacitor | Verify correct voltage; reduce load; test/replace capacitor |
8. Warranty and Support
This Dayton motor is manufactured to high-quality standards. For warranty information, please refer to the documentation provided at the time of purchase or contact your supplier. Keep your purchase receipt as proof of purchase.
For technical support or service inquiries, please contact the retailer or manufacturer's customer service department. Provide the motor's model number (48-Frame) and ASIN (B07J293QSC) when seeking assistance.


