
Dent-de-lion blue 120
Instruction Manual
Dent-de-lion 120A Battery Connector Quick Connect Modular Power Connectors
Model: blue 120
Introduction
This manual provides essential information for the safe and effective use of your Dent-de-lion 120A Battery Connector Quick Connect Modular Power Connectors. These connectors are designed for reliable and efficient power transfer in various applications, offering quick and secure connections. Please read this manual thoroughly before installation and operation.
Package Contents
Verify that all components listed below are present in your package:
- 4 x 120A Quick Connect Sockets (Blue)
- 8 x Silver Copper Terminals (for 2/4/6 AWG wire)

Figure 1: Contents of the 120A Battery Connector package.
Specifications
| Feature | Detail |
|---|---|
| Rated Current | 120 Amps |
| Rated Voltage | 600 Volts |
| Contact Barrel Wire Size | 2/4/6 AWG (13.3 mm² - 33.6 mm²) |
| Medium Contact Resistance | 140 micro-ohms |
| Isolation Resistance (Test Voltage) | 2200V (AC/DC) |
| Contact Retention Force | 100 lbf |
| No Load Contact/Disconnect Cycles | 10,000 cycles |
| Operating Temperature | -20°C to 105°C |
| Flammability Class (Housing) | UL 94-V0 |
| Material | Silver Copper (Terminals), Plastic (Housing) |
| Color | Blue |
| Certification | UL Recognized |
Setup and Installation
Proper installation is crucial for the safe and reliable operation of these connectors. Follow these steps carefully:
- Prepare Wires: Strip approximately 1.5 inches (3.8 cm) of insulation from the end of your 2, 4, or 6 AWG wire. For smaller gauge wires (e.g., 4 or 6 AWG), it is recommended to fold the stripped wire in half to ensure a secure crimp within the terminal.
- Crimp Terminals: Insert the stripped wire into the silver copper terminal. Use a hydraulic crimper or a suitable heavy-duty crimping tool to securely crimp the terminal onto the wire. Ensure a tight, permanent connection.
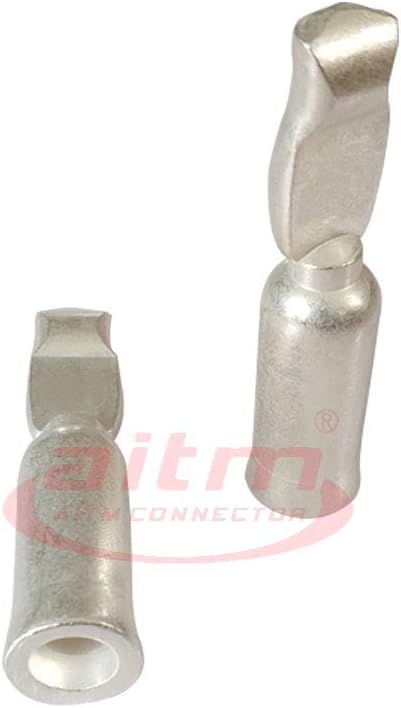
Figure 2: Silver Copper Terminals.
- Insert Terminals into Housing: Carefully slide the crimped terminals into the blue connector housing. Ensure that the terminals are oriented correctly (positive and negative markings on the housing). The "auto-erasure" design helps maintain clean contact surfaces.
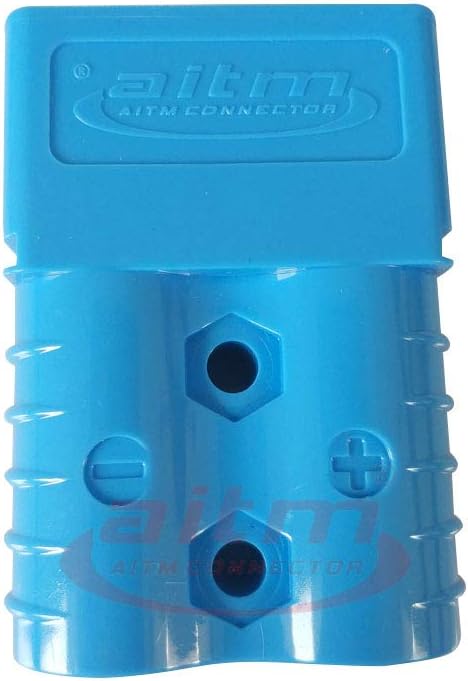
Figure 3: Front view of the connector housing.

Figure 4: Back view of the connector housing with specifications.
- Secure Terminals: Ensure the terminals click into place within the housing. The stainless steel shrapnel inside the housing helps maintain constant contact stress.
- Verify Connection: Gently pull on the wires to ensure the terminals are firmly seated and cannot be easily pulled out of the housing.
Important Safety Note: Always ensure power is disconnected from the battery or power source before working with electrical connectors to prevent electric shock or short circuits.
Operating Instructions
These connectors are designed for simple and reliable operation:
- Connecting: To connect two power sources or devices, simply align two connectors of the same color and push them firmly together until they click. The design ensures that only connectors of the same color can mate, preventing incorrect polarity connections.
- Disconnecting: To disconnect, firmly grasp both connector housings and pull them apart. The quick disconnect feature allows for fast and easy separation.
- High Current Applications: These connectors are suitable for applications requiring up to 120 Amps and 600 Volts. Their robust design allows for use in environments with strong shock and provides reliable performance under large electric currents.
Maintenance
The Dent-de-lion 120A Battery Connectors are designed for durability and minimal maintenance. However, following these guidelines can extend their lifespan:
- Regular Inspection: Periodically inspect the connector housings and terminals for any signs of wear, corrosion, or damage. Ensure the wires are still securely crimped.
- Cleaning: If necessary, clean the connector surfaces and terminals with a dry, lint-free cloth. Avoid using abrasive cleaners or solvents that could damage the plastic housing or contact surfaces. The auto-erasure feature helps keep the push needle surface clean during connection/disconnection.
- Storage: Store unused connectors in a clean, dry environment, away from extreme temperatures and direct sunlight.
Troubleshooting
If you encounter issues with your connectors, consider the following common problems and solutions:
| Problem | Possible Cause | Solution |
|---|---|---|
| Difficulty connecting/disconnecting | Misalignment, debris in connector, new connector stiffness. | Ensure proper alignment. Check for and remove any debris. New connectors may require a few cycles to loosen up. |
| Loose connection / Intermittent power | Poorly crimped terminals, damaged terminals, incorrect wire gauge. | Inspect terminal crimps. Re-crimp if necessary. Replace damaged terminals. Ensure wire gauge matches specifications. |
| Connector overheating | Overcurrent, poor contact, damaged connector. | Verify current draw is within 120A limit. Check for clean and secure contact. Replace connector if damaged or discolored. |
| Different color connectors won't mate | Intentional design feature. | This is by design to prevent incorrect polarity. Only connectors of the same color can be mated. |
Warranty and Support
For warranty information or technical support, please refer to the product packaging or contact Dent-de-lion customer service through the retailer where the product was purchased. Keep your purchase receipt as proof of purchase.
Manufacturer: Dent-de-lion
Country of Origin: China
Ask a question about this manual
Ask about setup, troubleshooting, compatibility, parts, safety, or missing instructions. Manuals+ will review the question and use this page’s manual context to help answer it.