
1. Introduction
This manual provides essential information for the safe and efficient installation, operation, and maintenance of your FASCO 1/40 HP Shaded Pole HVAC Motor. Please read this manual thoroughly before attempting any installation or operation. Retain this manual for future reference.
The FASCO 1/40 HP HVAC Motor is designed for various heating, ventilation, and air conditioning applications, providing reliable performance for fan and blower systems. This motor features a shaded pole design, operating at 1500/1250 Nameplate RPM with a 230 Voltage input and a Frame 3.3 construction.
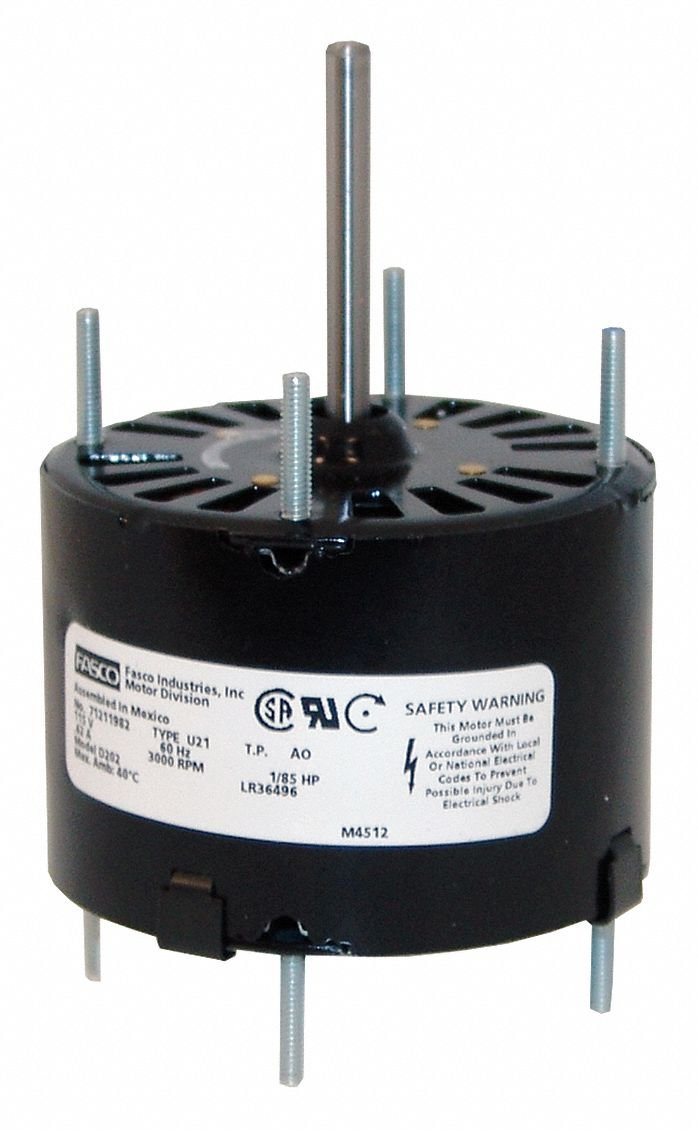
Figure 1: Front view of the FASCO 1/40 HP HVAC Motor. This image shows the motor casing, shaft, and electrical connection points.
2. Safety Information
WARNING: Failure to follow these safety instructions may result in electric shock, fire, serious injury, or death.
- Always disconnect power before installing, servicing, or cleaning the motor.
- Installation and wiring must be performed by a qualified electrician in accordance with all local and national electrical codes.
- Ensure the motor is properly grounded to prevent electrical shock.
- Do not operate the motor if it is damaged or if any wires are frayed or exposed.
- Keep hands, clothing, and tools clear of moving parts during operation.
- Ensure adequate ventilation around the motor to prevent overheating.
- Do not expose the motor to excessive moisture or corrosive environments unless specifically rated for such conditions.
3. Setup and Installation
3.1 Unpacking and Inspection
Carefully remove the motor from its packaging. Inspect the motor for any signs of shipping damage. If damage is found, do not proceed with installation and contact your supplier immediately.
3.2 Mounting
- Ensure the mounting surface is stable, level, and capable of supporting the motor's weight and operational vibrations.
- Mount the motor securely using appropriate bolts and washers. Refer to the motor's frame size (Frame 3.3) for compatible mounting hardware.
- Ensure proper alignment of the motor shaft with the driven component (e.g., fan blade, blower wheel) to prevent excessive wear and vibration.
3.3 Electrical Connections
CAUTION: All electrical work must be performed by a qualified electrician.
- Verify that the supply voltage matches the motor's rated voltage (230V).
- Connect the motor wiring according to the wiring diagram provided on the motor's nameplate or in the specific product documentation.
- Ensure all connections are tight and secure.
- Properly ground the motor chassis to an earth ground.
4. Operating Instructions
4.1 Pre-Operation Check
- Confirm all mounting bolts are tightened.
- Verify all electrical connections are secure and insulated.
- Ensure there are no obstructions around the motor or the driven component.
- Check that the motor shaft rotates freely by hand (if accessible and safe).
4.2 Starting the Motor
Once all pre-operation checks are complete, apply power to the motor. The motor should start smoothly and reach its operating speed (1500/1250 RPM) within a few seconds. Listen for any unusual noises or vibrations.
4.3 Normal Operation
During normal operation, the motor may generate some heat, which is typical. However, excessive heat, loud noises, or strong vibrations indicate a potential issue. Monitor the motor's performance regularly.
4.4 Stopping the Motor
To stop the motor, disconnect the power supply. Allow the motor and driven components to come to a complete stop before any inspection or maintenance.
5. Maintenance
WARNING: Disconnect all power before performing any maintenance.
5.1 Regular Inspection
- Monthly: Visually inspect the motor for dirt, dust, and debris accumulation. Check for any loose connections or signs of wear on wiring.
- Quarterly: Check mounting bolts for tightness. Inspect the motor housing for cracks or damage. Listen for unusual bearing noises.
5.2 Cleaning
Keep the motor clean and free from dust, lint, and other obstructions that can impede airflow and cause overheating. Use a soft brush or compressed air to clean the exterior of the motor. Do not use water or solvents directly on the motor.
5.3 Lubrication
This shaded pole motor typically features permanently lubricated bearings and does not require routine lubrication. Refer to the motor's specific documentation or nameplate for any lubrication requirements. Do not lubricate if not specified, as this can cause damage.
6. Troubleshooting
This section provides solutions to common issues. For problems not listed here, contact a qualified service technician.
| Problem | Possible Cause | Solution |
|---|---|---|
| Motor does not start | No power supply Incorrect wiring Overload protection tripped Seized bearings |
Check power source and circuit breaker Verify wiring against diagram Reset overload protector Inspect and replace bearings if necessary |
| Motor runs hot | Insufficient ventilation Overload condition Low voltage Bearing friction |
Clear obstructions, ensure proper airflow Reduce load on motor Check supply voltage Inspect bearings |
| Excessive noise or vibration | Loose mounting Misalignment of driven component Worn bearings Damaged fan/blower wheel |
Tighten mounting bolts Realign components Replace bearings Inspect and replace damaged parts |
7. Specifications
The following are the key specifications for the FASCO 1/40 HP HVAC Motor:
- Brand: Fasco
- Horsepower (HP): 1/40 HP
- Motor Type: Shaded Pole
- Nameplate RPM: 1500/1250 rpm
- Voltage: 230 volts
- Frame Size: 3.3
- Material: Copper
- UPC: 696334136593
- ASIN: B07HLWF22W
8. Product Videos
No official product videos from the seller are available for this model at this time.


