1. Product Overview
This document provides instructions for the installation and proper use of the De'Longhi replacement cable winder, designed for specific Colombina Class vacuum cleaner models. This component is essential for the safe and convenient storage of your vacuum cleaner's power cord.
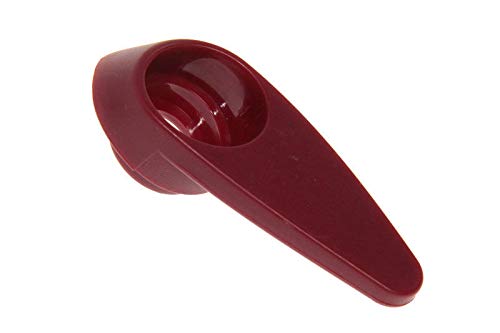
Figure 1: De'Longhi Colombina Class Cable Winder. This image shows the replacement cable winder, a red plastic component designed to manage the vacuum cleaner's power cord.
2. Compatibility
This cable winder is compatible with the following De'Longhi Colombina Class vacuum cleaner models:
- XL125.20, XL125.20 EX:1
- XL130.20, XL130.20 EX:1
- XL135.20, XL135.20 EX:1
- XL150.40, XL150.40 EX:1
- XL155.40, XL155.40 EX:1
- XL160.40, XL160.40 EX:1
- XL165.40, XL165.40 EX:1, XL165.40T, XL165.40T EX:1
To ensure correct compatibility, please locate the identification plate on your appliance, typically found on the underside. Verify your specific model number against the list above. If your model is not listed, please contact customer support for assistance.
3. Safety Information
Before attempting any installation or maintenance, always observe the following safety precautions:
- Disconnect Power: Always unplug the vacuum cleaner from the electrical outlet before beginning any work.
- Use Correct Tools: Ensure you have the appropriate tools for disassembly and reassembly.
- Handle with Care: Be careful when handling internal components to avoid damage or injury.
- Professional Assistance: If you are unsure about any step, consult a qualified technician.
4. Installation Instructions
Follow these general steps to replace the cable winder. Specific disassembly procedures may vary slightly by model.
- Prepare the Vacuum Cleaner: Ensure the vacuum cleaner is unplugged and placed on a stable, clean surface.
- Access the Cable Winder Compartment: Depending on your model, you may need to remove screws or clips to open the housing that contains the cable winder mechanism. Refer to your vacuum cleaner's original manual for specific disassembly instructions if available.
- Disconnect the Old Winder: Carefully disconnect any electrical connections or mechanical linkages attached to the old cable winder. Note their positions for reassembly.
- Remove the Old Winder: Once disconnected, remove the faulty cable winder from its housing.
- Install the New Winder: Place the new De'Longhi cable winder into the compartment, ensuring it fits securely.
- Reconnect Components: Reconnect any electrical wires or mechanical linkages to the new winder, ensuring all connections are firm and correct.
- Reassemble the Vacuum Cleaner: Carefully close and secure the vacuum cleaner housing, replacing all screws or clips.
- Test Functionality: Plug the vacuum cleaner back into an electrical outlet and test the cable winding mechanism to ensure it operates smoothly and retracts the cable properly.
5. Operation
Once installed, the cable winder operates as part of your vacuum cleaner's power cord management system. To retract the cable, gently pull the cord slightly and then release it, allowing the internal spring mechanism to wind the cable back into the appliance. Always guide the cable to prevent tangling or damage.
6. Maintenance
To ensure the longevity and proper function of your cable winder:
- Keep Clean: Periodically inspect the cable entry point for dust or debris and clean as necessary.
- Avoid Over-Extension: Do not pull the power cord beyond its marked limit.
- Gentle Retraction: Allow the cable to retract smoothly; do not force it or let it snap back violently.
7. Troubleshooting
If you experience issues with the cable winder after installation:
- Cable Not Retracting:
- Check for obstructions at the cable entry point.
- Ensure the cable is not tangled inside the compartment.
- Verify that the winder was installed correctly and all connections are secure.
- Partial Retraction: This may indicate a weak spring or an obstruction. Re-check installation and clean the mechanism if accessible.
If problems persist, contact De'Longhi customer support or a qualified service technician.
8. Specifications
| Feature | Specification |
|---|---|
| Brand | De'Longhi |
| Product Dimensions (L x W x H) | 2.3 x 1.9 x 6.1 cm (0.9 x 0.75 x 2.4 inches) |
| Item Weight | 10 g (0.35 ounces) |
| Compatible Models | Colombina Class XL125, XL130, XL135, XL150, XL155, XL160, XL165 series |
9. Warranty and Support
For information regarding warranty coverage, please refer to the original purchase documentation or contact the retailer from whom you purchased this replacement part. For technical support or further assistance, please visit the official De'Longhi website or contact their customer service department.
De'Longhi Official Website: www.delonghi.com


