
1. Introduction
This manual provides essential information for the safe and effective operation, maintenance, and troubleshooting of your Milwaukee M18 CCS55 18V Cordless Circular Saw. Please read these instructions carefully before using the tool and keep them for future reference. This tool is designed for cutting wood and wood-based materials.
2. Safety Instructions
Always follow basic safety precautions to reduce the risk of fire, electric shock, and personal injury.
- Work Area Safety: Keep the work area clean and well-lit. Cluttered or dark areas invite accidents. Do not operate power tools in explosive atmospheres, such as in the presence of flammable liquids, gases, or dust.
- Electrical Safety: Avoid body contact with earthed or grounded surfaces such as pipes, radiators, ranges, and refrigerators. Do not expose power tools to rain or wet conditions.
- Personal Safety: Always wear eye protection. Use hearing protection when operating the tool. Dress properly; avoid loose clothing or jewelry. Secure long hair.
- Tool Use and Care: Do not force the power tool. Use the correct power tool for your application. Disconnect the battery pack from the power tool before making any adjustments, changing accessories, or storing power tools.
- Circular Saw Specific Safety: Keep hands away from the cutting area and the blade. Do not reach underneath the workpiece. Adjust the cutting depth to the thickness of the workpiece. Never hold the workpiece in your hands or across your leg while cutting.
3. Product Overview
Familiarize yourself with the components of your Milwaukee M18 CCS55 Circular Saw.
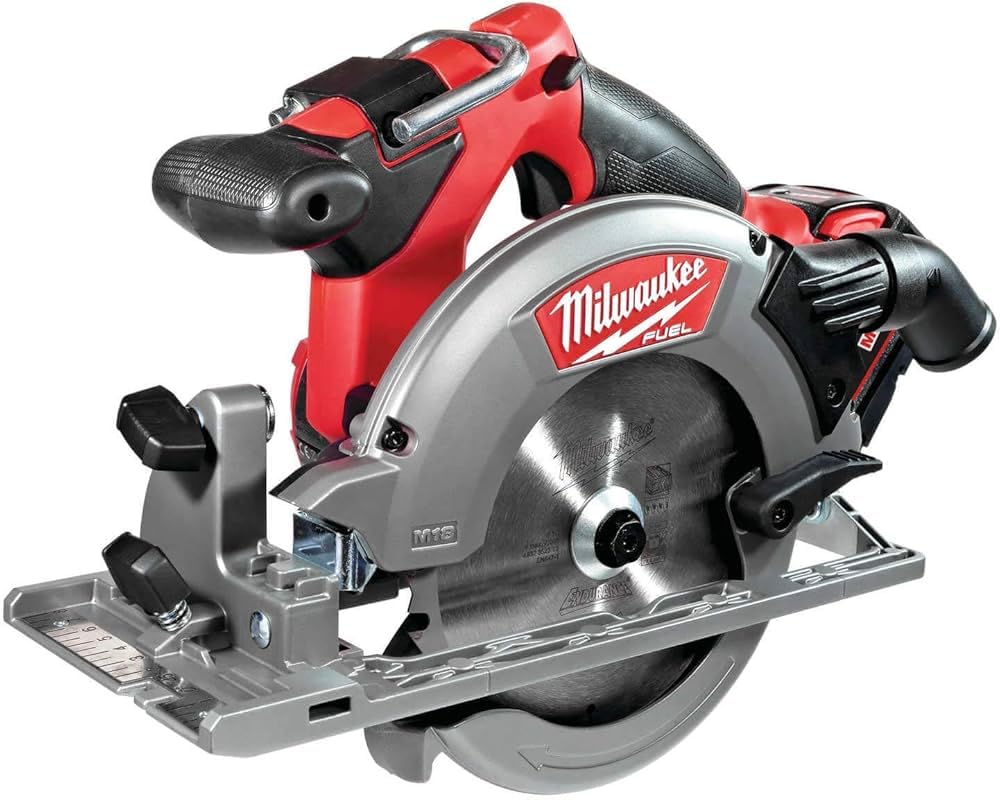
Image 1: Milwaukee M18 CCS55 18V Cordless Circular Saw. This image displays the main unit of the circular saw, highlighting its compact design and ergonomic handle. The blade guard and base plate are visible, indicating its readiness for various cutting tasks.
- Blade Guard: Retracts automatically during cutting to expose the blade.
- Base Plate (Shoe): Provides stability and guides the saw along the workpiece.
- Depth Adjustment Lever: Allows setting the desired cutting depth.
- Bevel Adjustment Lever: For setting the cutting angle (bevel).
- Handle: Ergonomic grip for control and comfort.
- Trigger Switch: Activates the motor.
- Spindle Lock Button: Used to lock the spindle for blade changes.
- Battery Port: For inserting the M18 series battery pack (not included).
4. Setup
4.1. Installing/Removing the Saw Blade
- Ensure the battery pack is removed from the tool.
- Press and hold the spindle lock button.
- Using the provided blade wrench, loosen the blade bolt by turning it counter-clockwise.
- Remove the outer flange and the old blade.
- Clean the inner and outer flanges.
- Place the new blade onto the spindle, ensuring the teeth are pointing in the direction of the arrow on the blade guard.
- Replace the outer flange and tighten the blade bolt clockwise with the wrench while holding the spindle lock button. Do not overtighten.
4.2. Installing/Removing the Battery Pack
- To install, slide the battery pack into the tool's battery port until it clicks into place.
- To remove, press the battery release button and slide the battery pack out.
4.3. Adjusting Cutting Depth
- Loosen the depth adjustment lever.
- Raise or lower the base plate until the blade extends approximately 3-6 mm below the workpiece.
- Tighten the depth adjustment lever securely.
4.4. Adjusting Bevel Angle
- Loosen the bevel adjustment lever.
- Tilt the base plate to the desired angle (0-50 degrees).
- Tighten the bevel adjustment lever securely.
5. Operating Instructions
5.1. Starting and Stopping the Saw
- Ensure the battery is fully charged and properly installed.
- To start, depress the safety lock-off button (if present) and then squeeze the trigger switch.
- To stop, release the trigger switch.
5.2. Making a Cut
- Secure the workpiece firmly with clamps. Never hold it by hand.
- Position the front of the base plate on the workpiece, ensuring the blade is clear of the material.
- Start the saw and allow the blade to reach full speed before engaging the material.
- Guide the saw smoothly and steadily through the workpiece, maintaining a firm grip. Do not force the saw.
- Once the cut is complete, release the trigger and allow the blade to stop completely before lifting the saw from the workpiece.
6. Maintenance
Regular maintenance ensures optimal performance and extends the life of your tool.
- Cleaning: Keep the tool's ventilation openings clean and free of debris. Use a soft brush or compressed air to remove dust from the motor housing.
- Blade Inspection: Regularly inspect the saw blade for sharpness, cracks, or missing teeth. Replace dull or damaged blades immediately.
- Battery Care: Store battery packs in a cool, dry place. Do not expose them to extreme temperatures or moisture.
- General Inspection: Check all screws and fasteners for tightness. Ensure the blade guard operates freely and returns to its closed position.
- Lubrication: This tool features a brushless motor and sealed bearings, requiring no internal lubrication.
7. Troubleshooting
Refer to this section for common issues and their solutions.
| Problem | Possible Cause | Solution |
|---|---|---|
| Saw does not start | Battery not inserted correctly; Battery discharged; Faulty switch | Ensure battery is fully seated; Charge battery; Contact service center |
| Blade binds or cuts slowly | Dull or damaged blade; Incorrect cutting depth; Material pinching blade | Replace blade; Adjust cutting depth; Support workpiece properly to prevent pinching |
| Excessive vibration | Loose blade bolt; Damaged blade; Worn bearings | Tighten blade bolt; Replace blade; Contact service center |
| Motor overheats | Overloading the tool; Blocked ventilation slots | Reduce cutting pressure; Clear ventilation slots; Allow tool to cool |
8. Specifications
Technical data for the Milwaukee M18 CCS55 Circular Saw.
| Feature | Specification |
|---|---|
| Model Number | M18 CCS55 |
| Voltage | 18 V |
| Power | 90 Watts |
| No-Load Speed | 4500 RPM |
| Saw Blade Diameter | 190 mm |
| Max Cutting Depth (90°) | 55 mm (estimated based on 45° depth) |
| Max Cutting Depth (45°) | 48 mm |
| Blade Material | Alloy Steel |
| Recommended Surface | Wood |
| Special Features | Brushless Motor |
| Weight (Tool Only) | 1 kg |
| Dimensions (L x W x H) | 12 x 12 x 12 cm |
| Battery Type | Lithium-ion (M18 series) |
| Battery Included | No (Tool Only) |
9. Warranty and Support
Milwaukee power tools are designed for durability and performance. For specific warranty information, please refer to the warranty card included with your product or visit the official Milwaukee website. In case of technical issues, repairs, or spare parts inquiries, please contact your authorized Milwaukee service center or the retailer where you purchased the tool. Always use genuine Milwaukee replacement parts to ensure safety and maintain product warranty.
For further assistance, you may visit the official Milwaukee website: www.milwaukeetool.eu


