
1. Introduction
Thank you for choosing the Klarstein DryFy20 Dehumidifier. This 2-in-1 appliance is designed to efficiently remove excess moisture from the air and purify it, improving air quality and preventing issues like mold and mildew. It is suitable for various indoor environments, including bathrooms, living rooms, bedrooms, kitchens, and basements. Please read this manual thoroughly before operating the device to ensure safe and optimal performance.

Image 1.1: The Klarstein DryFy20 Dehumidifier, a compact and efficient unit designed to remove moisture from indoor spaces.
2. Safety Instructions
To reduce the risk of fire, electric shock, or injury, always follow these basic safety precautions:
- Read all instructions before using the appliance.
- Ensure the power supply matches the voltage specified on the rating label.
- Do not operate the dehumidifier with a damaged cord or plug.
- Keep the appliance away from heat sources, direct sunlight, and flammable materials.
- Do not block air inlets or outlets.
- Always place the unit on a stable, level surface.
- Unplug the unit before cleaning or performing any maintenance.
- Do not immerse the unit, power cord, or plug in water or other liquids.
- This appliance is for indoor use only.
- Children should be supervised to ensure they do not play with the appliance.
3. Product Overview
Familiarize yourself with the components of your Klarstein DryFy20 Dehumidifier.

Image 3.1: The Klarstein DryFy20 Dehumidifier features an elegant design that blends into various home environments, providing effective dehumidification.
Key Components:
- Control Panel: Located on the top, for setting modes and functions.
- Air Inlet/Outlet: Where air enters and exits the unit.
- Water Tank: Removable tank for collecting condensed water.
- Continuous Drainage Port: For attaching a hose for continuous water removal.
- Wheels and Handle: For easy portability.
- Air Filter: Located at the back, for filtering dust and particles.
4. Setup
4.1 Unpacking
- Carefully remove the dehumidifier from its packaging.
- Remove all packing materials and ensure no components are missing or damaged.
- Keep the packaging for future storage or transport.
4.2 Placement
Place the dehumidifier on a firm, level surface in the area where dehumidification is desired. Ensure there is at least 20 cm (8 inches) of space around the unit for proper airflow. The unit's 360° swivel wheels and integrated handle allow for easy movement without scratching floors.

Image 4.1: The DryFy20 is versatile and can be used in various rooms such as kitchens, bathrooms, bedrooms, and basements to control humidity.
4.3 Power Connection
Plug the power cord into a grounded electrical outlet. The unit is now ready for operation.
5. Operating Instructions
5.1 Control Panel
The control panel allows you to manage all functions of the dehumidifier.

Image 5.1: The DrySelect control panel features intuitive buttons for setting desired humidity levels and activating various modes.
5.2 Power On/Off
Press the Power button (symbol: circle with vertical line) to turn the unit on or off.
5.3 Setting Desired Humidity (DrySelect)
Press the Humidity button (symbol: %) repeatedly to cycle through desired humidity levels (e.g., 30%, 40%, 50%, 60%, 70%, 80%, or continuous operation). The unit will operate until the set humidity level is reached, then pause.
5.4 Fan Speed
Press the Fan Speed button (symbol: fan blades) to select between High and Low fan speeds.
5.5 Timer Function
Press the Timer button (symbol: clock) to set the operating duration from 1 to 24 hours. The unit will automatically turn off after the set time.
5.6 Laundry Mode
Activate the Laundry Mode (symbol: shirt) for faster drying of clothes. In this mode, the unit operates continuously at high fan speed until manually turned off or the water tank is full.
5.7 Continuous Drainage
For continuous operation without emptying the water tank, attach the included drainage hose to the continuous drainage port at the back of the unit. Ensure the hose is directed downwards to a suitable drain.

Image 5.2: The continuous drainage feature allows for extended operation by directing collected water through a hose to a drain, eliminating the need to manually empty the tank.
6. Maintenance
Regular maintenance ensures the longevity and efficiency of your dehumidifier.
6.1 Emptying the Water Tank
When the water tank is full, the unit will automatically stop operating and an indicator light will illuminate. Carefully remove the water tank from the front of the unit, empty the collected water, and reinsert the tank securely. The unit will resume operation.
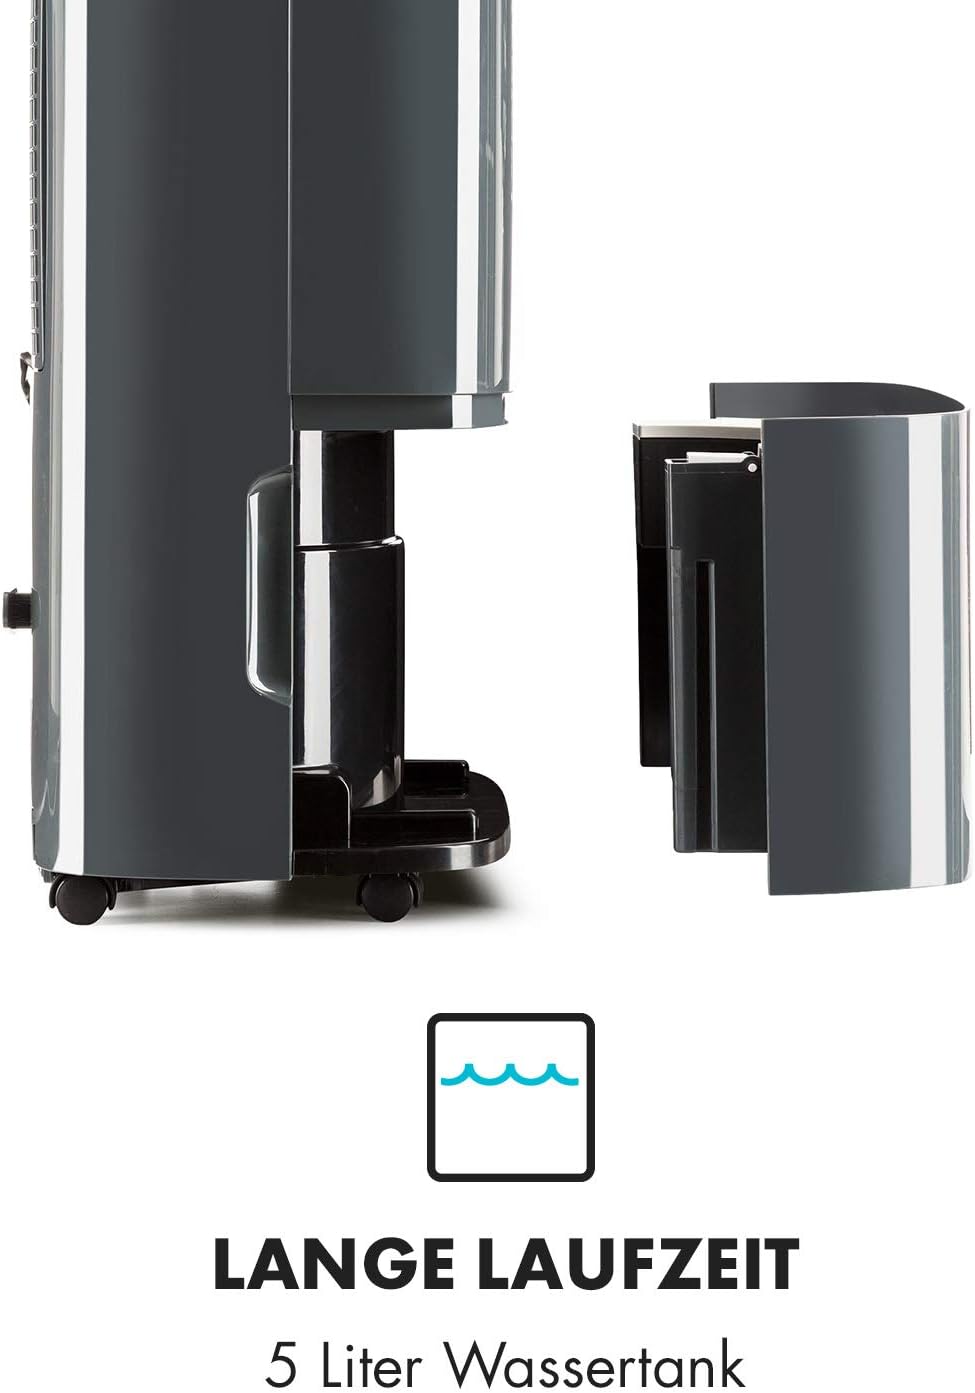
Image 6.1: The removable 5-liter water tank is easily accessible for emptying, ensuring convenient operation.
6.2 Cleaning the Air Filter
The air filter should be cleaned every two weeks or more frequently depending on usage. A dirty filter can reduce efficiency. To clean:
- Turn off and unplug the dehumidifier.
- Remove the filter from the back of the unit.
- Wash the filter with warm, soapy water. Rinse thoroughly.
- Allow the filter to air dry completely before reinserting it.

Image 6.2: The integrated nylon and activated carbon filters work to remove dust and odors from the air, contributing to cleaner indoor air quality.
6.3 Cleaning the Unit Exterior
Wipe the exterior of the unit with a soft, damp cloth. Do not use harsh chemicals or abrasive cleaners.
7. Troubleshooting
If you encounter issues with your dehumidifier, refer to the following table for common problems and solutions.
| Problem | Possible Cause | Solution |
|---|---|---|
| Unit does not turn on. | No power supply. | Check if the power cord is securely plugged in and the outlet is functional. |
| Unit is running but not collecting water. | Humidity level set too high; ambient humidity is low; air filter is clogged. | Lower the desired humidity setting; check ambient humidity; clean the air filter. |
| Unit stops operating. | Water tank is full; timer has expired. | Empty the water tank; check timer settings. |
| Airflow is weak or noisy. | Air filter is clogged. | Clean the air filter. |
If the problem persists after trying these solutions, please contact customer support.
8. Specifications
Technical details for the Klarstein DryFy20 Dehumidifier.
| Feature | Detail |
|---|---|
| Model Number | DXJ2-DryFy-20-grey |
| Power | 420 Watts |
| Voltage | 220 Volts |
| Dehumidification Capacity | 20 Liters/24 hours |
| Water Tank Capacity | 5 Liters |
| Recommended Room Size | 40-50 m² |
| Noise Level | 45 dB |
| Dimensions (L x W x H) | 24 x 34 x 51 cm |
| Weight | 14.2 Kilograms |
| Operating Temperature Range | 5°C to 35°C |

Image 8.1: The Klarstein DryFy20 offers a dehumidification capacity of 20 liters per 24 hours, ideal for rooms sized 40-50 m².
9. Warranty and Support
Klarstein products are manufactured with quality and reliability in mind. For information regarding warranty coverage, terms, and conditions, please refer to the warranty card included with your purchase or visit the official Klarstein website.
For technical support, spare parts, or service inquiries, please contact Klarstein customer service. Have your model number (DryFy20) and purchase date ready when contacting support.