
FTVOGUE FTVOGUE7uf35b9np4-01
FTVOGUE Code Security Touch Digital Keypad Electronic Deadbolt Lock User Manual
Model: FTVOGUE7uf35b9np4-01
Brand: FTVOGUE
1. Introduction
This manual provides detailed instructions for the installation, operation, and maintenance of your FTVOGUE Code Security Touch Digital Keypad Electronic Deadbolt Lock. Please read this manual thoroughly before installation and use to ensure proper function and security.
2. Product Overview
2.1 Key Features
- Customizable Security: Set a personal password with 1 to 15 digits. A 4-6 digit code is recommended for optimal security.
- Keyless Access: Eliminates the need for physical keys, providing convenient access.
- Durable Construction: Crafted from high-quality Acrylonitrile Butadiene Styrene (ABS) material for longevity.
- Compact and Stylish Design: Integrates seamlessly into various environments.
- Easy Management: Features a default management password and clear indicators for lock status.
- Audible Alerts: Provides an audible alert for incorrect password entries.
2.2 Package Contents
Verify that all components are present before beginning installation:
- Digital Keypad Lock Unit
- Mounting Panel
- Mounting Nut
- Mounting Screws
- Instruction Manual (this document)
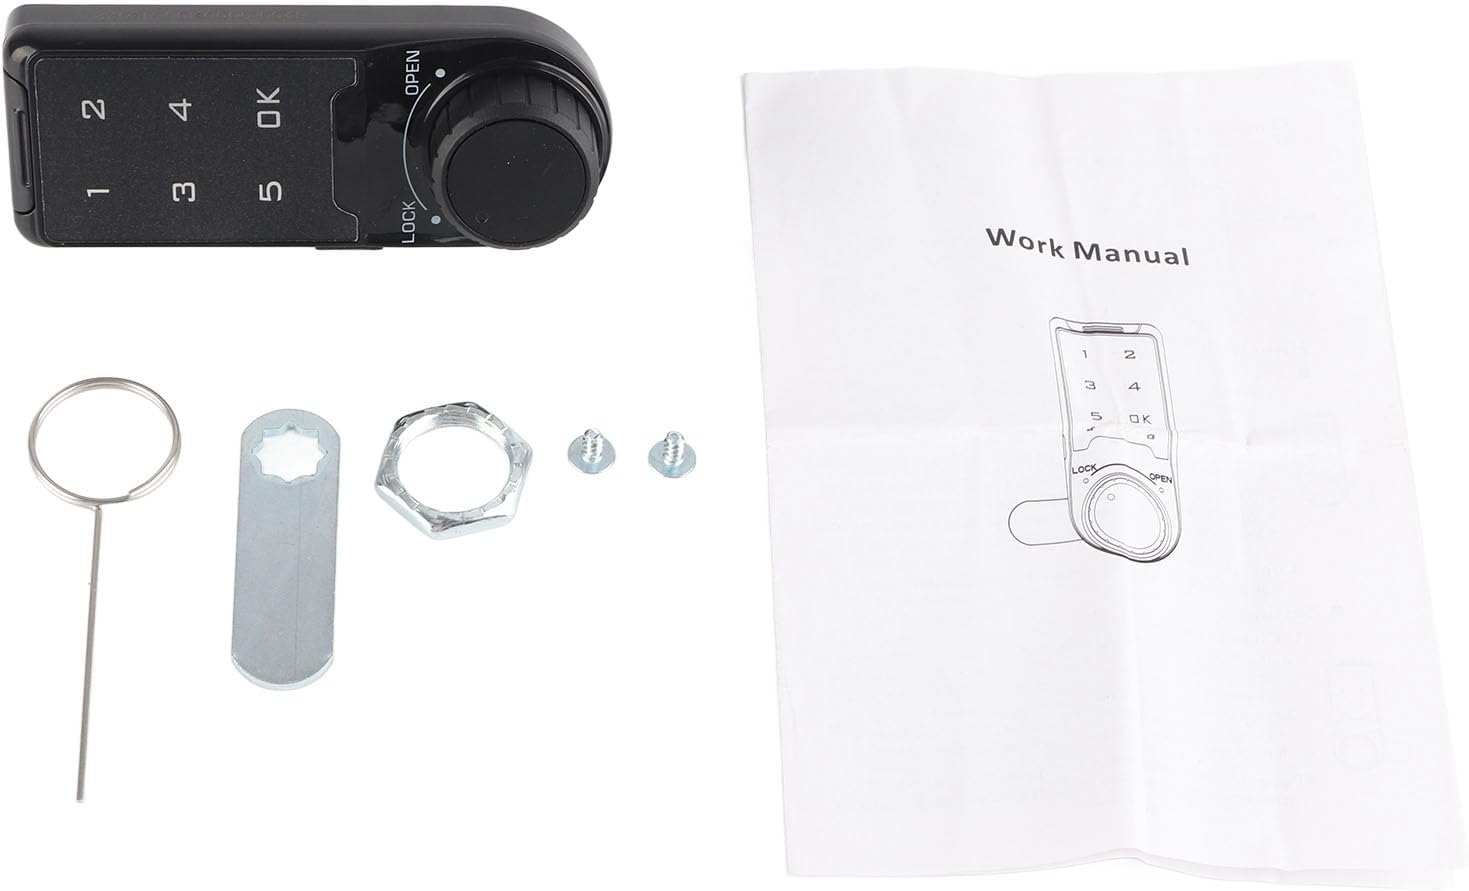
Image: All components included with the FTVOGUE Digital Keypad Lock, including the lock unit, mounting hardware, and manual.
3. Installation
Follow these steps to install your FTVOGUE Digital Keypad Lock:
- Prepare the Mounting Surface: Ensure the cabinet or furniture door has a suitable opening for the lock mechanism. Refer to the dimensional diagram for precise measurements.
- Insert the Lock Unit: Place the main lock unit through the prepared hole from the exterior side of the cabinet.
- Secure the Mounting Panel: From the interior side, attach the mounting panel over the lock mechanism.
- Fasten with Nut and Screws: Secure the lock in place using the provided mounting nut and screws. Ensure the lock is firmly attached and does not wobble.
- Install Batteries: The lock requires batteries for operation (not included). Open the battery compartment, insert the correct type and number of batteries, and close the compartment securely.

Image: Technical drawing showing the dimensions and mounting requirements for the lock unit.

Image: The FTVOGUE Digital Keypad Lock shown installed on a cabinet door, highlighting its integrated appearance.
4. Operation
4.1 Initial Setup and Default Password
Upon first use or after a factory reset, the management password is set to 1234. The lock operates in default home mode. When unlocked, a green indicator will illuminate.

Image: The lock unit with an overlay indicating the factory default management password is '1234' and it is in home mode.
4.2 Setting a New Password
To change the default management password or set a new user password:
- Enter the current password (default is 1234) and press the 'OK' button.
- While the lock is unlocked, press and hold the 'OK' button until the indicator light changes.
- Enter your new password (1-15 digits, 4-6 recommended) and press 'OK'.
- Re-enter your new password to confirm and press 'OK'.
- The indicator light will confirm the password change.
4.3 Locking and Unlocking
- To Unlock: Enter your set password and press 'OK'. The lock will disengage, and the green indicator will light up.
- To Lock: Rotate the knob to the 'LOCK' position. The lock will engage.
4.4 Public Mode and Temporary Passwords
The lock supports public mode and the creation of temporary passwords. Refer to the detailed instructions in the included manual for specific programming steps for these advanced features.
5. Maintenance
5.1 Battery Replacement
The lock requires batteries for operation. When the battery power is low, the lock may exhibit signs such as delayed response or failure to operate. Replace batteries promptly to ensure continuous functionality.
- Locate the battery compartment on the interior side of the lock unit.
- Open the compartment cover.
- Remove the old batteries and insert new ones, ensuring correct polarity.
- Close the battery compartment cover securely.
Note: Always use fresh, high-quality batteries of the specified type. Do not mix old and new batteries.
5.2 Cleaning
To clean the keypad and lock exterior, use a soft, dry cloth. Avoid abrasive cleaners, solvents, or excessive moisture, as these can damage the electronic components or finish.
6. Troubleshooting
6.1 Incorrect Password Alert
If an incorrect password is entered, the lock will emit an audible alert, typically three "Di Di Di" sounds, and will not unlock.

Image: The lock unit with an overlay indicating that an incorrect password entry will result in three 'Di Di Di' sounds.
6.2 Lock Not Responding or Opening
- Check Batteries: The most common cause is low or dead batteries. Replace them as described in the Maintenance section.
- Verify Password: Ensure you are entering the correct password. Double-check the sequence and press 'OK' after entry.
- Mechanical Obstruction: Inspect the lock mechanism for any physical obstructions preventing it from engaging or disengaging.
6.3 Resetting the Lock
If you encounter persistent issues or forget your password, a factory reset may be necessary. Refer to the specific instructions in the full product manual for the reset procedure, as this typically involves accessing internal components.
7. Specifications
| Brand | FTVOGUE |
| Model Name | FTVOGUE7uf35b9np4-01 |
| Lock Type | Keypad |
| Material | Acrylonitrile Butadiene Styrene (ABS) |
| Item Dimensions (L x W x H) | 3.74 x 1.38 x 0.59 inches |
| Item Weight | 3.52 ounces (0.1 Kilograms) |
| Control Method | Touch |
| Voltage | 1 Volts |
| Batteries Required? | No (Batteries not included, but required for operation) |
8. Warranty and Support
FTVOGUE is committed to providing high-quality products and customer satisfaction. If you have any questions, concerns, or require assistance with your product after purchase, please contact FTVOGUE customer support. We are dedicated to seriously answering your questions and providing high-quality after-sales service.
Ask a question about this manual
Ask about setup, troubleshooting, compatibility, parts, safety, or missing instructions. Manuals+ will review the question and use this page’s manual context to help answer it.