
Intex 2x68306EP
Intex Challenger K2 2-Person Inflatable Sporty Kayak Instruction Manual
Model: 2x68306EP
Brand: Intex
1. Introduction
The Intex Challenger K2 is a versatile 2-person inflatable kayak designed for recreational use on lakes and mild rivers. Its streamlined design ensures easy paddling, while the robust vinyl construction provides durability and resistance to common wear and tear. This manual will guide you through the proper setup, operation, and maintenance of your kayak to ensure a safe and enjoyable experience.

Figure 1.1: Intex Challenger K2 Kayak with included accessories.
2. Safety Information
WARNING: Failure to follow these instructions may result in serious injury or death.
- Always wear a U.S. Coast Guard-approved personal flotation device (PFD) when using the kayak.
- Do not exceed the maximum weight capacity of 400 lbs (180 kg).
- Never use the kayak in rough waters, strong currents, or during storms.
- Avoid sharp objects and abrasive surfaces that could puncture the kayak.
- Ensure all air chambers are properly inflated before each use.
- Children should only use the kayak under strict adult supervision.
- Be aware of your surroundings and other watercraft.
- Do not consume alcohol or drugs before or during kayak operation.
3. Components Included
Your Intex Challenger K2 package includes the following items:
- Intex Challenger K2 Inflatable Kayak (2 units)
- 84-inch Aluminum Oars (2 pairs)
- High-Output Hand Pump (1 unit)
- Inflatable Seats with Backrests (2 units)
- Removable Skeg (1 unit)
- Repair Patch Kit
- Carry Bag
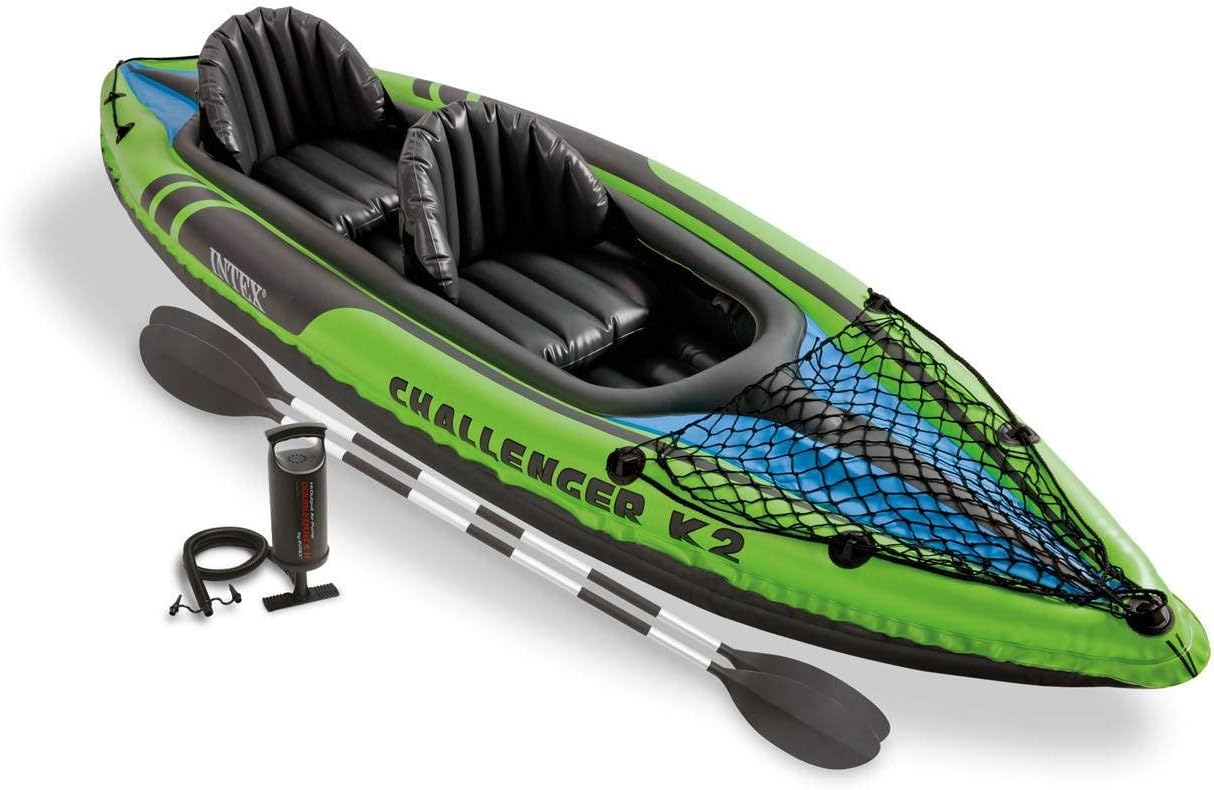
Figure 3.1: Kayak, pump, and oars as packaged.
4. Setup
4.1. Inflation
The kayak features two main air chambers with Boston air valves for quick inflation and deflation. Use the included high-output hand pump for inflation.
- Unfold the kayak on a clean, flat surface.
- Locate the Boston valves on the main air chambers.
- Open the outer cap of the valve.
- Insert the pump hose nozzle into the valve and twist to secure.
- Inflate each chamber until firm to the touch, but not hard. Do not overinflate.
- Once inflated, quickly remove the pump and close the inner cap, then the outer cap, to prevent air leakage.

Figure 4.1: Included hand pump for inflation.
4.2. Seat Installation
The inflatable seats are adjustable and attach to the kayak floor using Velcro patches. This allows for customized seating positions for one or two paddlers.
- Inflate the seats to a comfortable firmness.
- Position the seats inside the kayak.
- Press the bottom of each seat firmly onto the corresponding Velcro patch on the kayak floor to secure it.
- Adjust the seat position forward or backward as desired for optimal comfort and paddling efficiency.

Figure 4.2: Top view of the kayak with seats installed.
4.3. Oar Assembly
The 84-inch aluminum oars come in multiple pieces for compact storage and easy assembly.
- Connect the oar shaft sections by aligning the push-button clips and snapping them into place.
- Attach the oar blades to the ends of the assembled shafts, ensuring they are securely locked.

Figure 4.3: Assembled aluminum oar.
4.4. Skeg Attachment
The removable skeg enhances directional stability, especially in open water.
- Locate the skeg slot on the underside of the kayak at the rear.
- Slide the skeg into the slot until it clicks securely into place.
- Ensure the skeg is firmly attached before launching.
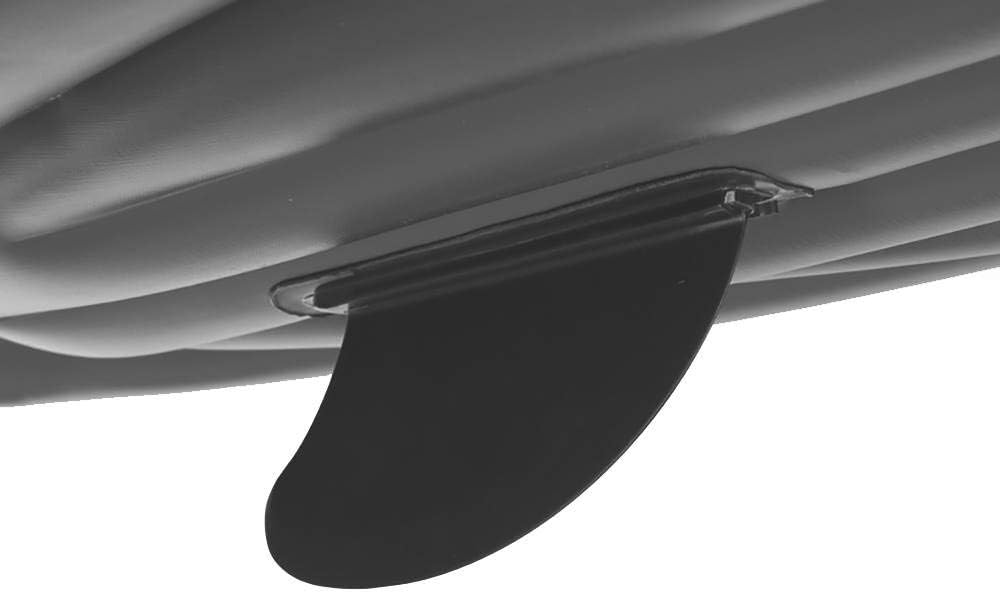
Figure 4.4: Removable skeg for directional stability.
5. Operating Instructions
5.1. Launching and Entering
- Carry the inflated kayak to the water's edge.
- Ensure the water is deep enough to avoid scraping the bottom.
- Carefully enter the kayak, distributing your weight evenly.
5.2. Paddling Techniques
Use the assembled oars to propel and steer the kayak. Basic paddling involves alternating strokes on each side of the kayak. For steering, apply more force on one side or use sweep strokes.
5.3. Cargo Net Use
The spacious cockpit includes a cargo net at the front for storing personal belongings. Secure items under the net to prevent them from falling out during paddling.

Figure 5.1: Enjoying the Intex Challenger K2 on the water.
Video 5.1: Intex Sport Series Inflatable Kayaks in action.
6. Maintenance
6.1. Cleaning and Drying
After each use, rinse the kayak thoroughly with fresh water to remove salt, sand, or dirt. Allow the kayak to dry completely before deflating and storing to prevent mold and mildew.
6.2. Storage
Deflate the kayak by opening the Boston valves and allowing air to escape. Fold the kayak neatly and store it in the included carry bag in a cool, dry place away from direct sunlight and extreme temperatures.
6.3. Repair Patch Kit
Your kayak comes with a repair patch kit. In case of minor punctures, follow the instructions provided with the kit to apply a patch. Ensure the area is clean and dry before applying the patch.
7. Troubleshooting
7.1. Kayak Not Holding Air
- Check all Boston valves to ensure they are fully closed and sealed.
- Inspect the kayak surface for any visible punctures or leaks. Use soapy water to identify small leaks by looking for bubbles.
- If a leak is found, use the provided repair patch kit according to its instructions.
7.2. Difficulty Paddling Straight
- Ensure the removable skeg is properly installed on the underside of the kayak. The skeg is crucial for directional stability.
- Verify that both main air chambers are equally inflated to maintain proper shape and balance.
8. Specifications
| Feature | Detail |
|---|---|
| Brand | Intex |
| Model Name | Challenger K2 / Sports Series |
| Model Number | 2x68306EP |
| UPC | 842372180818 |
| Material | Vinyl |
| Color | Green |
| Seating Capacity | 2 Persons |
| Item Package Dimensions | 23.9 x 16.3 x 13.5 inches |
| Package Weight | 77.3 Pounds |
9. Warranty and Support
For warranty information, product registration, or customer support, please visit the official Intex website or contact their customer service department. Keep your purchase receipt as proof of purchase for any warranty claims.
Visit the Intex Store: Intex Official Store
Related documents2x68306EP


Ask a question about this manual
Ask about setup, troubleshooting, compatibility, parts, safety, or missing instructions. Manuals+ will review the question and use this page’s manual context to help answer it.